Spring always makes me itch for hands-in-dirt projects, and seed starter pots are the kind of simple craft that turns a rainy afternoon into a cheerful windowsill. I remember lining up a dozen tiny pots on my sill, the smell of fresh soil mingling with wet cardboard, and the thrill of seeing those first pale shoots push through.
This list of Spring Seed Starter Pot Crafts collects playful, low-fuss ideas that felt like small celebrations of green beginnings.
Each idea reminded me of a tiny, hopeful moment when a kitchen scrap or leftover package became a new home for a seed.
Egg carton herb starters with rustic charm
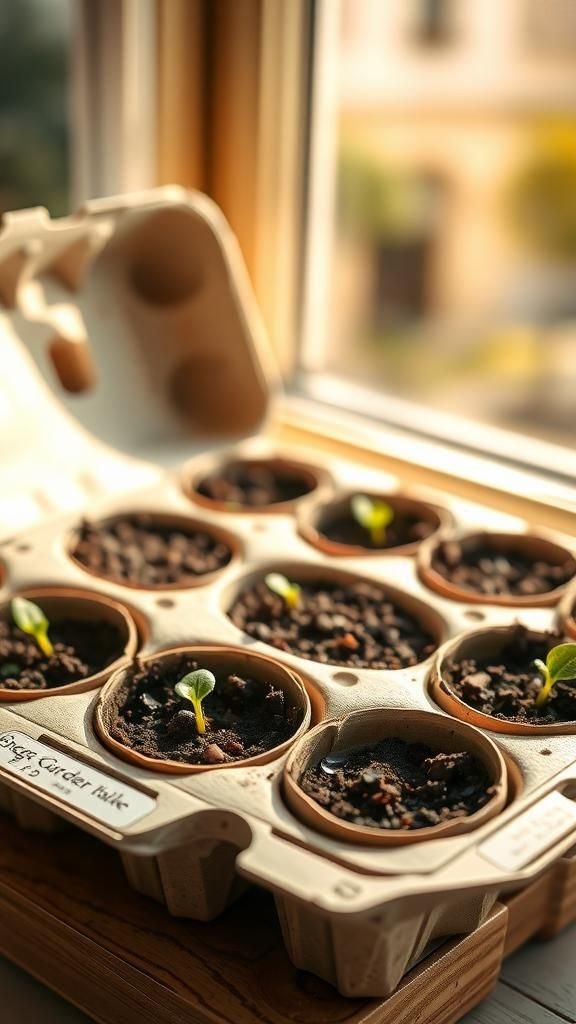
I always keep an empty egg carton for little surprises, and turning those dimples into herb homes felt cozy. The texture of damp carton against my fingers was oddly soothing, and the faint papery scent blended with the earthy aroma of potting mix.
Watching tiny green threads peek up from the shallow cups felt like a secret shared between me and the kitchen window. Those clustered seedlings made the sill look like a miniature nursery, and every time I watered I loved the soft patter and scent of fresh soil.
Steps
- Gather an empty egg carton, loose seed-starting mix, small herb seeds, and a tray to catch water.
- Poke a tiny drainage hole in each cup by pressing with a blunt tool, then place the carton on the tray.
- Spoon mix into each cup until nearly full and press seeds gently into the surface.
- Moisten the mix with a fine mist and set the tray near a bright window.
- Keep the surface slightly damp and move seedlings to larger pots once roots begin to crowd.
Toilet paper roll biodegradable pots for seedlings
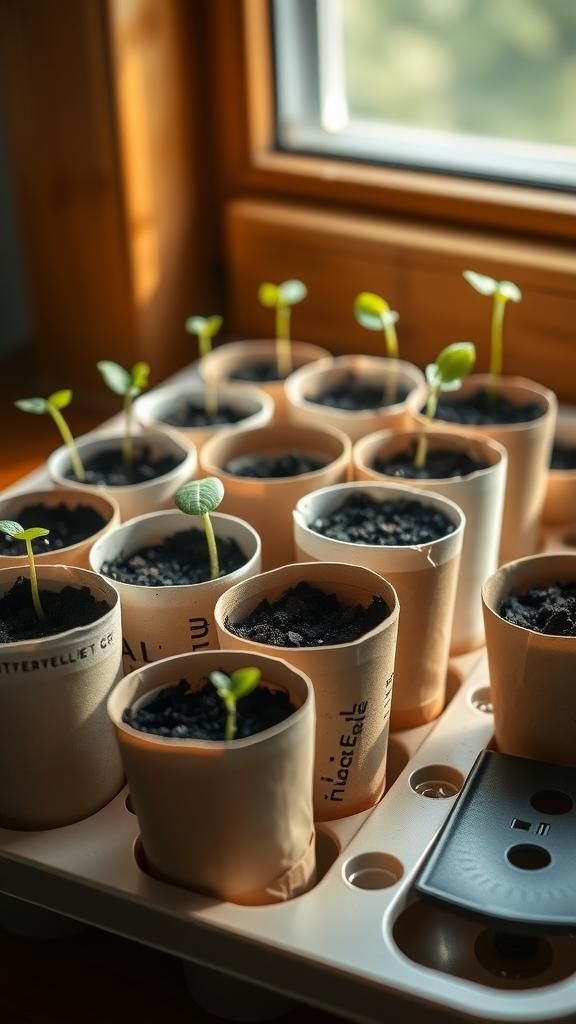
There was something satisfying about a pile of empty cardboard tubes turning into neat little planters. The hollow cylinder feels lightweight and papery when held, and the edges softened after a splash of water.
I liked how they absorbed moisture and gave the roots a breathable, slightly papery warmth. Lining them up along the sill created a rhythm of cylinders and green tips, and I always noticed the quiet rustle when I nudged one.
They felt especially right for spring, a reminder that small beginnings can come from modest scraps.
Steps
- Collect clean toilet paper rolls and a shallow tray or seed flat for support.
- Flatten each tube slightly and fold one end inward to create a base, then set upright on the tray.
- Fill tubes with seed-starting mix and nestle seeds into the surface according to packet guidance.
- Mist gently to moisten and position the tray in a bright, warm spot.
- Monitor moisture and transplant tubes directly into the garden once roots reach the tube edges.
Painted clay pots with chalky labels and texture
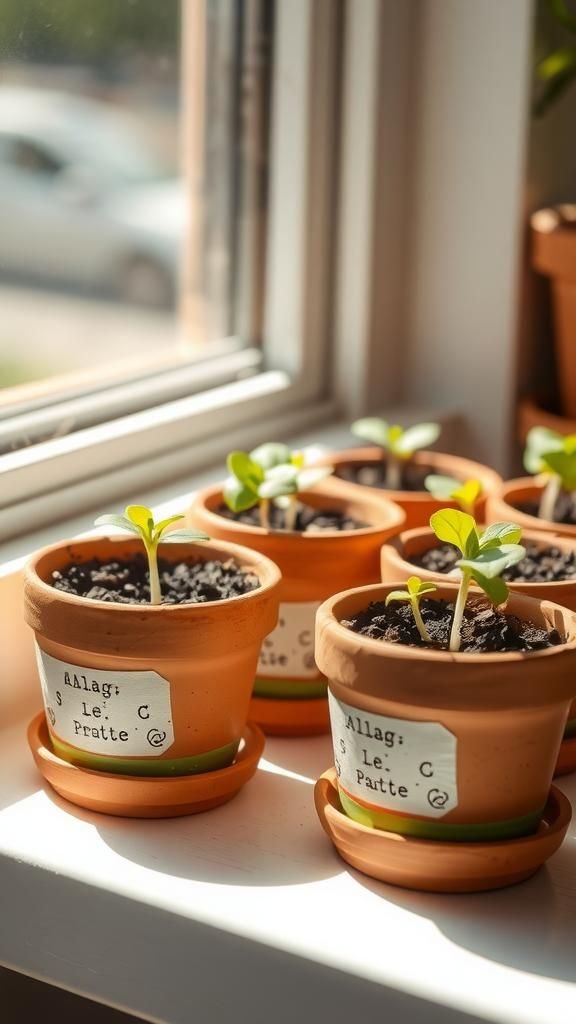
I have a soft spot for small terracotta pots turned into little personalities. The dry, warm surface of clay takes paint in a way that feels tactile, and the scent of fresh paint drying against the porous pot is oddly comforting.
Chalky labels added a playful, erasable touch that made me smile during the first days of sprouts. The pots lined up on the sill had a mix of flaky terracotta edges and glossy bands of color, and every time I watered there was a faint earthy perfume that reminded me of a garden path after rain.
Steps
- Gather small terracotta pots, acrylic or outdoor-safe paint, chalk marker, and a saucer for each pot.
- Apply paint in layers or patterns, allowing each coat to dry thoroughly between applications.
- Once dry, write plant names with chalk marker on the rim or a small attached tag.
- Fill each pot with seed-starting mix and press seeds into the soil according to packet spacing.
- Place pots on saucers and set them where they receive bright, indirect light while keeping soil evenly moist.
Mason jar windowsill starters with wire supports
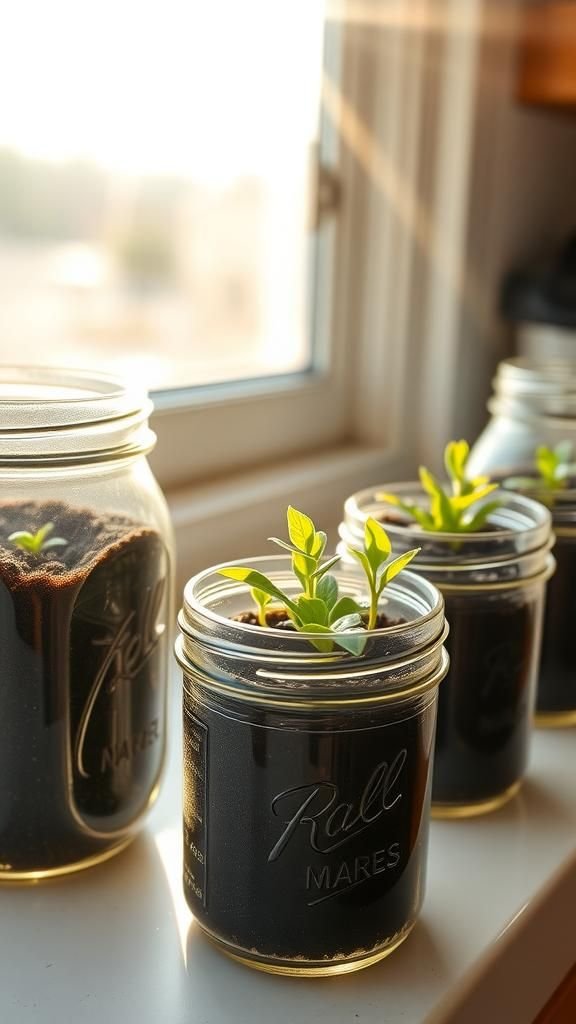
Mason jars felt like tiny greenhouses when I first tried them for seed starting. The cool, clear glass held light in a way that made every water droplet sparkle, and the condensation on the inner walls created a soft, misty scene.
I enjoyed the weight of a jar in my hands and the smooth clink as lids met glass. Rows of jars caught the morning sun, throwing little patches of brightness across the countertop.
Those small, glass vessels turned the ordinary act of sowing into a miniature indoor garden ritual.
Steps
- Collect clean mason jars, fine mesh or breathable fabric for lids, seed-starting mix, and seeds.
- Layer a bit of pebbles for drainage at the bottom of each jar if desired, then add seed-starting mix.
- Press seeds gently into the surface and lightly moisten the mix with a spray bottle.
- Cover jars with mesh or a loosely fitted lid to maintain humidity and set them in bright light.
- Remove covers for short periods each day to allow airflow and transplant seedlings when roots become visible.
Eggshell halves as delicate micro-planters

Using eggshells felt lovingly domestic, a tiny cradle for a single seed. The thin shell had a chalky, fragile texture that made handling feel careful and intimate.
When I pressed soil into each half, the scent was a muted mix of shell and damp earth. Arranged on a shallow tray, the eggshells made the whole arrangement look like a tiny fossil bed of potential leaves.
I liked the way light moved through the thin rim at dusk, and cracking one open later to plant directly into the garden was oddly satisfying.
Steps
- Rinse and dry eggshell halves and set them in a shallow tray or egg carton for stability.
- Add a small pinch of seed-starting mix into each shell and press seeds lightly into the surface.
- Mist the soil to moisten and keep the tray in a warm, bright spot.
- Monitor soil moisture and thin seedlings if multiple sprouts appear in one shell.
- Plant the whole shell into the garden once roots reach the shell wall, shell will break down in soil.
Newspaper folded seed pots for classic charm
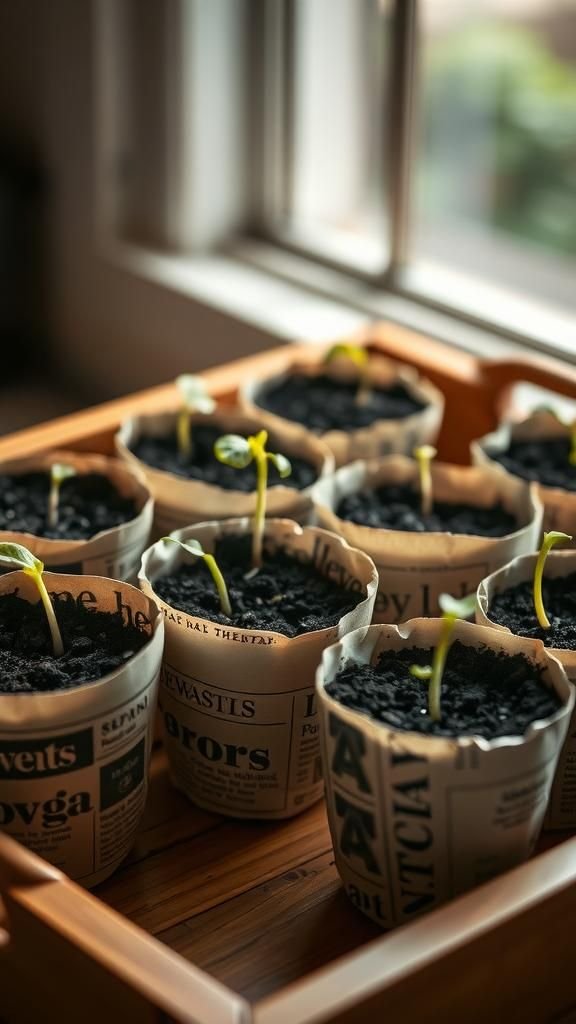
I remember folding newspaper pots with a mug and a quiet playlist, the crisp rustle of newsprint under my fingers feeling oddly satisfying. The ink smelled faintly of paper and warmth, and the thin walls soaked up gentle moisture in a friendly way.
Those little pots had a lived-in look, with headlines peeking from the rims and damp soil darkening the print. Lined up on a tray they looked both practical and whimsical, and I loved the low-key promise that these humble cylinders held for future leaves.
Steps
- Roll a sheet of newspaper around a small jar or cup, tucking and folding to form a pot shape, then slide it off gently.
- Place the folded pots in a shallow tray to keep them upright and add seed-starting mix.
- Nestle seeds into the surface and mist to moisten the soil.
- Keep the tray in a warm, bright location and maintain even moisture.
- Transplant pots directly into the garden when roots reach the paper, which will decompose naturally.
Citrus peel half-shell planters that smell fresh
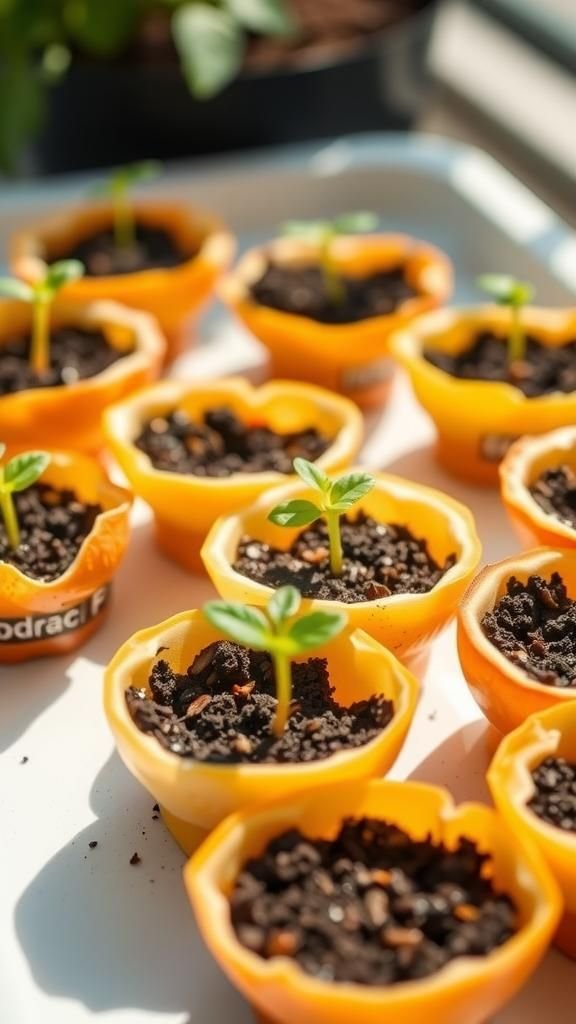
I once used halved orange peels as mini pots and was surprised by how lively the little citrus scent made the space feel. The bright rind had a waxy texture and a cheerful color that contrasted with the rich soil inside.
As the peel dried and darkened slightly, its fragrance mellowed into something green and warm. The curved shape cradled the soil like a bowl, and when I lined several in a tray the array looked like a tiny, fragrant orchard.
Each time I passed by I caught a soft citrus hint that lifted the mood.
Steps
- Halve firm citrus fruits and scoop out the segments, leaving a neat rind cup for each seedling.
- Place peel halves in a shallow tray to catch moisture and add a small amount of seed-starting mix.
- Press seeds lightly into the soil and mist to moisten the surface.
- Keep the tray in bright light and top up moisture as needed.
- Plant peel and seedling into garden soil when roots reach the rind and begin to seek air.
Wine cork mini starters for tiny succulents
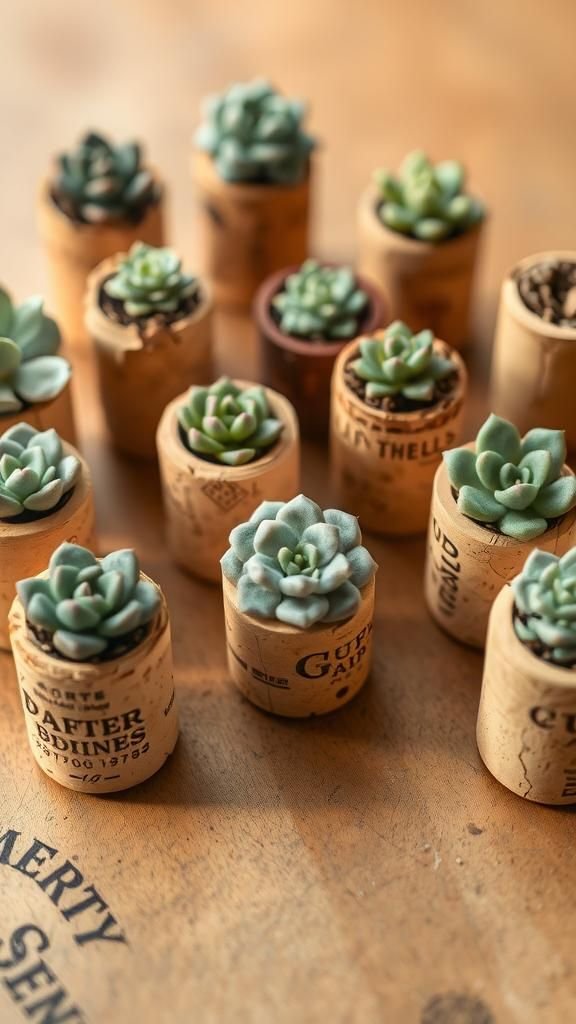
Those little cork plugs felt like tiny islands of earthy scent when hollowed and filled. The cork texture was springy and warm, and handling a row of them reminded me of a picnic or a sprawling kitchen table.
I enjoyed the concentrated scale of a single succulent pup settled in a cork, like a small sculpture. The neutral tan color made the green of the plants pop, and the arrangement had a hand-gathered charm that made the whole tabletop feel friendlier.
They were a compact, private display of new life.
Steps
- Hollow out wine corks lengthwise to create small cavities, using a tool that feels safe and steady.
- Place corks in a shallow tray and add a tiny pinch of well-draining soil to each cavity.
- Nestle small succulent cuttings or seeds into the soil and press gently to make contact.
- Provide bright, indirect light and mist sparingly to avoid waterlogging.
- Monitor root development and transfer to a larger container when corks no longer contain the root mass.
Coconut shell halves as tropical mini planters

A halved coconut shell brought an instant tropical note to my table. The fibrous brown exterior felt rugged and aromatic while the inner smoothness held soil with a dark, almost glossy contrast.
The weight of a shell made it feel stable and grounding, and the faint ocean-whisper scent took me back to summer afternoons. Seedlings nestled in the curve of a shell looked sheltered and confident, and when water pooled briefly on the inner rim there was a small reflective shimmer that made each tiny leaf catch the light beautifully.
Steps
- Clean and dry coconut halves, leaving a rim for stability, and set them in a shallow tray or saucer.
- Add well-draining soil mix to each shell and press seeds lightly into the surface.
- Mist to moisten and place shells where they receive bright, indirect light.
- Maintain gentle moisture without oversaturating, allowing slight drying between waterings.
- When root systems fill the shell, consider moving the plant to a larger pot or garden bed.
Bamboo segment planters with natural drainage
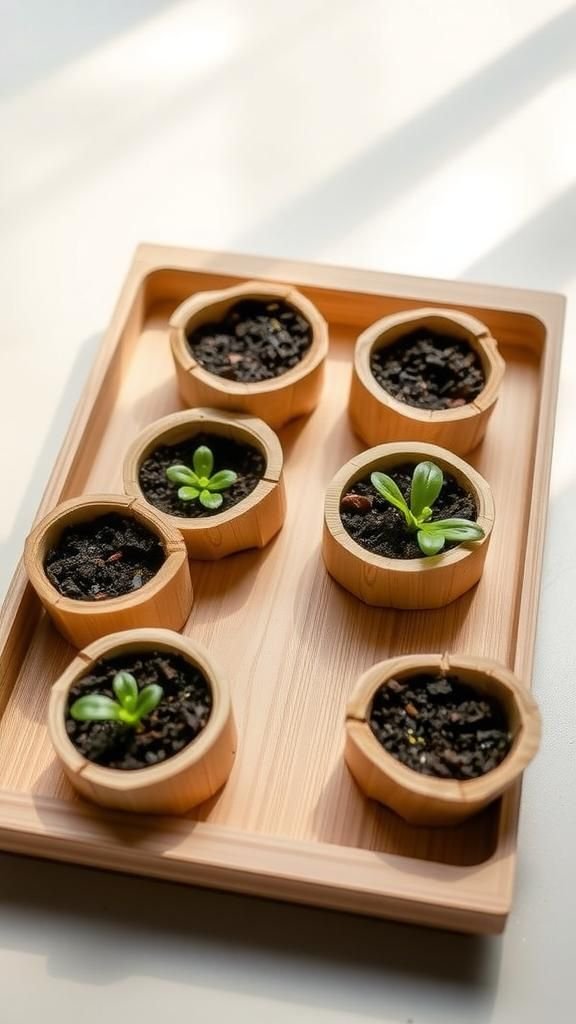
I once found short bamboo segments and loved their hollow, clean-scented interiors as little pots. The smooth, pale inner surface contrasted with the textured, jointed exterior in a pleasing way.
Each segment felt like a tiny cylinder carved out by nature, and the faint grassy scent added an outdoor freshness to the shelf. When lined up, the bamboo brought an organic rhythm and a whisper of the outdoors.
The light reflected softly off the inner curve, and every seed that pushed a tiny leaf felt wrapped in a miniature grove.
Steps
- Collect short sections of bamboo with closed nodes on one end, ensuring stability for each planter.
- Stand segments upright in a tray and add a small amount of seed-starting mix into each hollow.
- Place seeds on the surface and mist lightly to moisten the soil.
- Position the tray in bright, indirect light and keep soil consistently moist.
- Transplant seedlings into garden soil or larger containers when roots begin to seek air through nodes.
Tin can planters with cheerful wrapped twine
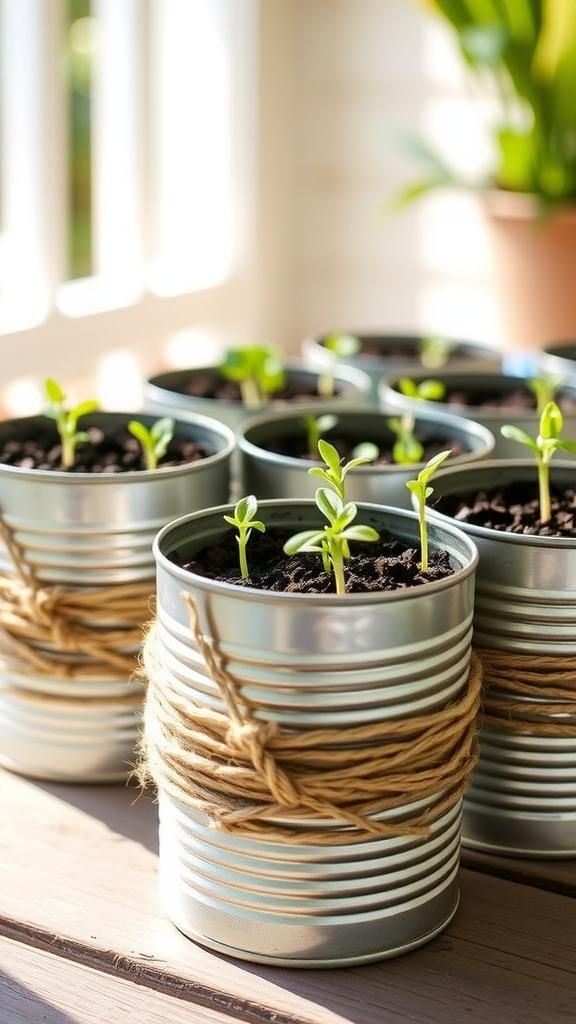
There was a satisfying weight to a recycled tin can when repurposed as a planter, a contrast to the lightness of seedlings. The cool metal edge met the warmth of wrapped twine and made a tactile mix I enjoyed running my fingers along.
The faint metallic scent mixed with damp earth felt industrial and homey at once. A row of wrapped cans on a porch step created a little urban garden banner, the roughness of the twine softening the metal’s gleam.
Each tiny leaf seemed to announce that even scrap can become a green anchor.
Steps
- Rinse and dry used tin cans and line the base with a few small pebbles for drainage if desired.
- Wrap twine or natural fiber around the exterior for decorative texture and secure ends discreetly.
- Fill cans with seed-starting mix and press seeds into the soil surface gently.
- Place cans on saucers to protect surfaces and position where they receive adequate light.
- Keep soil evenly moist and transplant when seedlings outgrow the can interior.
Pinecone seed starters with woodland textures
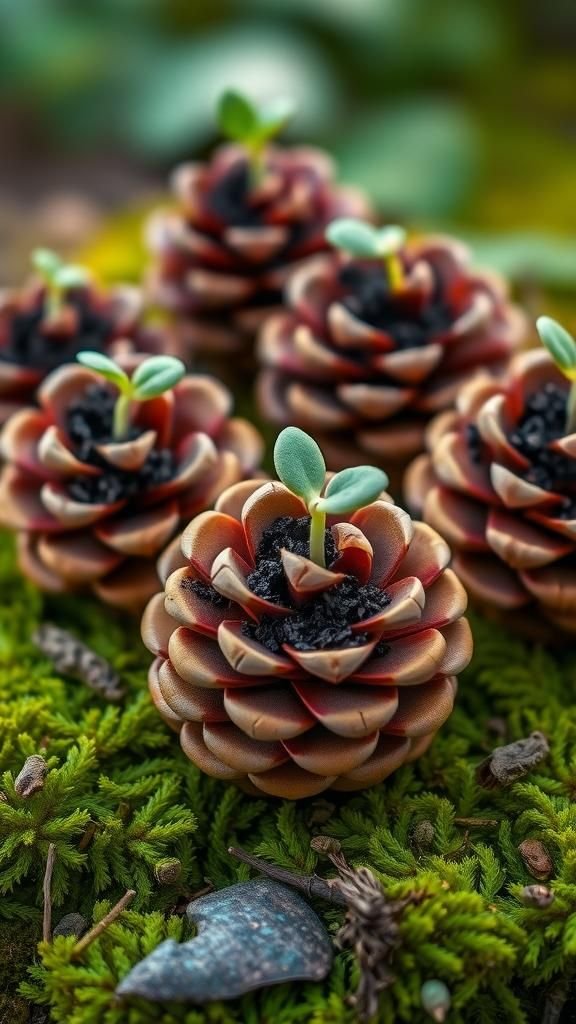
I gathered pinecones after a walk and loved their crinkled, resin-scented layers as tiny planters. The woody scent brought the outdoors in, and the palette of browns made green shoots stand out like little exclamation points.
Tucking a pinch of soil into the folds felt like slipping a letter into an envelope. Placed on a mossy tray, the pinecones looked as if they were just waiting for a forest to begin.
Each small sprout felt like part of a miniature ecosystem, charming and a bit magical in its forest-floor honesty.
Steps
- Collect clean, dry pinecones and set them on a shallow tray lined with moss or paper.
- Tuck a small amount of seed-starting mix into the folds near the base of the cone.
- Place seeds into the nestled soil and mist lightly to moisten the mix.
- Keep the tray in a bright area with gentle humidity and maintain light moisture.
- Transplant when roots establish and cones no longer hold soil securely.
Denim-pocket planters from old jeans
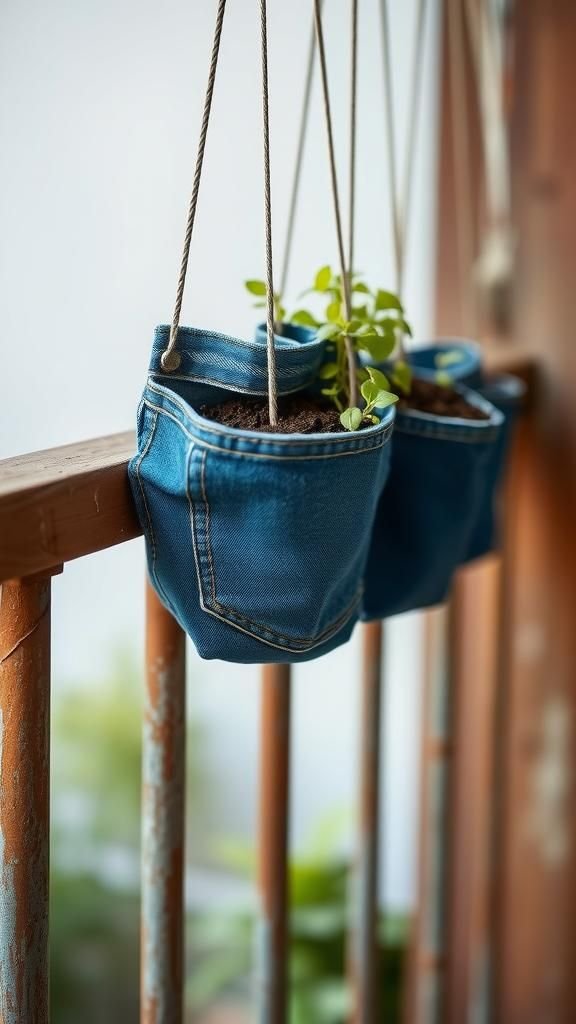
Turning an old pair of jeans into pocket planters felt playful and resourceful. The worn denim had a comforting, familiar scent and a pleasingly soft abrasion against the fingers.
Pockets created small, sheltered nests that made seedlings look like they were peeking out of clothing. Arranged along a fence or balcony railing, the blue denim added a casual, lived-in look, and the rough weave soaked up morning dew into a gentle sparkle.
I liked the idea of something familiar wearing new life, a subtle conversation between fabric and foliage.
Steps
- Cut usable pockets from worn jeans and create small drainage by gently piercing the fabric base if needed.
- Line pockets with a thin layer of gravel or fabric for stability and add seed-starting mix.
- Place seeds into the soil and press lightly to make contact.
- Hang pockets on hooks or a rail where they receive bright light and can drain freely.
- Water carefully to keep soil moist and move pockets to larger containers when plants outgrow them.
Cupcake liner seedlings in a muffin tin display
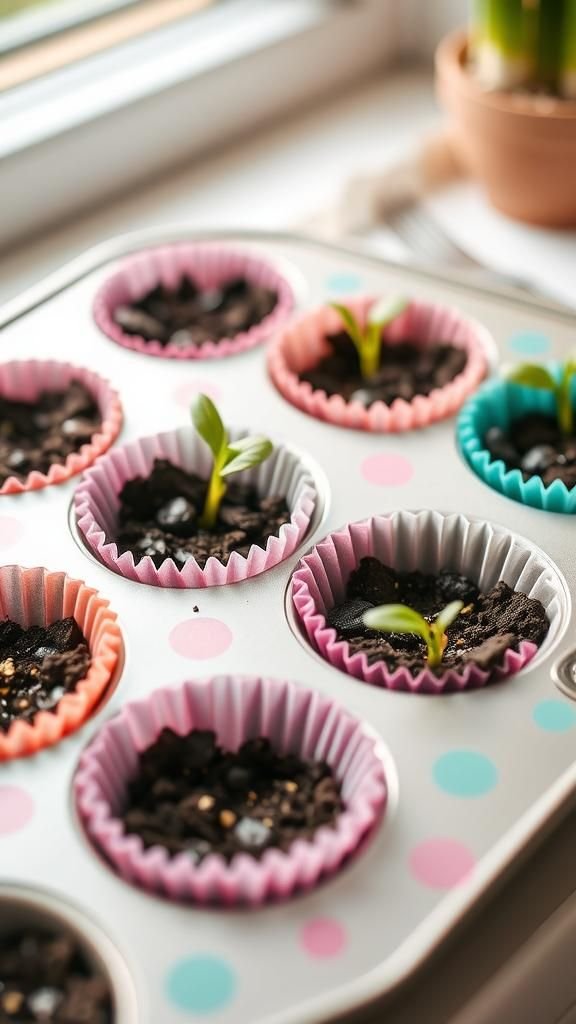
A muffin tin lined with colorful cupcake papers turned the whole project into a cheerful baking-meets-garden tableau. The thin liners made everything feel tidy and slightly festive, and the scent of fresh soil sitting in pastel cups was almost like a cozy kitchen memory.
Rows of liners with green tips looked like a tiny pastry tray of growth, and the contrast of paper patterns with living leaves was unexpectedly charming. When misted, the paper darkened in pretty ways, and each time I peered in I felt a small, buoyant hope.
Steps
- Place cupcake liners into a muffin tin to hold shape and add seed-starting mix into each liner.
- Press seeds gently into the surface of the soil according to seed packet spacing.
- Mist the liners to moisten and set the tin in a warm, bright spot.
- Keep soil lightly damp and rotate tin occasionally for even light exposure.
- Move seedlings to larger pots when roots begin to emerge from the liner base.
Moss-lined shells for a soft, green bed
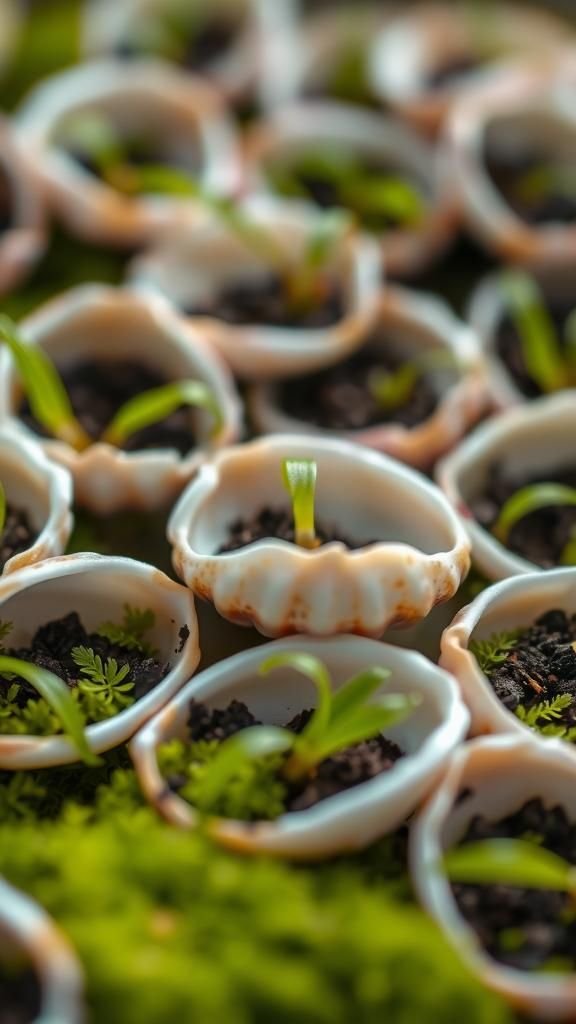
Cradling seeds in a shell lined with moss felt like making a tiny green pillow. The moss was cool and spongy under my fingertips, releasing a fresh forest scent when dampened.
The pale shell curved into a natural basin, and the bright green of the moss made the seedlings look like they were waking in a hidden grove. The whole arrangement had a gentle hush, as if the plants were under a small canopy.
I kept a few of these on the bathroom ledge and enjoyed the small damp, fragrant atmosphere they created.
Steps
- Gather small shells and line the interior with a soft layer of damp sphagnum moss.
- Add a thin layer of seed-starting mix over the moss and press seeds gently into place.
- Mist frequently to maintain the moss’s moisture and set shells in bright, indirect light.
- Ensure shells sit in a shallow tray to catch any excess water.
- Transplant seedlings with moss intact once roots establish and the plant needs more space.
Muffin tin herb sampler with mixed textures
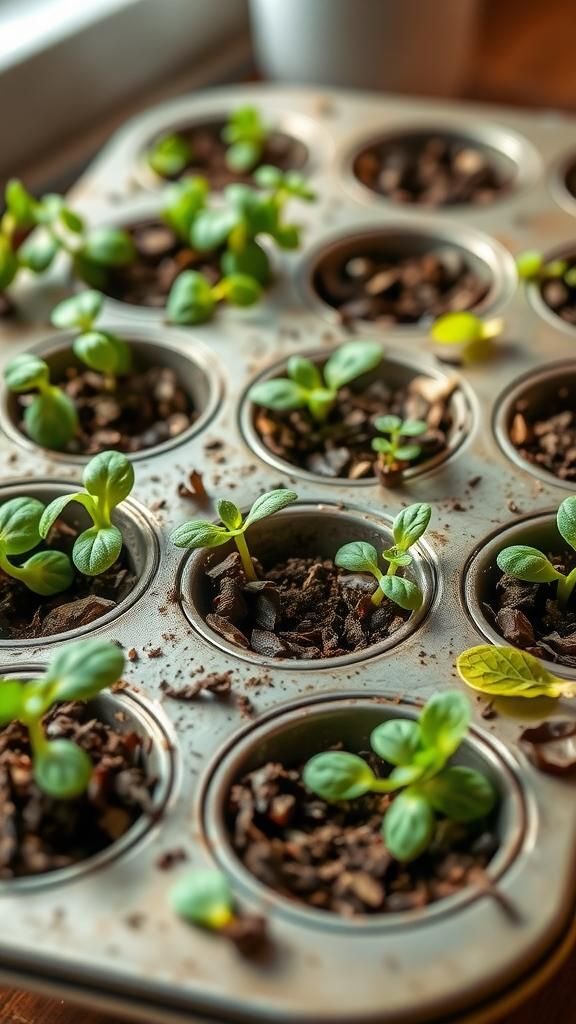
A metal muffin tin filled with a handful of different herbs felt like a miniature culinary map. The tin’s cool metal edges contrasted with tiny spikes of green and the warm, peppery scent of emerging herbs.
Each well held its own little character, and the scent that rose when I leaned in made me think of soups and afternoon teas. There was a tactile pleasure in nudging soil into each cup and then watching a variety of leaf textures appear.
The tin seemed practical and celebratory at once, a small festival of flavor beginning.
Steps
- Use a clean muffin tin and place a liner or fabric in each cup if desired for easier removal.
- Fill each cup with seed-starting mix and place different herb seeds into separate wells.
- Lightly mist to moisten and set the tin in a bright, warm spot.
- Maintain even moisture and rotate the tin for balanced light exposure.
- Transplant herbs to individual pots when roots begin to crowd the muffin cups.
Seed sachets in breathable fabric pouches
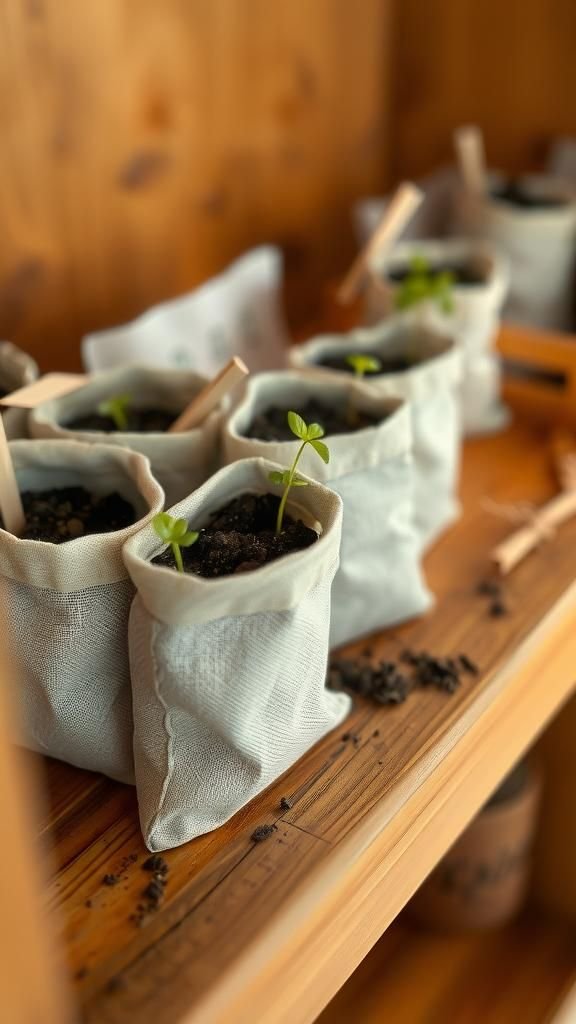
Tiny fabric pouches filled with soil felt like little sleeping bags for seeds. The weave of linen or cotton allowed air to move through, and the soft fabric smelled faintly of laundry and sun when warm.
Holding a pouch in my hand felt like cradling a small promise, and the surface wrinkled gently as seedlings pushed upward. Laying out a band of pouches across a shelf looked casual and delicate, with fabric folds catching light in soft ways.
Each sprout felt like it was emerging from a private, cushioned nest.
Steps
- Select small breathable fabric pouches or make sachets from linen and leave the top open for planting.
- Add seed-starting mix into each pouch and press seeds into the fabric-lined soil.
- Set pouches upright in a shallow tray to provide stability and mist to moisten.
- Place the tray in bright light and keep the fabric gently damp without soaking.
- When roots reach the pouch edge, transfer the pouch or plant into a larger container or garden bed.
Paper mache bowls turned into quirky planters
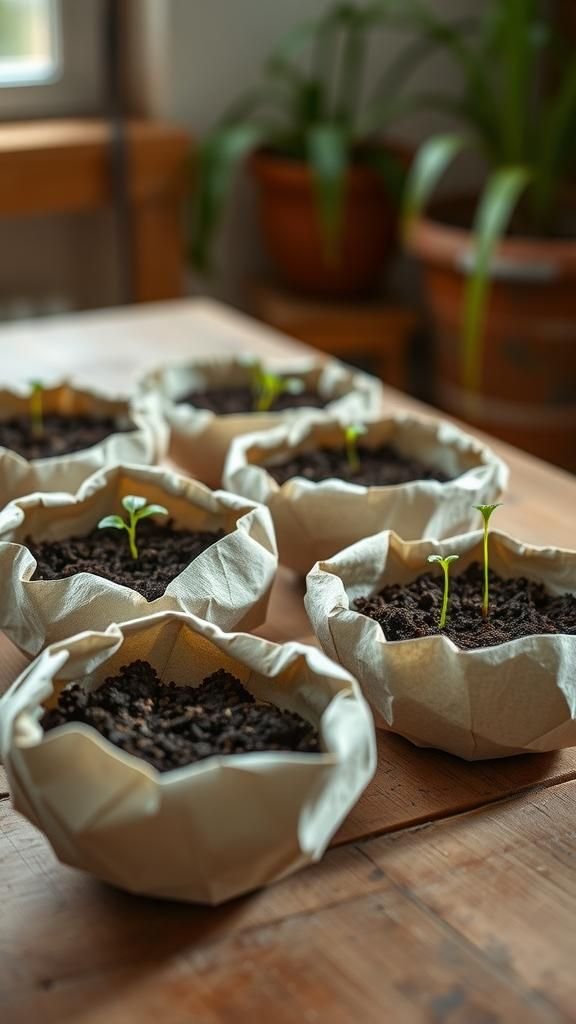
I made small paper mache bowls one afternoon and they felt unexpectedly sturdy once dry. The surface had a soft, papery grain that accepted stains and ink in interesting ways.
Filling them with seed mix introduced a whisper of damp paper smell that blended with the soil. Those bowls looked handmade, each rim irregular and charming, and they caught light differently depending on brush strokes and paper layers.
A cluster of bowls on a side table suggested an artist’s approach to planting, each tiny green shoot framed by a personal, slightly wobbly vessel.
Steps
- Create small paper mache bowls using recycled paper and a paste, then allow bowls to dry completely.
- Seal the inside lightly if desired with a safe coating, then add seed-starting mix to each bowl.
- Place seeds into the soil surface and mist gently to moisten.
- Arrange bowls on a tray in bright, indirect light and maintain even moisture.
- Move seedlings to larger containers when roots begin to require more space.
Jelly jar terrariums for humid-loving seedlings
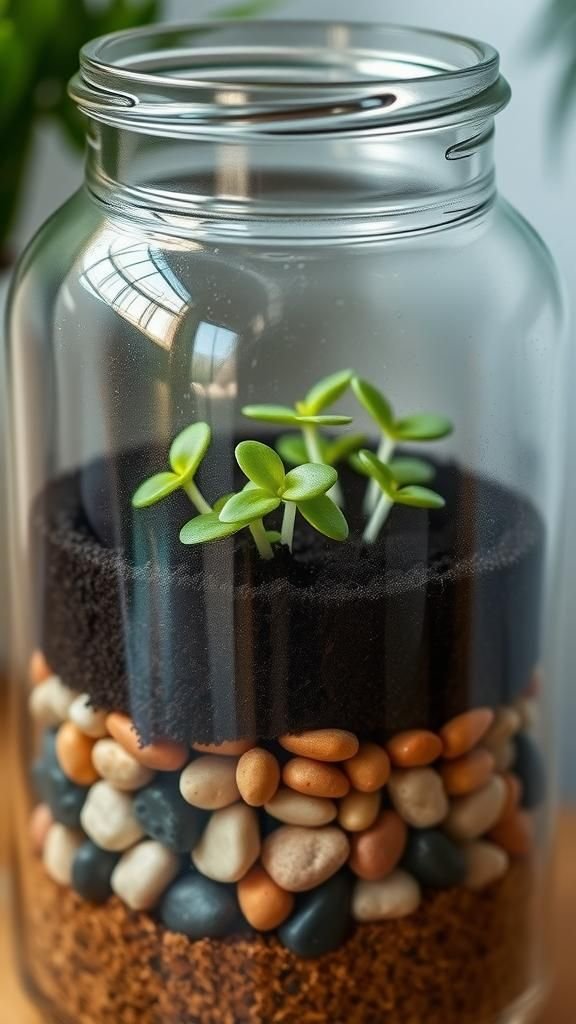
A recycled jelly jar with a tight lid created a little humid world where seedlings felt snug. The glass trapped tiny droplets that glittered like morning pearls, and the moist, sweet scent of damp earth filled the jar when opened.
I liked the way condensation traced slow rivulets down the glass, and the green shapes looked amplified through the curved walls. Those terrariums felt like living snow globes, gentle and private.
Opening one released a soft breath of humidity that made the nearby air feel suddenly alive and close.
Steps
- Clean jelly jars thoroughly and layer small pebbles at the bottom for drainage if desired.
- Add a thin layer of activated charcoal for freshness, then fill with seed-starting mix.
- Plant seeds into the soil surface and mist to moisten before sealing with the lid.
- Place jars in bright, indirect light and open briefly each day for air exchange.
- Unseal permanently once seedlings need more airflow and space to grow.
Tea cup and saucer planters with vintage flair
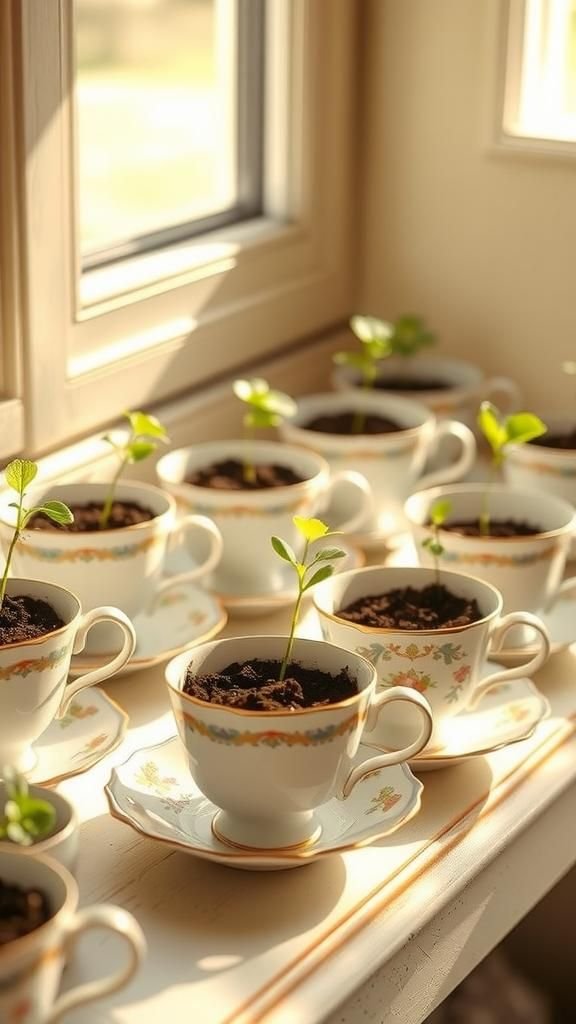
I love the quaintness of a mismatched tea cup serving as a tiny planter. The smooth porcelain felt cool and delicate in my hands, and the faint scent of old tea mingled with fresh soil when I filled a cup.
The saucer caught tiny splashes of water and made the whole arrangement feel like a tiny tea service for plants. Seedlings peeking over the rim looked like polite guests at a garden party.
Displaying a few on a sun-drenched shelf made the space feel like a slow Sunday afternoon indoors.
Steps
- Choose vintage or mismatched tea cups and place saucers beneath to catch excess moisture.
- Add a small amount of well-draining seed-starting mix into each cup and nestle seeds into the surface.
- Mist lightly to moisten and set cups in a bright location with gentle light.
- Keep soil evenly damp and avoid waterlogging the cup interior.
- Transplant seedlings into larger pots when roots begin to crowd the cup’s interior.
Wooden matchbox planters for petite displays

Tiny wooden matchboxes felt like secret little crates for the smallest seeds. The soft timber had a warm scent, and when opened the sliding drawer made a gentle scratch that became part of the ritual.
Nestling soil into the shallow space created a compact, intimate bed that made a single seed feel important. Lining a row of matchbox planters on a shelf produced an almost musical arrangement of tiny rectangles and green tips.
They seemed like treasures to be handled with care, each one promising a small, patient reveal.
Steps
- Clean small wooden matchboxes and leave one drawer slightly ajar for airflow if needed.
- Place a small amount of seed-starting mix inside the drawer and press seeds gently into the surface.
- Set the matchboxes on a tray to catch any loose soil and mist lightly to moisten.
- Keep them in bright, indirect light and monitor moisture carefully due to small volume.
- Transplant seedlings when roots show at the drawer edges or plants need more space.