I remember the first time I sat at my kitchen table with a block of polymer clay and a cup of tea, watching colors merge under my fingertips. Those early afternoons led to afternoons of tiny experiments and a drawer full of odd pairs of earrings that each had their own little story.
Polymer clay earring craft projects became my favorite way to unwind.
Making small pieces felt like exploring a tiny world where color, texture, and little surprises came together, and each finished pair felt like a small joyful discovery to share with friends.
Marbled disc studs with subtle color swirls
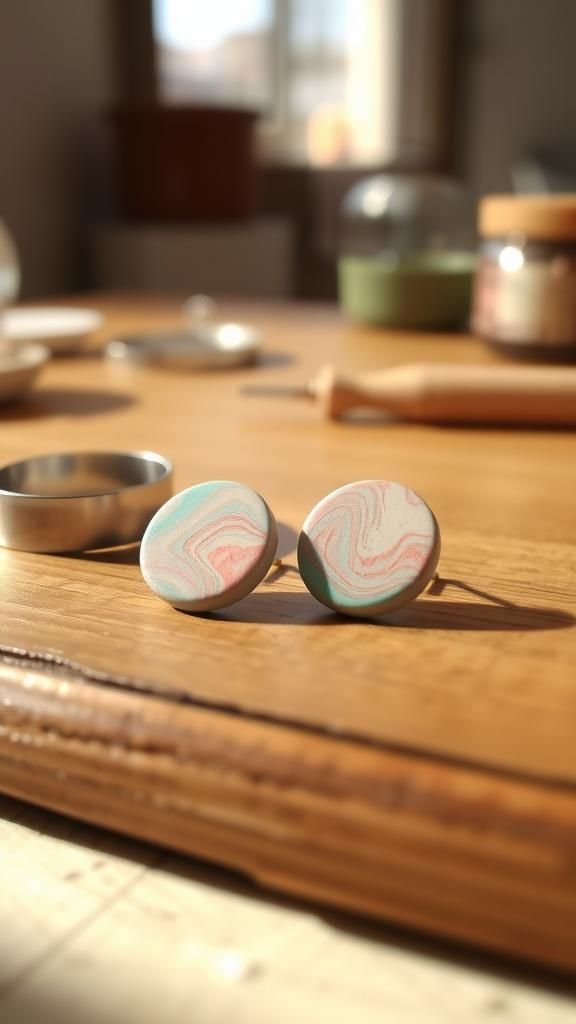
I fell for these marbled discs because the textures seemed to change as light moved across them. The clay warmed beneath my palms while colors threaded together in soft ribbons, creating tiny landscapes inside each circle.
After baking, the surfaces hold a faint sheen and a pleasing weight that feels comfortable against the ear. Holding a pair up to the light reveals tiny veins of contrasting hues, and the edges offer a little tactile reminder of how handmade pieces keep a human trace.
Steps
- Gather materials including two or three polymer clay colors, a thin blade, circular cutter, earring posts, a small file, jewelry adhesive, and an oven.
- Soften clay through gentle kneading until it becomes pliable, then press together thin ribbons of different colors and blend them with light folds to form a marbled slab.
- Stamp circular shapes from the slab with a cutter, pierce a small hole for a post, bake according to the clay brand’s guidance, cool completely, then fasten posts with a small drop of jewelry adhesive and refine edges with a file.
Tiny geometric triangles with metallic inlays
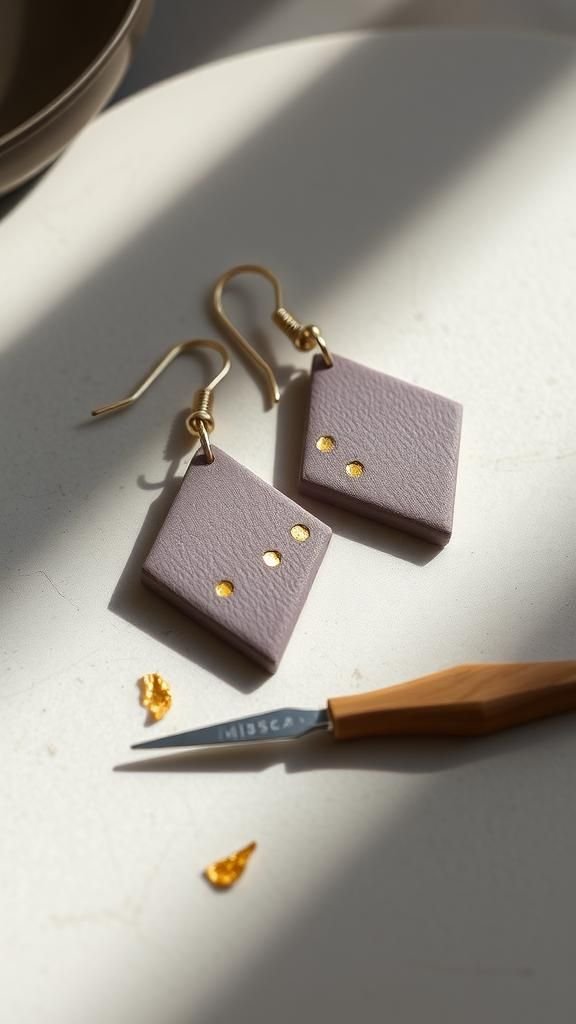
These little triangles always catch my eye because the metallic flashes feel unexpectedly elegant against matte clay. The edges have a small, satisfying crispness that contrasts with the shimmer trapped inlay.
When I study them closely, I notice tiny variations where a speck of metallic leaf rested more heavily, creating one-of-a-kind accents. Wearing them brings a quiet confidence; the geometry reads clean and modern, while the reflective inserts respond to movement and light, sending delicate glints when someone turns their head.
Steps
- Collect polymer clay in a matte color and a complementary metallic leaf, triangle cutters, a thin blade, earring posts, fine file, jewelry adhesive, and an oven.
- Knead clay until even, roll into a thin sheet with a cylindrical tool alternative, gently press a triangle cutter to create shapes, and dab small pieces of metallic leaf into shallow recesses on the surface.
- Bake following manufacturer directions, allow to cool, smooth edges with a file, then secure posts to backs with a small amount of jewelry adhesive.
Tiny floral millefiori slices with delicate details

The millefiori slices have a miniature charm that always makes me smile. Small bouquets reveal themselves when a cane is sliced, each petal crisp and slightly raised so that the tactile feel invites a closer look.
Color choices can sway the mood from playful to soft nostalgia; I remember mixing muted pastels on a rainy afternoon and ending up with little floral suns. When light hits the edges of the baked slices, the translucent bits glow faintly, and the tiny imperfections feel like fingerprints from a day of quiet making.
Steps
- Assemble polymer clay in chosen floral colors, a central core color, thin blade, cane tools, micro cutters, earring posts, a fine file, jewelry adhesive, and an oven.
- Condition clay thoroughly, create thin canes by stacking and combining layers around the core to form petal shapes, then compress gently to firm seams.
- Slice very thin discs from the cane with a sharp blade, arrange slices for earrings, bake per clay directions, cool, smooth edges with a file, and attach posts with jewelry adhesive.
Terrazzo speckled drops in soft muted hues
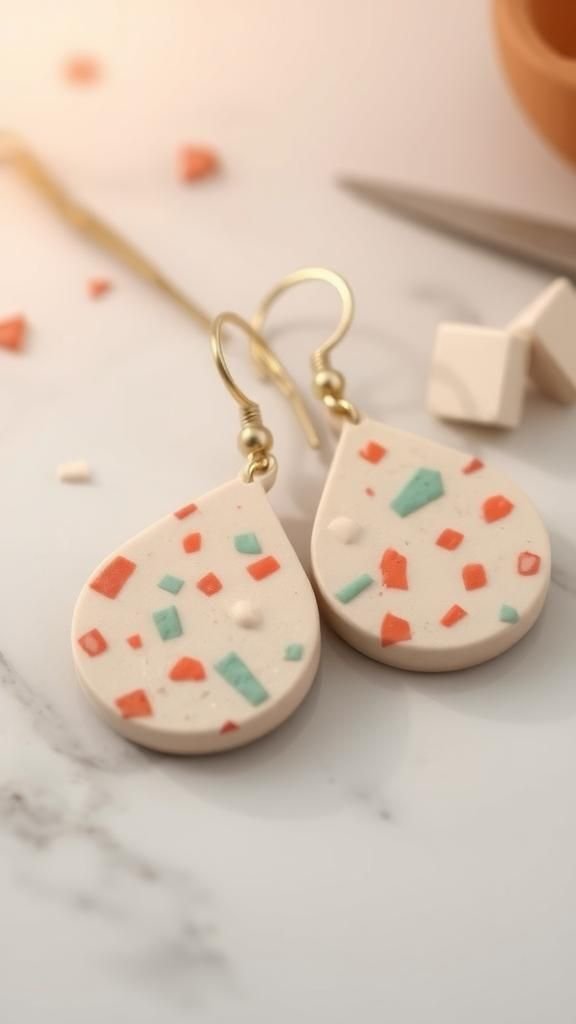
I like terrazzo drops because they feel playful and kind of grown-up at the same time. Flecks of contrasting color sit embedded inside the base clay like tiny islands, and brushing a fingertip across the surface reveals a subtle texture where fragments meet background.
The shapes are often slightly irregular, which only adds to their personality. They complement simple outfits and bring a small handcrafted accent that nods to mid-century design.
Each pair tells a short story about color pairing and the luck of how fragments landed.
Steps
- Gather base colored polymer clay, small scrap pieces in accent colors, a thin blade, droplet cutters or templates, earring posts, a fine file, jewelry adhesive, and an oven.
- Knead the base clay to conditioning, press small specks from accent scraps into the base, and blend gently so the fragments sit embedded without disappearing.
- Form a thin slab, stamp droplet shapes, pierce for posts, bake according to the clay brand, cool fully, refine edges with a file, and adhere posts with a small amount of jewelry adhesive.
Ombre teardrops in translucent pastel layers
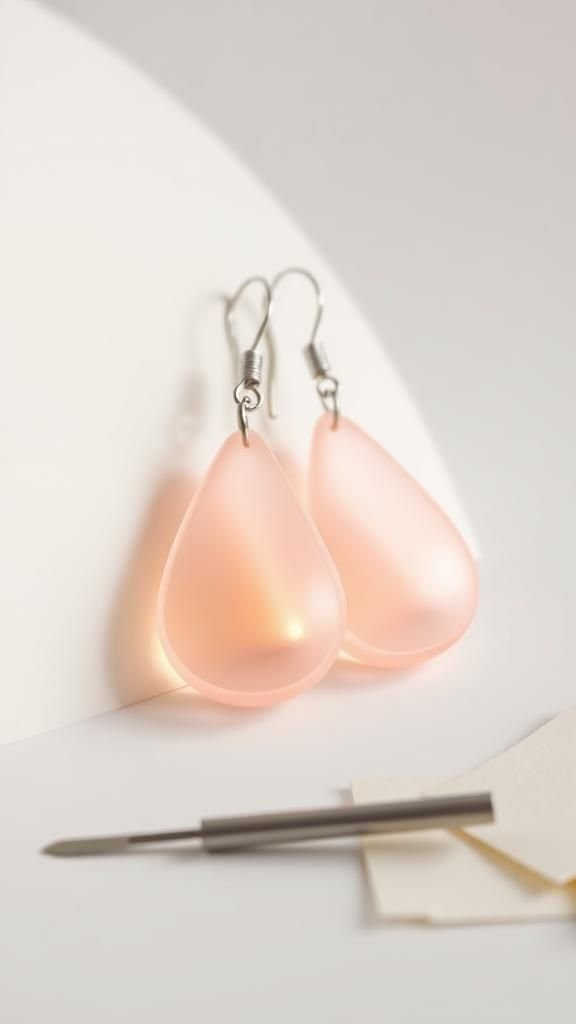
Ombre teardrops always feel like miniature skies to me, gentle graduations from one tone to another that catch evening light in a soft way. Thin translucent layers allow inner tones to glow, and holding them up against a lamp shows a quiet luminosity.
The surface finishes with a smooth, cool feel that is pleasant against the skin. I often pair them with simple outfits because the color shift becomes the focal point, offering a calm statement that moves subtly with the wearer.
Steps
- Collect translucent polymer clay in a range of pastel shades, a thin blade, teardrop cutters or a template, earring posts, a fine file, jewelry adhesive, and an oven.
- Condition each color separately until pliable, press thin sheets of progressively darker shades together to form a layered slab with a gentle gradient.
- Cut teardrop shapes from the layered slab, create a small hole for the post, bake according to manufacturer directions, cool, refine edges with a file, and secure posts with jewelry adhesive.
Faux gemstone cabochons with mica shimmer
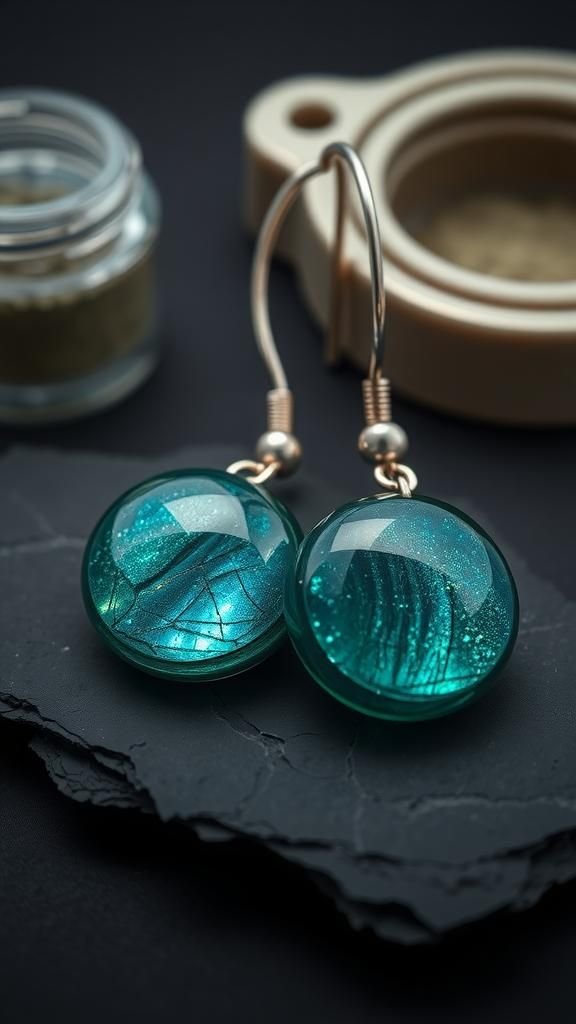
These faux gems were a little experiment that became a favorite. Fine mica powders create a depth that reads like natural stone, while tiny glassy veins add character.
The surface catches light in a way that makes the piece feel weighty and somewhat mysterious. Fingers trace the gentle dome and find it pleasantly smooth, and the edge where dome meets base often reveals a ribbon of color that looks accidental and beautiful.
Wearing them feels like wearing a miniature landscape that evolved from a quiet afternoon of mixing pigments.
Steps
- Gather polymer clay in a base color, mica powder in complementing hues, a domed cabochon cutter or curved template, a thin blade, earring posts, fine file, jewelry adhesive, and an oven.
- Condition the base clay, dust mica lightly across surfaces and swirl with a soft tool to create a stone-like depth, then form a small dome by pressing over a curved mold.
- Trim around the dome with a blade to create clean edges, bake following clay instructions, cool fully, smooth edges with a file, and affix earring posts with a small amount of jewelry adhesive.
Asymmetrical studs with subtle hammered texture
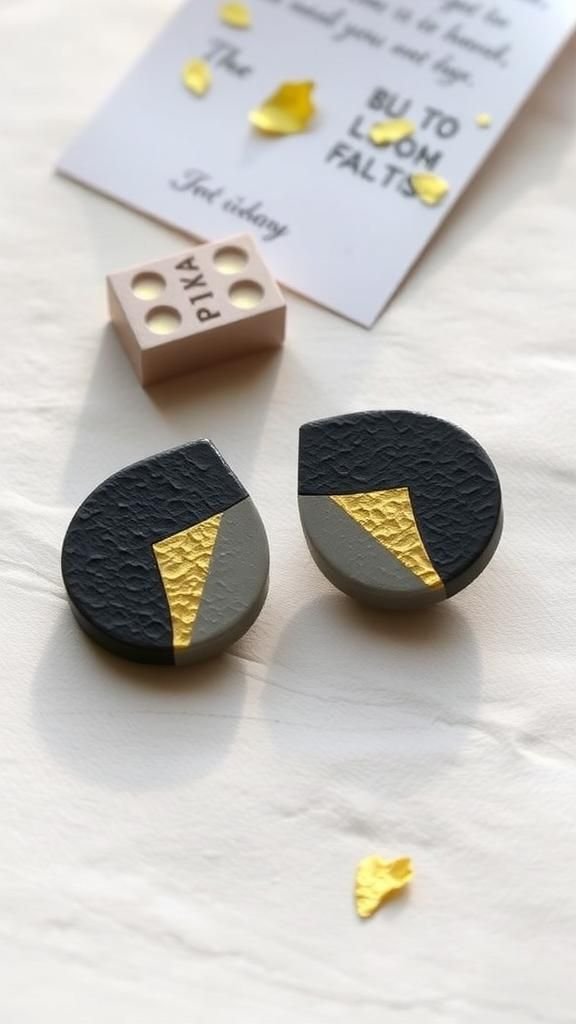
There is a cozy charm to asymmetrical studs because they feel intentionally imperfect in a way that suits everyday wear. The hammered texture adds a tiny landscape of pits and ridges that react to light, and each stud carries a little shadow pattern that reads different from every angle.
Metal leaf accents sometimes settle into the dimples, providing warm contrast, and the tactile surface invites a discreet touch. The result often pairs well with layered necklaces and casual sweaters, offering a handcrafted note without shouting for attention.
Steps
- Collect polymer clay in preferred tones, a small metal texture stamp or textured surface, triangle and circle cutters for variety, a thin blade, earring posts, fine file, jewelry adhesive, and an oven.
- Condition clay until pliable, press the textured surface gently to impress a hammered look across each small shape, then rescue and refine the shapes with cutters for asymmetry.
- Bake at the recommended temperature, cool completely, smooth any rough edges with a file, and adhere posts to the backs with a modest amount of jewelry adhesive.
Botanical imprint dangles with leafy impressions

Botanical imprints feel like little pressed gardens. I enjoy the smell of a last-minute walk to gather a leaf, then the crisp impression it leaves in clay.
Veins translate into delicate lines that carry a whisper of nature, while the overall curve of the dangle catches movement and shadow. The finished piece has an organic rhythm that reads as casual elegance.
Each leaf choice tells a different story; a fern gives a feathery pattern, while a rounded leaf produces gentle, bold veins that show up beautifully after baking.
Steps
- Gather polymer clay in earth tones, fresh or dried leaves for imprinting, a thin blade, teardrop or oval cutters, earring hooks or posts, fine file, jewelry adhesive, and oven access.
- Condition clay, press a leaf firmly onto a thin slab to capture veins and texture, then remove the leaf to reveal the imprint and cut a dangle silhouette around it.
- Cure according to the clay manufacturer’s instructions, allow to cool, refine edges with a file, and attach hooks or secure posts with a small amount of jewelry adhesive.
Layered clay hoops with stacked color bands
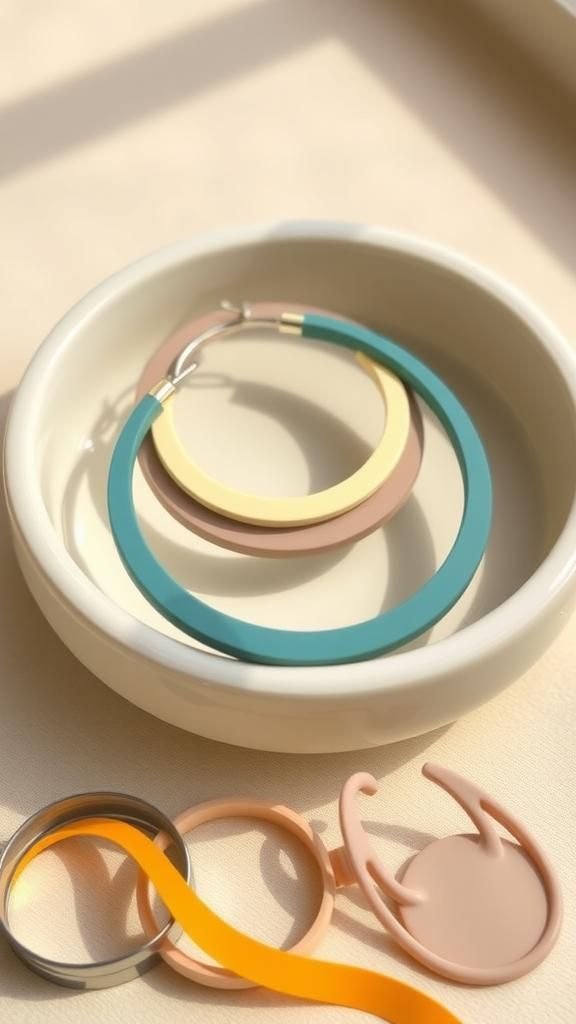
Layered hoops feel like tiny geological cross-sections around the ear. Bands of color stack and create a pleasing rhythm that moves when I turn my head.
The edges show the slight stratification of each layer, which becomes a quiet point of interest. Lightweight enough to stay comfortable, they add a sculptural element to simple outfits.
I often reach for them when I want a handmade accent that reads both modern and playful; the layered palette can be bold or subtle depending on whether I pick saturated or muted tones.
Steps
- Collect polymer clay in two to four complementary colors, a hoop cutter or circular template, a thin blade, earring posts or hoop findings, a fine file, jewelry adhesive, and an oven.
- Condition each color and stack thin sheets together to create a multi-layer slab, compact the layers gently so seams stay even, then cut circular hoops from the slab.
- Bake following manufacturer guidance, cool, smooth inner and outer edges with a file, and fasten posts or finish hoops with jewelry adhesive as needed.
Lace-inspired filigree discs with delicate negative space
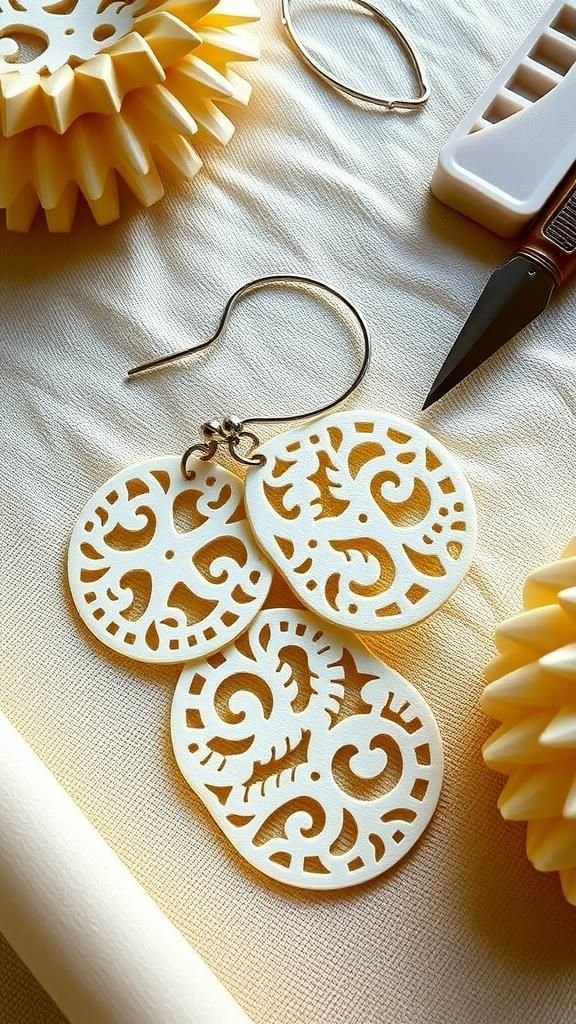
Filigree discs always feel a touch romantic to me, like miniature doilies that swing with the lightest motion. Intricate cutouts create airy negative space that plays with shadow on the neck.
The tactile edges are delicate, but the clay maintains a reassuring solidity that keeps them lightweight. I like setting them against solid fabrics to let the lace details read clearly.
Making them often results in a quiet satisfaction: close attention to tiny holes and loops produces a piece that rewards slow looking and gentle movement.
Steps
- Gather fine polymer clay, a thin blade or micro cutters, lace or filigree cutters, circular disc cutters, earring posts, a fine file, and an oven.
- Condition the clay to a thin, even sheet, overlay a lace template or punch delicate patterns with micro cutters to create negative space, then finish the disc silhouette.
- Bake at the clay brand’s recommended temperature, cool fully, smooth edges with a file, and attach posts with a small amount of jewelry adhesive.
Chunky retro shapes with bold color blocking
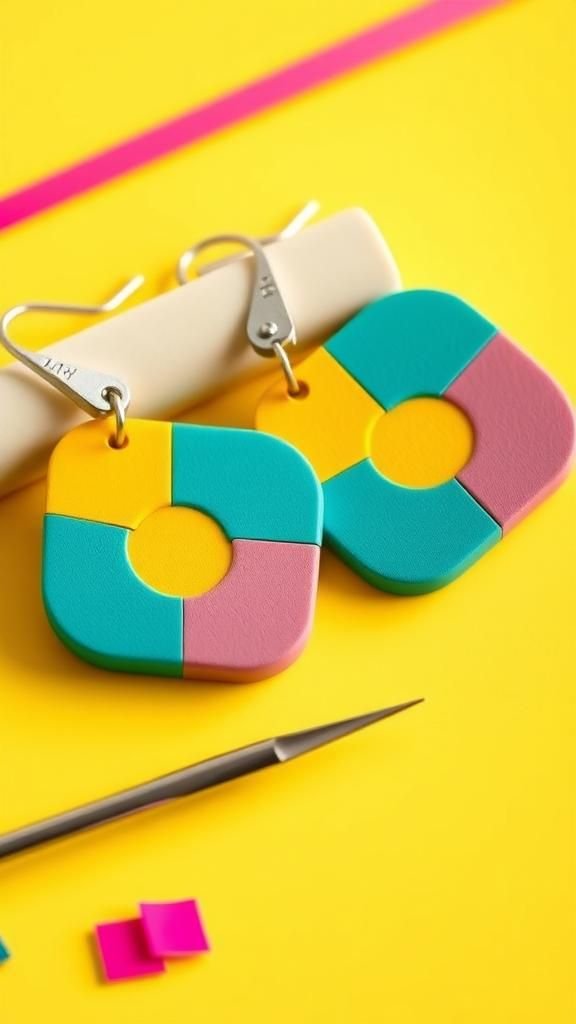
Chunky retro pieces feel like little nods to thrifted finds, with bold blocks of color arranged in playful geometry. The clay’s matte finish and pronounced silhouettes make them feel pleasantly tactile.
I enjoy how they balance a sense of nostalgia with modern simplicity; their presence is friendly without demanding attention. Wearing a pair brings back afternoons spent rearranging color swatches, and the lightness means they stay comfortable while making a cheerful statement.
They pair well with denim or a plain sweater when I want a pop of personality.
Steps
- Collect a few bright polymer clay colors, a set of geometric cutters or templates, a thin blade, earring posts, a fine file, jewelry adhesive, and an oven.
- Condition each color to an even sheet, stack and press blocks of contrasting color together to form a composite slab, then cut chunky geometric shapes for bold silhouettes.
- Cure according to the clay manufacturer’s guidance, cool thoroughly, refine edges with a file, and affix posts using a modest amount of jewelry adhesive.
Tiny animal silhouette studs for playful accents
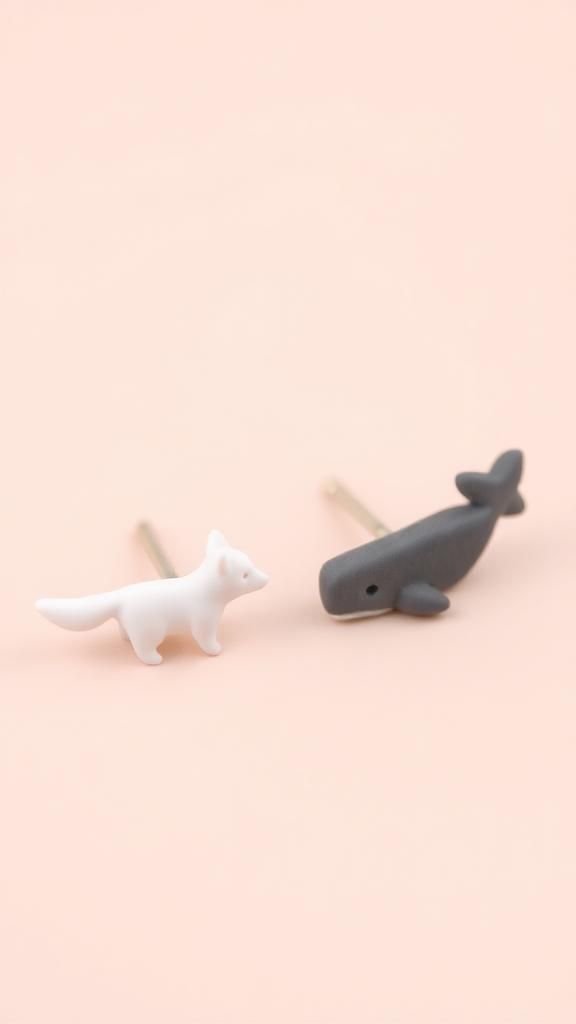
Animal silhouette studs always spark a little grin when I spot them in the mirror. Small shapes like a fox profile or a tiny whale feel nostalgic and playful, bringing a bit of storytelling to outfits.
The edges around ears pick up tiny highlights, and the silhouette can be bold or sweet depending on scale. Creating a matching pair yields a satisfying hunt for symmetry, and gifting a set to a friend often comes with a shared laugh about private jokes or favorite creatures, which is part of their charm.
Steps
- Gather polymer clay in chosen colors, thin blade, small silhouette cutters or hand-drawn templates, earring posts, a fine file, jewelry adhesive, and an oven.
- Condition clay until pliable, transfer silhouette templates onto the clay slab with a blade or micro cutter, and remove surrounding clay to reveal miniature animal shapes.
- Bake per the clay brand’s instructions, allow to cool completely, refine edges and tiny details with a file, and secure posts to the backs with a small dot of jewelry adhesive.
Sculpted pet portrait cameo earrings with charm
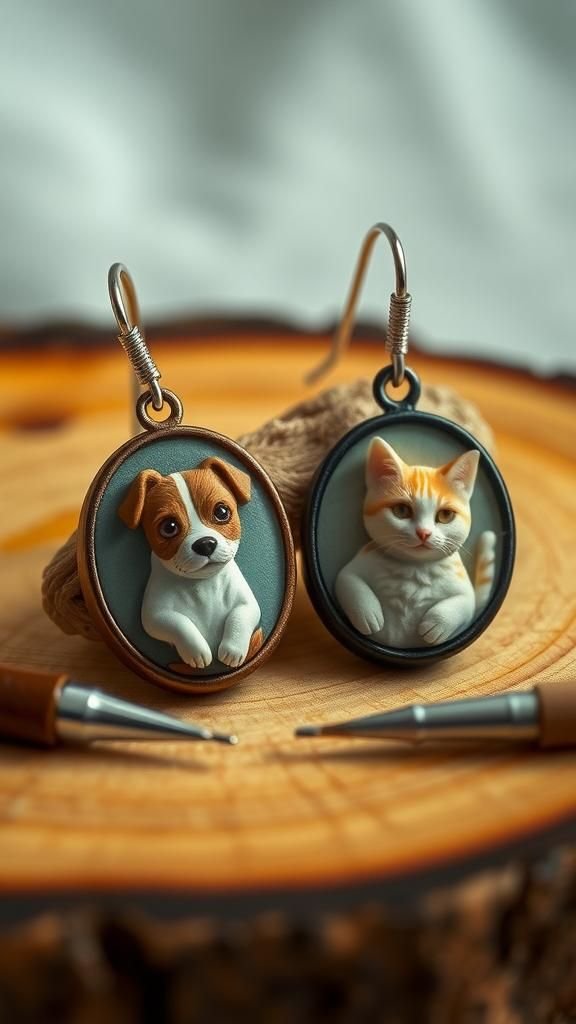
Making tiny pet portrait cameos became my favorite way to honor a beloved animal. The little faces have a delightful presence, with tiny raised noses and gentle eyes carved into shallow relief.
There is comfort in the slow focus required, and each portrait ends up with a personality that feels true. When someone asks about them, the story of the pet usually follows, which turns the earrings into a tiny memory keeper.
The tactile cameo often invites a warm comment, and I find myself smiling whenever I glance down.
Steps
- Gather flesh-toned polymer clay and small amounts of darker colors for fur details, a thin blade, small oval cutters, fine sculpting tools, earring posts, and an oven.
- Condition the base clay and press a small oval for the cameo, then model a simplified pet face in low relief with fine sculpting tools for eyes, nose, and ear shapes.
- Bake according to manufacturer directions, cool completely, refine any tiny details with a gentle file, and attach posts to the back with a small amount of jewelry adhesive.
Millefiori cane roses in tiny sliced blooms
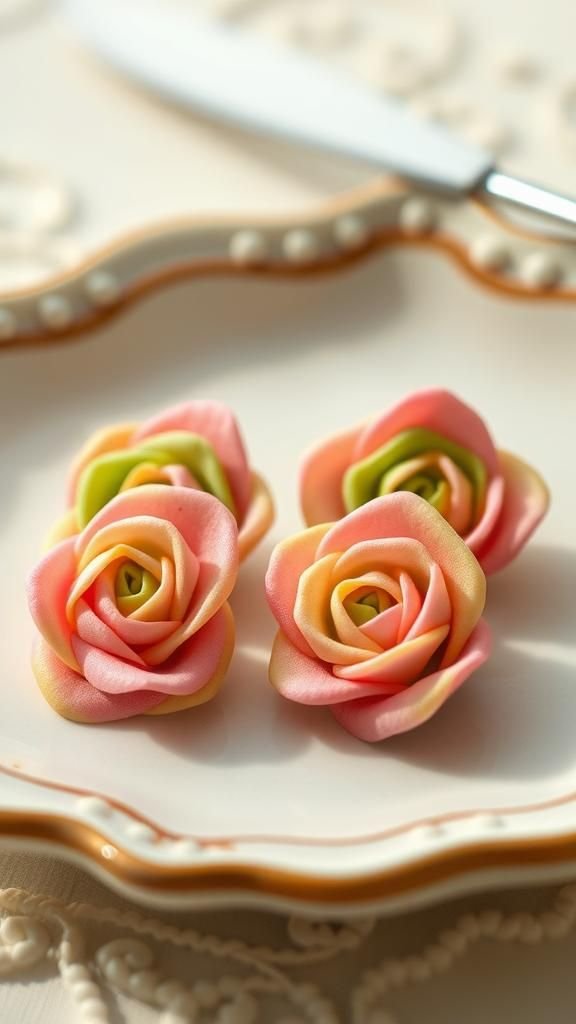
There is a small thrill when a long cane finally reveals a ring of rose petals in cross section. Each slice feels like a secret that was hiding in that log of clay, and the petals hold a slight relief that looks almost floral.
The tiny blooms bring a cheerful, vintage feel to earrings and often pair nicely with brass findings. Holding a slice close lets me see how the colors layered inward, and the gentle concentric pattern feels both orderly and charmingly handcrafted.
Steps
- Collect polymer clay in rose and leaf tones, a central core color, cane-making tools, a sharp thin blade, small round cutters, earring posts, a fine file, jewelry adhesive, and an oven.
- Create layered petal forms around a core to build a rose cane, compress the cane gently to secure internal seams, then reduce length by stretching or pulling carefully.
- Slice thin rounds from the cane with a sharp blade, arrange matching slices for each earring, bake per brand instructions, cool thoroughly, smooth edges with a file, and fasten posts with jewelry adhesive.
Glow-in-the-dark starry studs for evening wear
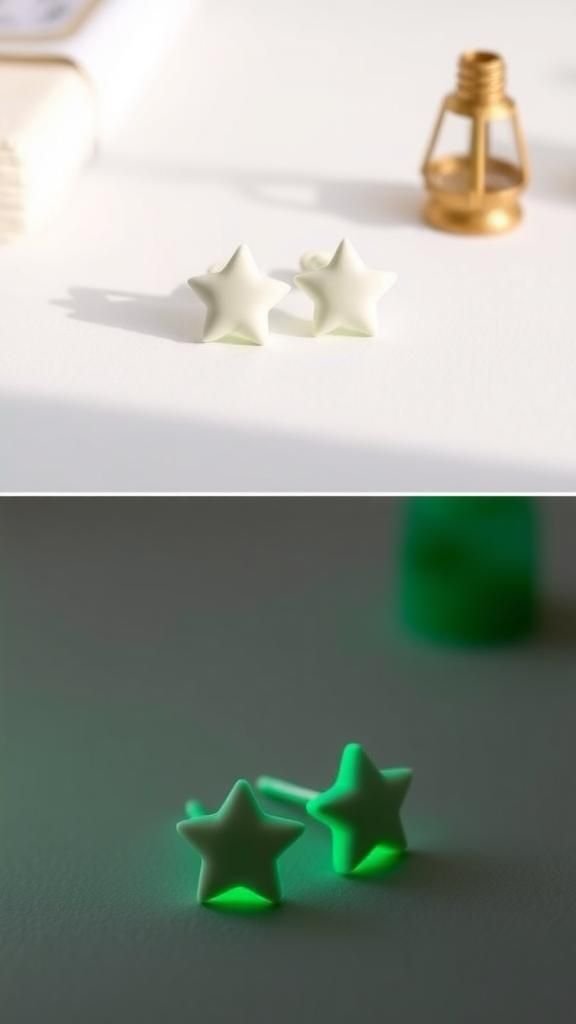
These playful star studs carry a small surprise when night falls. By day they read as soft matte shapes in pale colors, but in low light they emit a gentle, cool glow that feels almost secretive.
Wearing them to a nighttime gathering always sparks comments, and the glow adds a whimsical, childlike pleasure to the outfit. The texture is smooth and the glow varies with the thickness of clay, so some stars shine with a steady hush while others feel like tiny moons scattered across the lobes.
Steps
- Gather polymer clay in pale base shades, glow-in-the-dark powdered pigment, star cutters, a thin blade, earring posts, a fine file, jewelry adhesive, and an oven.
- Condition the base clay and blend glow pigment into portions of the clay to achieve an even luminous mix, then form thin sheets and stamp small star shapes.
- Bake according to manufacturer recommendations, allow to cool, refine star edges with a file, charge the pieces under bright light, and secure earring posts with a small amount of jewelry adhesive.
Geode-inspired shards with glitter and translucence
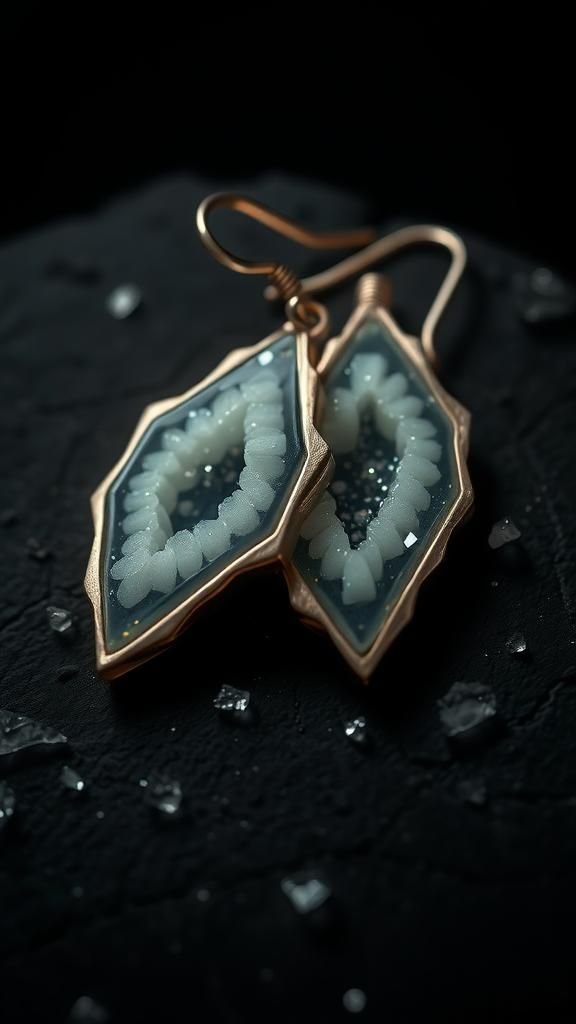
Geode shards bring a dramatic touch despite their small size. Thin translucent layers reveal pockets of sparkle and crushed glass that mimic mineral veins, and the jagged edges catch light in unexpected ways.
When I hold one up, tiny reflections scatter like distant stars. The tactile contrast between smooth faces and raw-looking edges is particularly satisfying.
Pairing them with a delicate metal hoop softens the rough feel and makes the pair wearable for evenings when I want a bit of rock-and-roll sparkle without heavy weight.
Steps
- Assemble translucent polymer clay, a selection of glitter or crushed glass fragments, a thin blade, irregular shard cutters or templates, earring posts, a fine file, jewelry adhesive, and an oven.
- Condition translucent clay, embed glitter or crushed fragments into selected areas to form internal pockets of sparkle, and compress lightly to hold fragments in place.
- Cut or slice irregular shard silhouettes, bake per manufacturer’s instructions, cool fully, refine edges with a file while keeping some jaggedness for realism, and affix posts or fittings with jewelry adhesive.
Braided rope-effect hoops with soft tactile texture
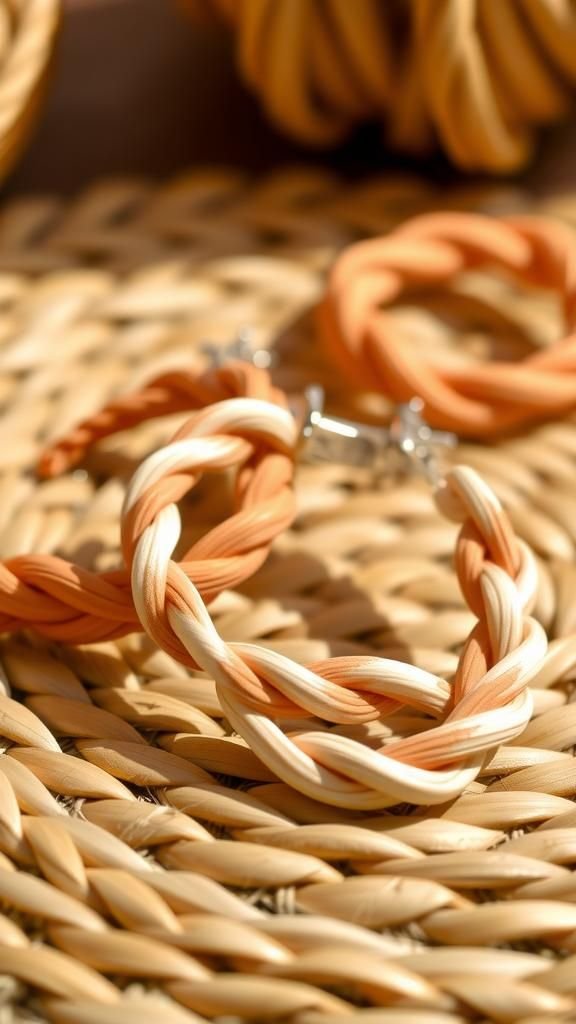
Braided hoops offer a warm, tactile quality that I find comforting. The intertwined strands create a gentle rhythm that invites a quiet touch, and the finished piece feels light despite its visual density.
Colors can be matched for subtlety or contrasted for a playful twist, and the rounded braid catches highlights in a pleasing way. Wearing them often draws a comment about the texture; people tend to be curious about how the little twists were made.
They feel friendly and approachable, with a bit of hand-worked charm.
Steps
- Gather three thin ropes of polymer clay in chosen colors, a circular hoop template or cutter, a thin blade, earring posts or hoop findings, a fine file, jewelry adhesive, and an oven.
- Condition each clay rope until pliable and even, braid the three strands together firmly to form a textured rope, then curve the braid around a circular template to form hoops.
- Trim the braid ends cleanly with a sharp blade, bake according to clay manufacturer directions, let cool completely, refine the shape and finish with a file, and secure posts or complete hoop findings with jewelry adhesive.
Nordic minimal rectangles with serene matte finish
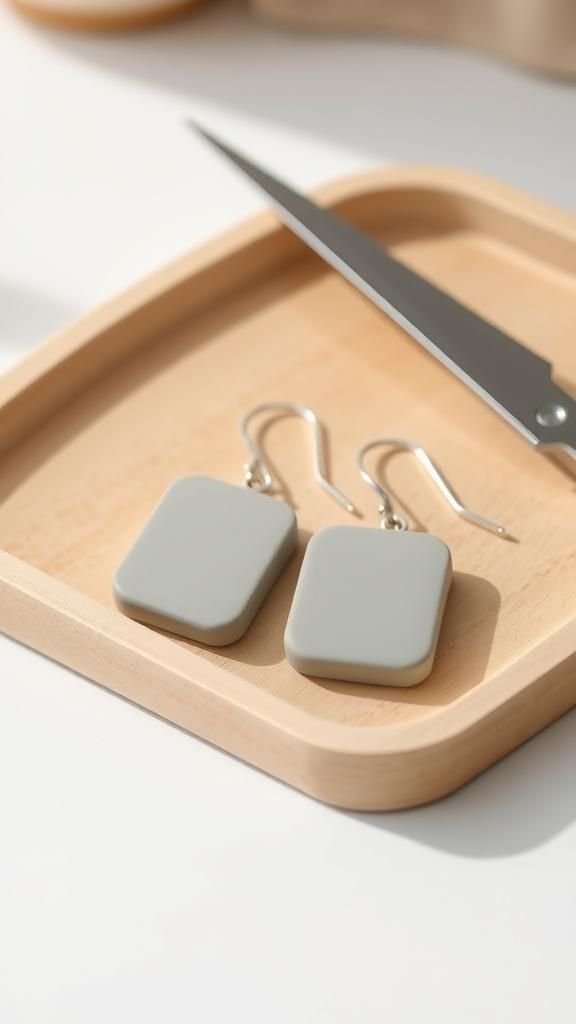
Nordic rectangles feel calm and collected, with clean lines and an understated presence. The matte finish softens the geometry, making the shapes appear almost ceramic.
They sit close to the ear and allow the material’s subtle color to shine without embellishment. I reach for them on days when the wardrobe leans toward neutrals; the earrings add an elevated simplicity that complements wool or linen textures.
There is a quiet satisfaction in the symmetry and restraint of these pieces that keeps them perennial favorites in my collection.
Steps
- Collect neutral-toned polymer clay, a thin blade, rectangular cutters or templates, earring posts, a fine file, jewelry adhesive, and an oven.
- Condition clay until smooth and even, roll a uniform thin slab with a cylindrical tool alternative, then cut clean rectangles using a sharp blade and a straight edge guide.
- Bake according to manufacturer instructions, cool fully, refine edges with a file to achieve crisp lines, and adhere posts to the backs with a small amount of jewelry adhesive.
Speckled confetti heart studs with joyful energy

Confetti hearts are little bursts of cheer. Tiny flecks of bright colors peek through a soft background and give each heart a festive personality.
They feel youthful and friendly, and slipping them on tends to brighten a mood. The texture is playful rather than precious, and the small size keeps them comfortable for everyday wear.
I keep a pair in my bag for quick outfit lifts; they pair well with denim jackets and casual tees when I want a small touch of whimsy.
Steps
- Gather a pale base polymer clay color, small leftover clay crumbs in bright hues, heart cutters, a thin blade, earring posts, a fine file, jewelry adhesive, and an oven.
- Condition the base clay, press and embed tiny crumbs of accent colors across the surface to create a confetti effect, then smooth lightly to keep flecks visible without blending away.
- Cut small hearts from the speckled slab with a cutter, bake per clay brand recommendations, cool, refine edges with a file, and fasten posts with a small amount of jewelry adhesive.
Holographic mica shift teardrops that flash color

Holographic teardrops feel like wearing a tiny mood ring; the color shift draws attention without shouting. A change in angle sends blues to purples and sometimes a hint of gold, and the effect can be mesmerizing in a social setting.
The surface keeps a subtle smoothness, and the internal shimmer seems to live beneath the clay. I often test lighting before leaving the house because the flash can be dramatic under certain bulbs.
They pair nicely with evening looks when a hint of color play feels festive.
Steps
- Collect polymer clay in a dark base shade, holographic mica powder or shift pigment, a thin blade, teardrop cutter, earring posts, a fine file, jewelry adhesive, and an oven.
- Condition the base clay and dust or blend holographic mica lightly into the surface to create an iridescent shift, then roll into an even thin sheet.
- Cut teardrop shapes, bake according to the clay manufacturer’s guidance, cool, refine edges with a file, and attach earring posts with a small amount of jewelry adhesive.
Abstract painterly slabs with bold brushlike marks
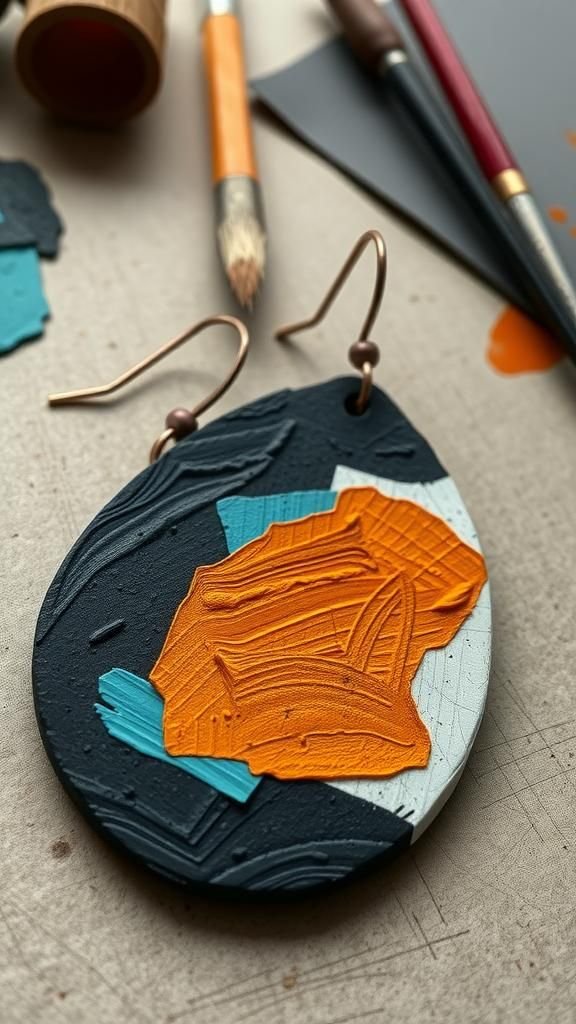
Abstract slabs feel like tiny canvases that I can wear. Brushed streaks, smudged patches, and splattered contrasts create a painterly surface that reads artistic and free.
The texture often retains a faint impression of the tools that moved across the clay, which I find charming. Each slab seems to capture a small moment of expression, and pairing them with simple clothing lets the artfulness stand out.
They invite conversation and sometimes prompt people to ask about the colors or the story behind a pair.
Steps
- Assemble polymer clay in several color choices, a set of small sculpting tools or blunt instruments for mark-making, thin blade, rectangular or freeform cutters, earring posts, fine file, jewelry adhesive, and an oven.
- Condition and layer thin sheets of color, then manipulate the surface with tools to create brushlike marks, smudges, and textured streaks that resemble painted strokes.
- Cut the slabs into matching earring shapes, bake according to manufacturer guidance, cool, refine edges with a file, and adhere posts with a modest amount of jewelry adhesive.