I’ve always kept a small shelf of terracotta pots that slowly gathered marks, drips, and memories from different projects. Lately I’ve been leaning into terracotta pot decorating as a way to turn those humble shapes into bright spots on the windowsill.
There’s something soothing about the tactile warmth of clay paired with bold color and pattern; each little pot becomes a snapshot of an afternoon with a cup of tea and a favorite playlist.
Over time I learned how small choices in color and finish change a pot’s personality. These terracotta pot decorating ideas grew from happy accidents, newspaper spills, and a love of texture, so the list mixes playful experiments with finishes that feel cozy and lived-in.
Soft ombré glaze across a terracotta pot
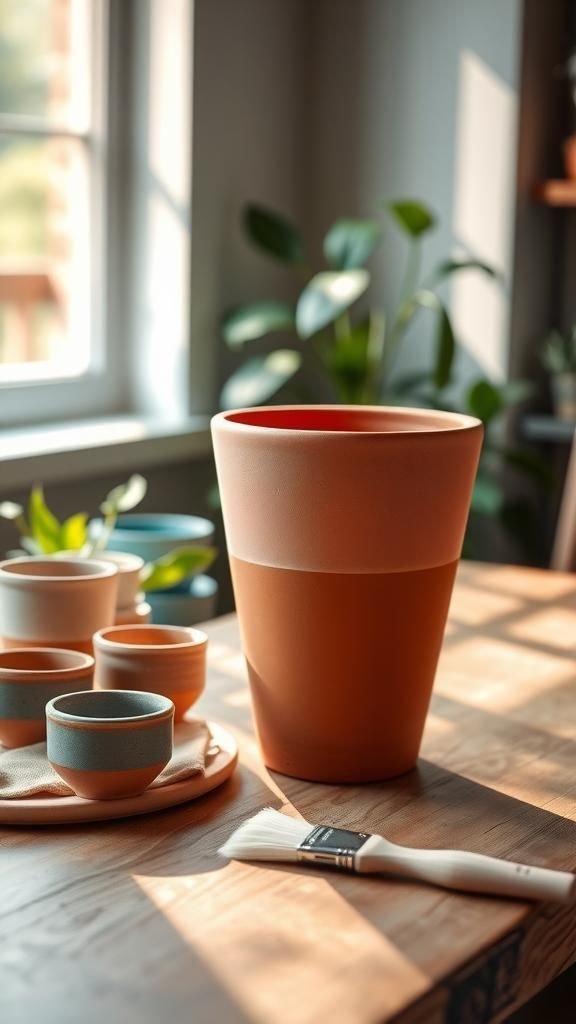
I love how a gentle ombré turns a simple pot into something quietly dramatic. The clay soaks up each hue in a way that feels warm and organic, and the transition between tones suggests a small sunset captured on a curve.
Up close there’s a faint brush-stroke rhythm and a slightly velvety surface that begs to be touched. On the windowsill the effect shifts with changing light, looking richer in the golden hour and cooler on cloudy days, which gives the pot its own little mood swings.
Steps
- Choose three related acrylic colors and pour small amounts on a palette.
- Wet a soft brush and pick up the lightest shade to coat the pot’s rim area.
- Layer the middle tone starting slightly below the first, blending downward with gentle horizontal strokes.
- Apply the darkest hue near the base, blending edges where colors meet and allow to air dry fully.
Bold geometric tape-resist pattern for a modern look
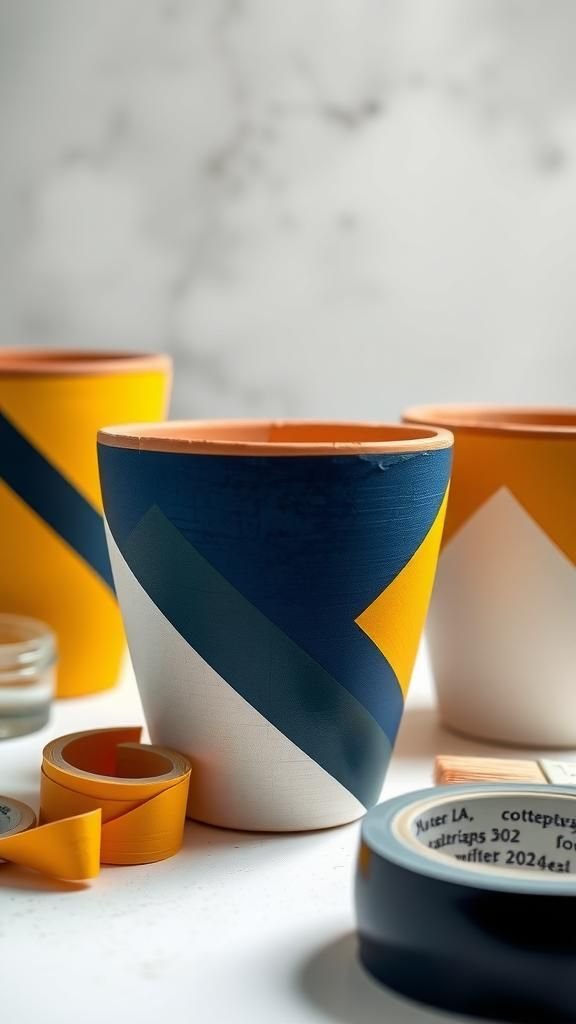
There’s a crisp thrill when geometry meets raw clay. The straight lines and sharp angles contrast with the pot’s rounded silhouette, creating a pleasing tension.
Light reflects differently on the matte clay and the color fields, giving a layered feeling. I often find myself stepping back across the room to admire the clean edges and how tiny misalignments add charm.
The finished piece feels contemporary but oddly homey; it reads like a small architectural model that also holds a rosemary plant.
Steps
- Apply thin strips of low-tack masking tape to create triangles and parallelograms on the pot.
- Fill the exposed areas with a flat acrylic tone using a foam brush for smooth coverage.
- Carefully lift the tape once tackiness subsides and let the transitions settle.
- Touch up any small edges with a fine brush and allow complete drying.
Soft chalky finish for a vintage cottage vibe

A velvety, chalk-like surface instantly mutes the terracotta and lends a cozy, lived-in feel. The finish absorbs light in a way that makes colors whisper rather than shout, and tiny imperfections look like deliberate character.
Holding the pot feels matte and pleasantly rough under the fingertips. When placed beside a white sink or a linen cushion, the charm is undeniable; it blends with linens and weathered wood, conjuring afternoons spent arranging cut flowers and scribbling shopping lists on scrap paper.
Steps
- Lightly scuff the pot’s surface with a fine abrasive pad to help the finish hold.
- Brush on a creamy chalk-style medium in a single thin layer and allow to set until tacky.
- Apply a second thin layer for full coverage, softening brush marks with gentle circular motions.
- Gently buff the surface with a dry cloth once fully cured for a velvety touch.
Hand-drawn botanicals in ink for a delicate touch
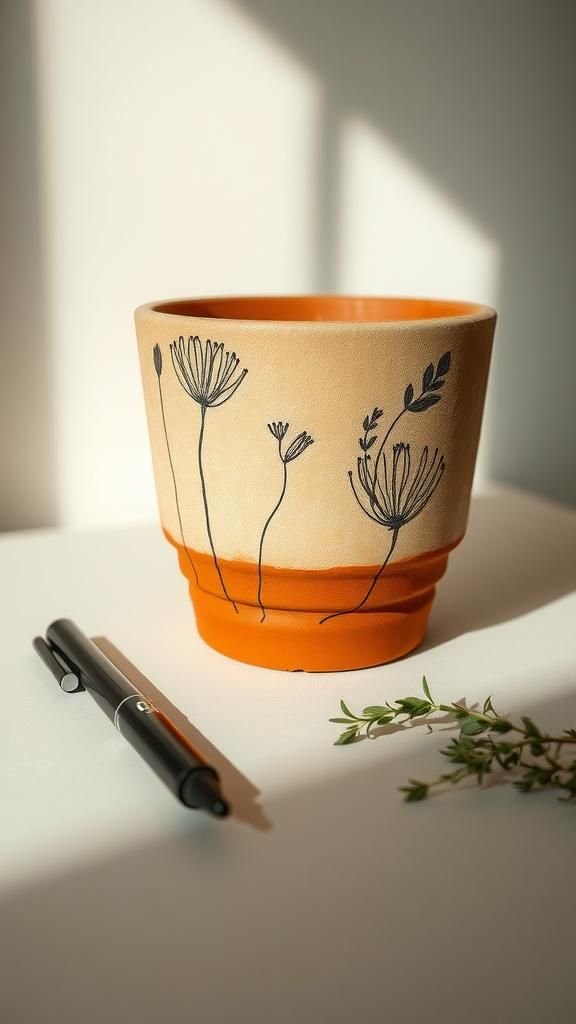
Fine ink drawings sketched across clay feel intimate, like a page plucked from a gardener’s journal. The thin stems and delicate leaf veins read as fragile lines against the pot’s warm backdrop, and the contrast between matte clay and dark ink is striking.
I enjoy the quiet satisfaction of watching a simple sketch age as the clay absorbs the ink just enough to soften hard edges. The result pairs beautifully with small herbs, echoing the plant forms in miniature.
Steps
- Wipe the pot to remove dust and allow to reach room dryness.
- Trace botanical shapes with a waterproof fine-tip ink pen, varying line weight for interest.
- Add light shading with tiny hatches to suggest leaf texture and depth.
- Let the ink cure thoroughly before placing any soil-filled plant inside.
Textured rope bands for tactile interest
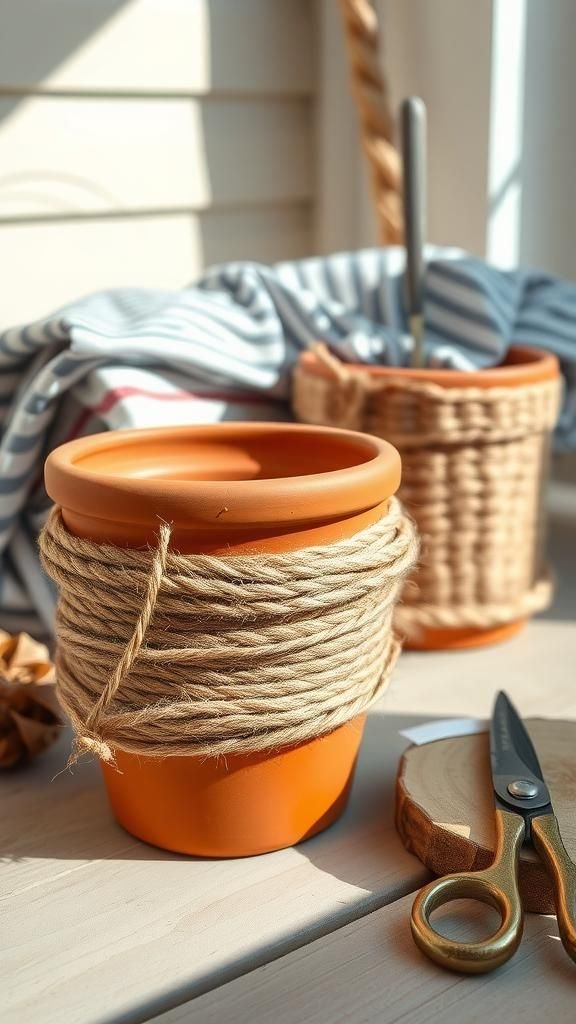
Wrapping the curved body with rough rope adds a maritime, tactile layer that invites fingers to trace its coils. The contrast between the clay’s smooth warmth and the rope’s fibrous surface creates a pleasing interplay of textures.
When sunlight hits the twists, tiny shadows form in the crevices, making an otherwise plain pot feel sculptural. Placed on a sunporch, the rope bands suggest slow afternoons and seaworn cottages, and the smell of the natural fibers mixes oddly well with the earthy clay aroma.
Steps
- Lay natural jute rope around the pot where a banded effect is desired, holding the ends snugly together.
- Fasten the coil by securing the ends with a small amount of pressure-mounted adhesive strip beneath the final wrap.
- Trim any stray fibers and tuck loose ends neatly under the last loop for a clean look.
- Optionally dust the rope with a light wash of diluted color for a muted tone and allow to dry.
Delicate gold rim for a little whispered luxury
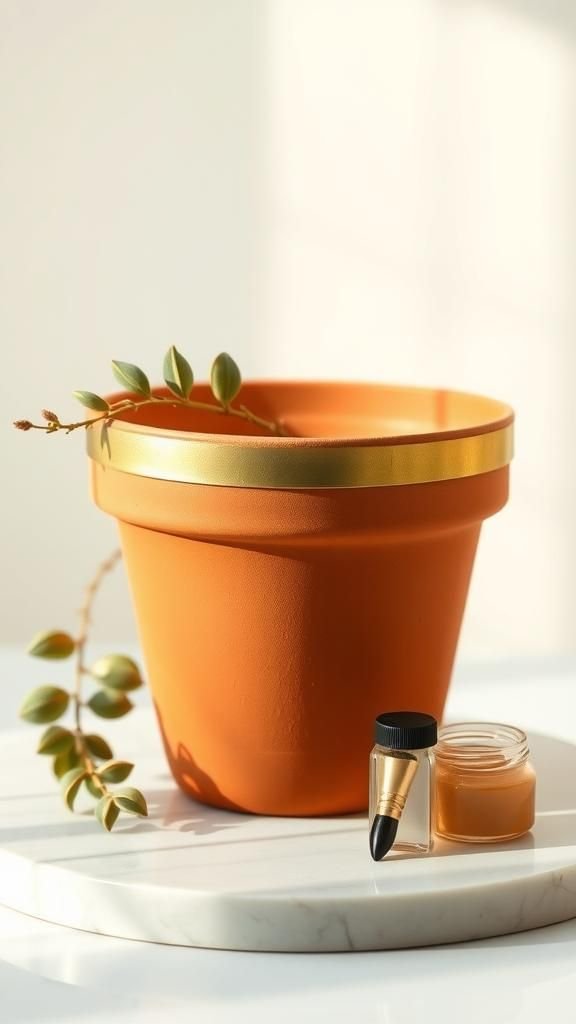
A thin band of metallic along the rim catches light in a subtle, indulgent way. It’s not flashy; instead it adds a refined punctuation that elevates the pot’s silhouette.
From across the room there’s a faint shimmer that draws the eye to the plant like a polite invitation. The metallic edge pairs well with plain clay, creating a contrast that feels unexpected and grown-up.
I often reach for such pieces when a table needs a soft touch of elegance without overwhelming the surrounding textures.
Steps
- Mask the area beneath the rim with a strip of low-tack tape to protect the body.
- Apply a metallic acrylic with a fine brush to the exposed rim, keeping strokes smooth and even.
- Remove the tape once the metallic layer sets enough to avoid smudging and let the finish fully dry.
- If desired, add a second thin metallic pass for greater lustre and allow to cure overnight.
Whimsical polka dots for cheerful patterning

Polka dots bring an instant playful energy to a pot, like confetti paused mid-air. I enjoy how different sizes and muted tones make the design feel handmade and warm rather than commercial.
Running a fingertip across the dots reveals subtle raised textures where the medium pooled, adding a tactile rhythm. These pots tend to pair well with bowl-shaped succulents, offering a lively counterpoint to spiky leaves.
Seeing them grouped together in a mismatched cluster gives a charming, friendly look that brightens the shelf.
Steps
- Dip the end of a rounded sponge or a soft dowel into a chosen color and test dot size on scrap paper.
- Press the tool gently against the pot to create spaced dots, varying pressure for variety in size.
- Introduce a secondary color for visual interest and balance across the surface.
- Allow all layers to cure fully before handling or planting.
Layered wash with visible brush textures
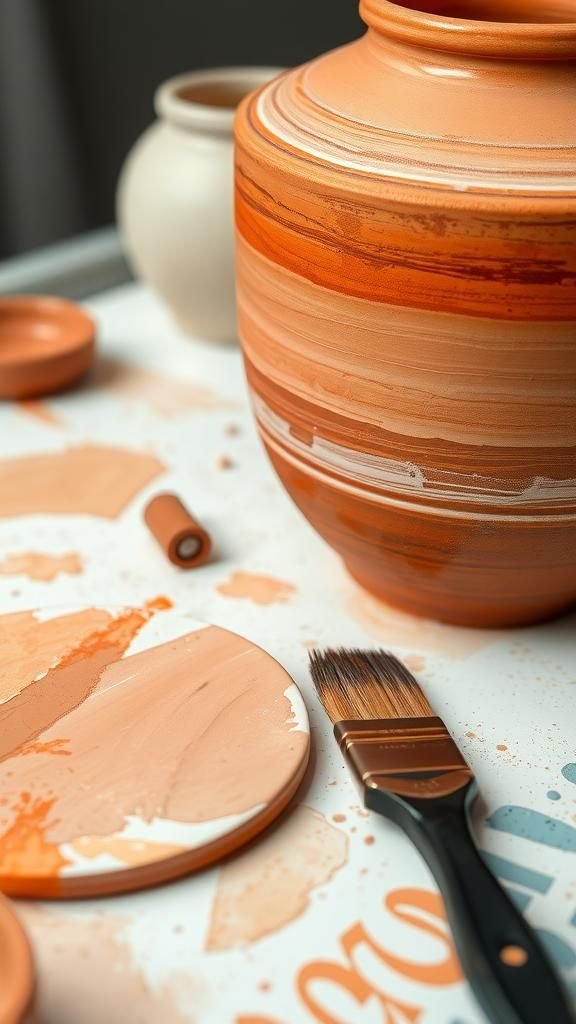
A thin wash of translucent color emphasizes the pot’s porous nature, letting the clay tone peek through. The brush textures remain visible, creating a painterly surface that feels honest and immediate.
I like how light travels over those overlapping strokes, offering subtle shifts in intensity that change with the hour. The pot reads like a small canvas, and each wash seems to tell a different mood depending on humidity and morning light.
It’s an approach that celebrates imperfection and human touch.
Steps
- Mix a translucent acrylic wash by diluting pigment with water to a tea-like consistency.
- Apply the wash in broad, sweeping strokes around the pot, allowing underlying terracotta tone to show.
- Repeat with a complementary wash for depth, crossing strokes at varied angles.
- Let the layered washes dry thoroughly before adding a plant.
Vintage script lettering that feels like a note

Curved, looping handwriting written across clay reads like a private message to anyone who notices. The script adds personality and feels as if the pot could have been part of a handwritten pantry or garden journal.
Ink lines show slight variation, lending warmth and authenticity. When small herbs spill over the edge, the words tuck behind leaves and peek back out, making the whole composition feel intimate.
I often add a short, single-word sentiment that feels like a small wink on a morning shelf.
Steps
- Lightly sketch the desired word or phrase with pencil to find spacing.
- Trace over pencil lines with a steady waterproof ink pen, allowing line weight to vary naturally.
- Erase any remaining pencil marks once the ink is fully dry.
- Optionally apply a gentle wash of muted color to the background and let cure.
Mosaic tile inlay for a jewel-like surface
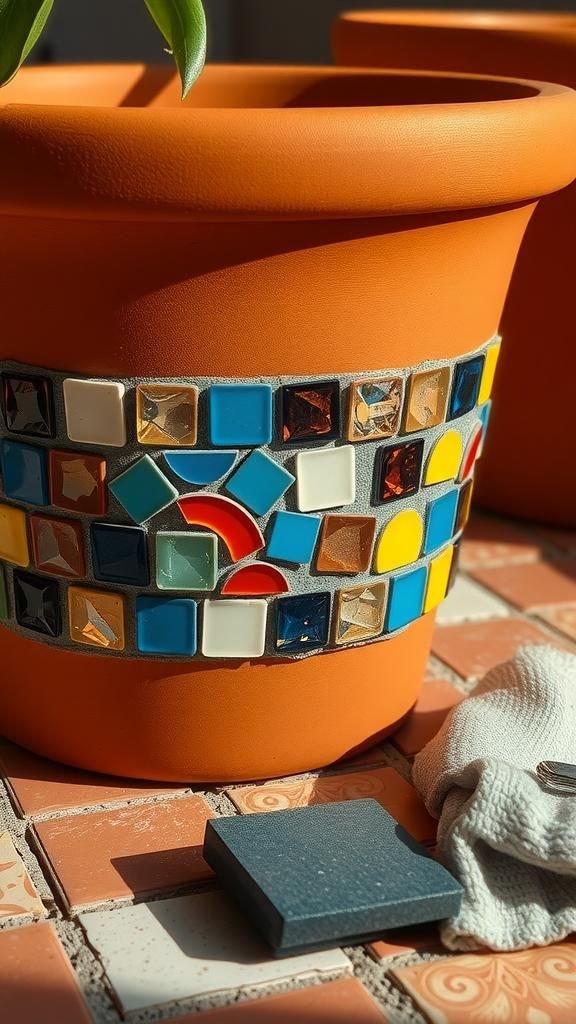
Tiny tiles set into the side of a pot create a miniature mosaic landscape that catches light and color like jewelry. The tactile ridges and glints from glossy tiles contrast beautifully with the matte clay.
Working around the curves yields little irregularities that feel handcrafted rather than precise, and those small catches of shadow bring depth. The finished pot glows when sunlight hits the tiles, scattering flecks of color across surfaces nearby.
It’s the kind of piece that invites close inspection and sparks conversation.
Steps
- Arrange small ceramic or glass tiles on the pot surface to plan the pattern without fixing them permanently.
- Press tiles into a thin bead of thick adhesive placed in small areas and leave space between tiles for grout.
- Once tiles set, work a fine grout into the gaps and remove excess with a damp cloth.
- Allow grout to cure and gently buff tile surfaces to a clean sheen.
Soft speckle glaze like morning drizzle
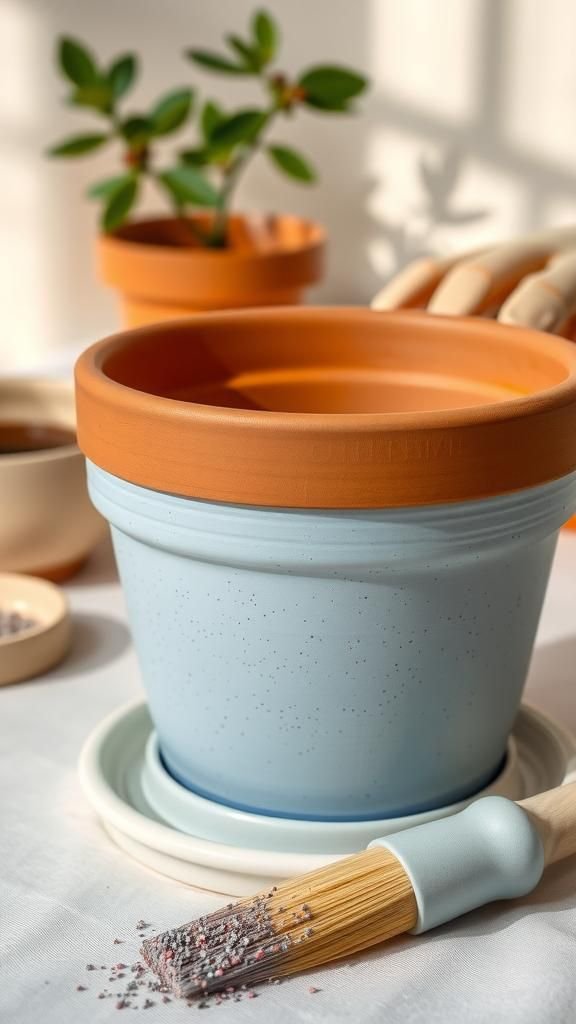
Delicate speckles scattered across the surface feel like the memory of rain on a summer morning. Tiny darker dots interrupt the base color, creating a lively, organic texture that reads as painterly and spontaneous.
The speckled surface leads the eye along the pot’s curve and provides a subtle canvas for any plant. I often find these pieces bring a quiet liveliness to neutral shelves because the speckles suggest motion without shouting.
They pair wonderfully with trailing plants whose leaves echo the scattered drops.
Steps
- Thin a contrasting pigment to a splatter-friendly consistency in a separate container.
- Flick a bristled brush over the pot from a short distance to produce varied speckles.
- Layer additional splatters after the first set dries for depth and randomness.
- Allow full drying time before introducing damp soil or plants.
Bold stripes with a hand-brushed personality
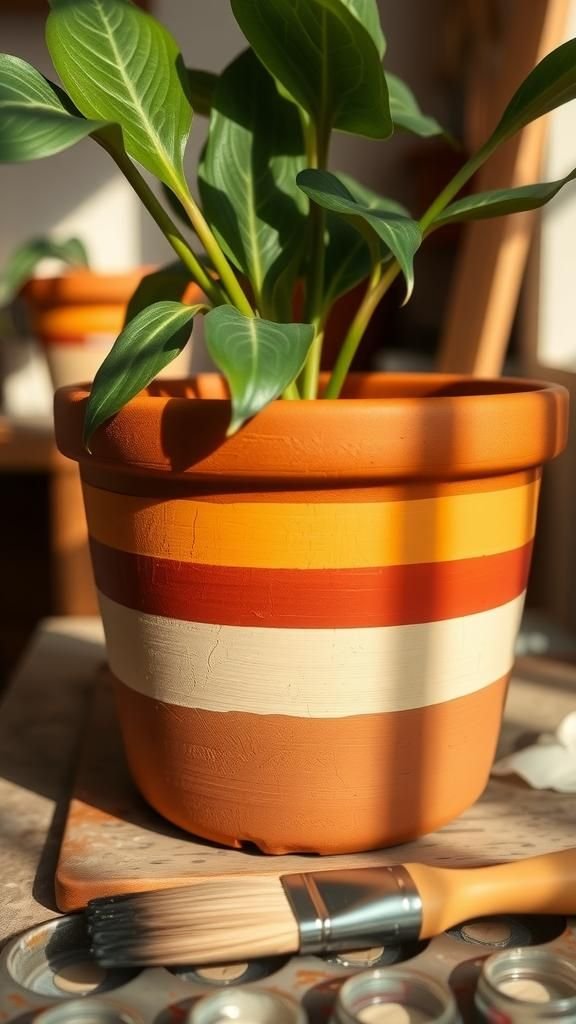
Hand-brushed stripes bring rhythm to the pot’s shape while preserving a human, imperfect touch. Slight wobbles and variances in width become part of the charm and give a sense of motion around the circumference.
When seen at different angles, the stripes interact with plant shadows, creating shifting patterns across the surface. I particularly like pairing wide rhythmic bands with spiky plants for contrast, and the overall effect reads playful yet tactile, like a little drum sitting on a sunny sill.
Steps
- Mark light guidelines around the pot with a washable pencil to map stripe placement.
- Load a flat brush with a medium-opacity color and sweep each stripe in confident, continuous strokes.
- Soften any hard edges by lightly brushing along the stripe’s length before it dries.
- Once dry, erase remaining pencil marks and admire the tactile brushwork.
Marbled swirls for a dreamy, fluid surface
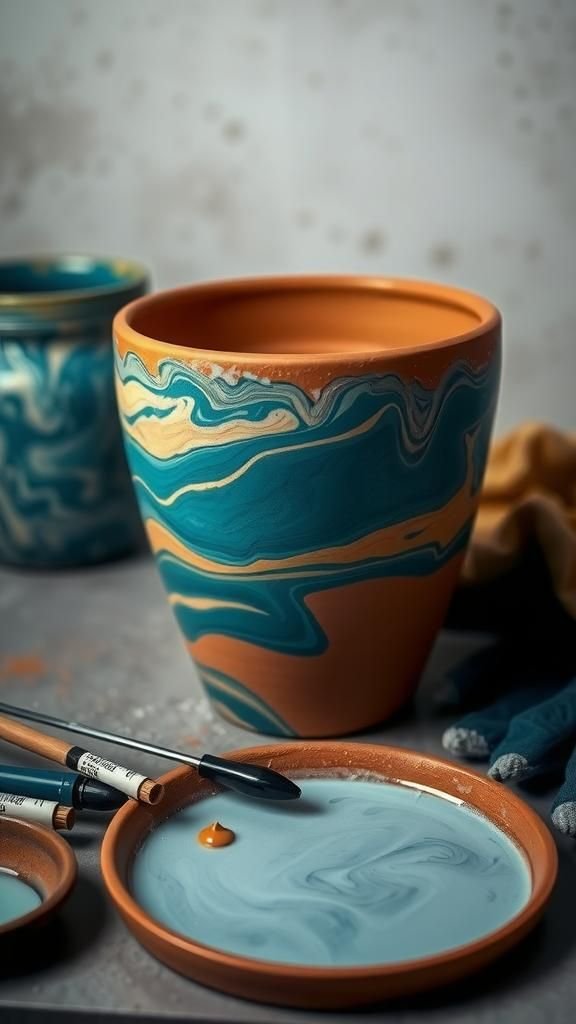
Marbled swirls create a sense of movement as if the pot’s surface holds a tiny landscape of liquids frozen in motion. The sinuous lines and soft color blends feel luxurious and soothing, inviting one to trace the flow with eyes or fingertips.
Each swirl is unique, so no two pots look the same, and the subtle gloss of the marbled layer contrasts pleasantly with the clay beneath. These pots often become focal pieces, catching attention with their hypnotic patterns while remaining quietly elegant on a shelf.
Steps
- Fill a shallow tray with water and float droplets of acrylic colors on the surface to form patterns.
- Gently roll the pot across the water surface to pick up the marbling, rotating for even coverage.
- Rinse the pot lightly with a soft spray to remove excess surface residue and set aside to dry.
- Repeat marbling in targeted areas for more pronounced designs and allow full curing before handling.
Stencil florals for neat, repeatable motifs
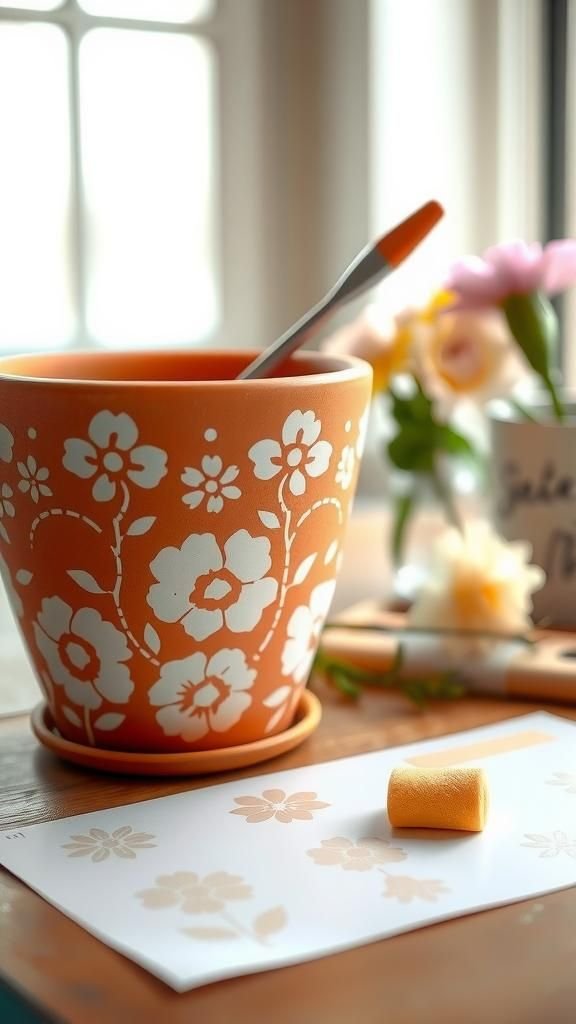
Stenciled florals create tidy, repeatable motifs that read like a small wallpaper wrapped around the pot. The clean edges and repeated shapes offer a composed look that feels orderly and decorative.
Up close, tiny variations in pressure and pigment build warmth into the design, so it never feels factory-made. These pots make a sweet pairing with flowering stems, the printed blooms echoing real petals.
I often imagine a row of such pots on a sill, nodding in sync like a miniature garden parade.
Steps
- Secure a floral stencil onto the pot with low-tack tape in an area to be patterned.
- Dab a soft sponge loaded with pigment onto the stencil openings for even coverage.
- Carefully lift the stencil and reposition to continue the pattern around the pot.
- Add occasional highlights with a finer brush after full drying for subtle depth.
Sgraffito scratches revealing clay beneath
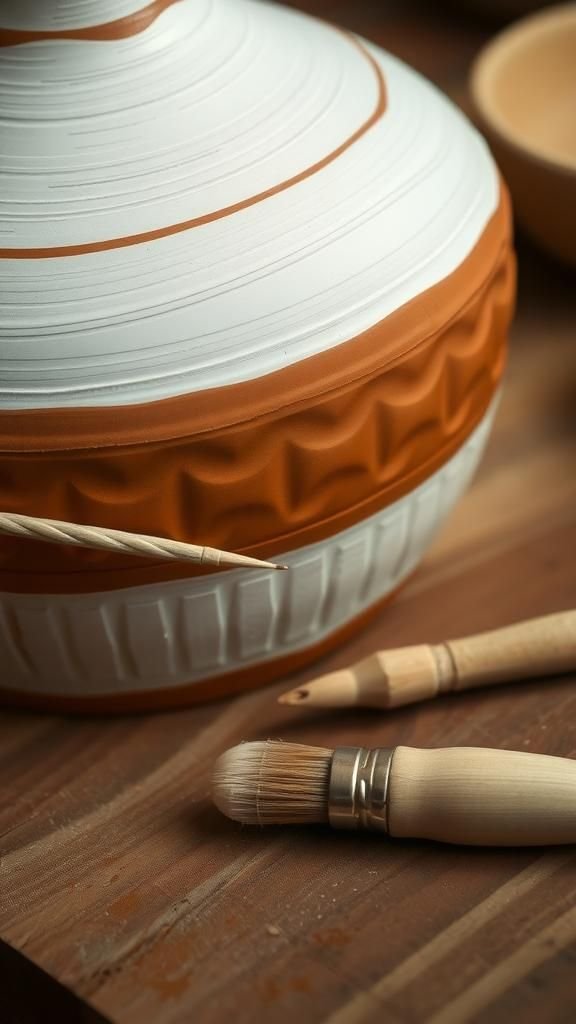
Sgraffito reveals the pot’s inner color through fine scratched lines, creating contrast that feels ancient and artisanal. The etched patterns—loops, dots, and tiny marks—read like a sketch in negative space, and the tactile grooves invite touch.
Light grazing the incised lines casts soft shadows that change throughout the day, adding a subtle living quality. This approach often results from a slow, meditative session, and the rhythm of making those marks becomes part of the object’s story, a quiet record of time spent at the workbench.
Steps
- Cover the pot with an even layer of a contrasting pigmented slip or opaque medium.
- Once the layer develops some tack, use a sharp stylus to draw lines and patterns that expose the clay beneath.
- Brush away loose particles gently and allow the piece to dry completely.
- Optionally enhance the contrast by applying a light wash over the surface and wiping back high spots.
Tonal wash with hand-stamped textures
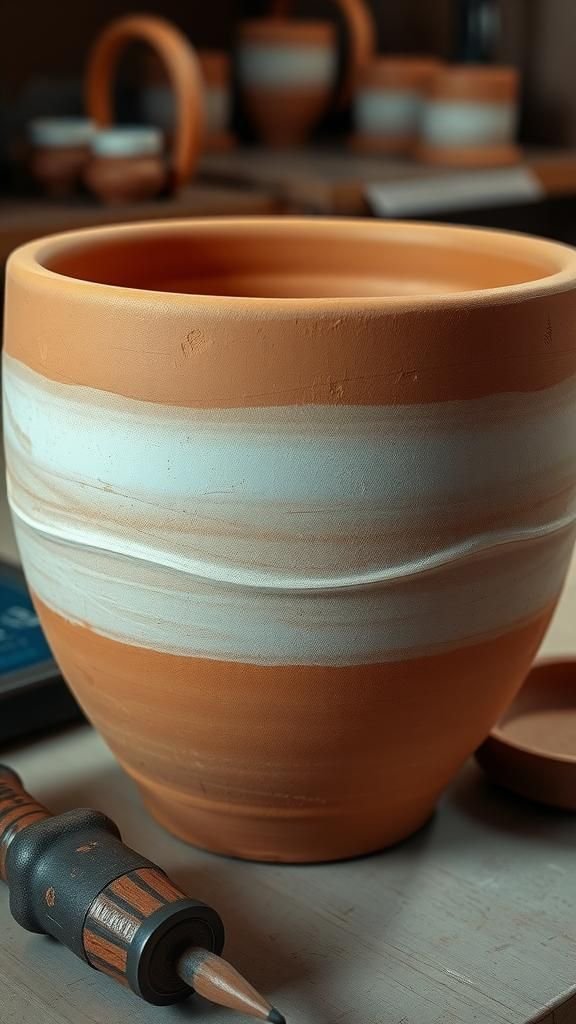
A muted tonal wash paired with small hand-stamped impressions creates a subtle, crafted surface that rewards close inspection. The impressions add rhythm and a hint of decoration without overwhelming the pot’s simple form.
Running a fingertip over the stamps finds tiny valleys that catch dust and light differently, giving a lived-in quality. These pots often feel quiet and thoughtful, like objects kept for their gentle character rather than flash.
Grouped on a low shelf they invite slow appreciation and neat conversation starters.
Steps
- Lay down a thin, even monochrome wash that lets the clay’s warmth show through.
- While the wash remains slightly damp, press small stamps or textured items to create repeating impressions.
- Vary pressure to obtain different depths and visual interest across the surface.
- Allow the piece to dry thoroughly before cleaning away any residual pigment from crevices.
Natural leaf print that feels freshly pressed

Leaf prints translate a garden’s detail into a single moment captured on clay. The veins and edges press faintly into the surface, leaving a ghost of a plant that looks both tender and botanical.
The resulting impression reads like a pressed specimen from a field notebook, and the subtle relief catches light in a delicate way. Placed by an open window, such pots create a quiet dialogue between real leaves and their impressions, celebrating the small joys of strolling outside and noticing textures beneathfoot.
Steps
- Choose fresh leaves with pronounced veins and press them gently against the pot to map placement.
- Coat the leaf lightly with a thin pigment or stain and transfer it onto the pot surface with even pressure.
- Lift the leaf carefully to reveal the delicate print and allow to dry thoroughly.
- Optionally enhance contrast with a muted wash around the print after curing.
Two-tone dipped base for low-key contrast
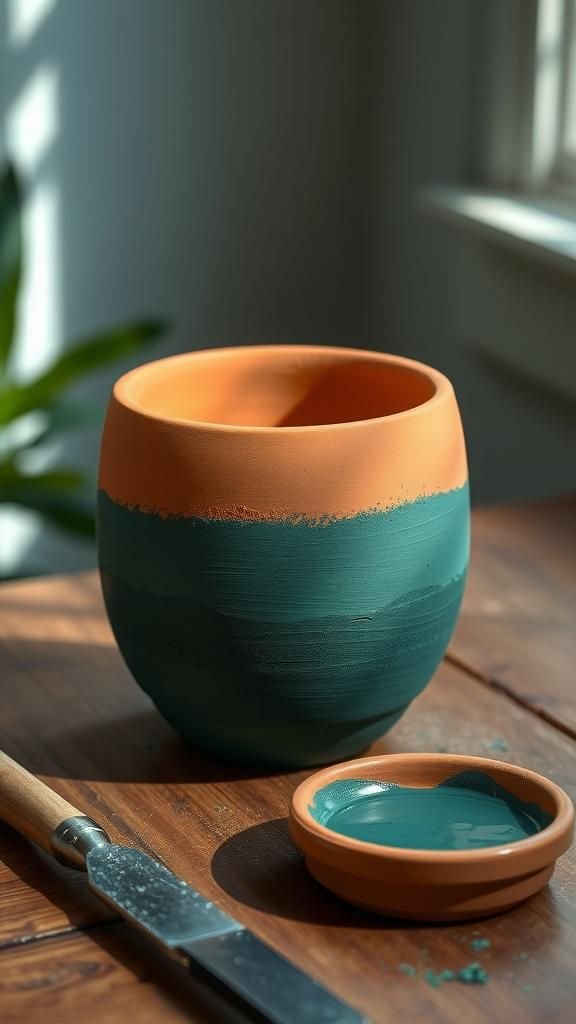
A two-tone dipped base creates a grounded look where the bottom anchors the piece in a different color while the upper portion remains true to terracotta. The abrupt change in color feels modern yet restrained, and the line where hues meet often shows lovely irregularities that read as handmade.
Holding one of these pots, the thumb naturally rests near the color change, making the contrast feel tactile as much as visual. Grouped on a hearth, they provide a subtle rhythm of color that complements both plants and neutral interiors.
Steps
- Prepare a shallow container with a chosen contrasting color to the pot’s natural tone.
- Dip the lower portion of the pot into the color to the desired height and hold steady for even coverage.
- Remove carefully and allow excess to drip away before placing upright to dry.
- Repeat dipping for a stronger effect if desired and let the pot cure fully.
Monochrome matte glaze with subtle sheen
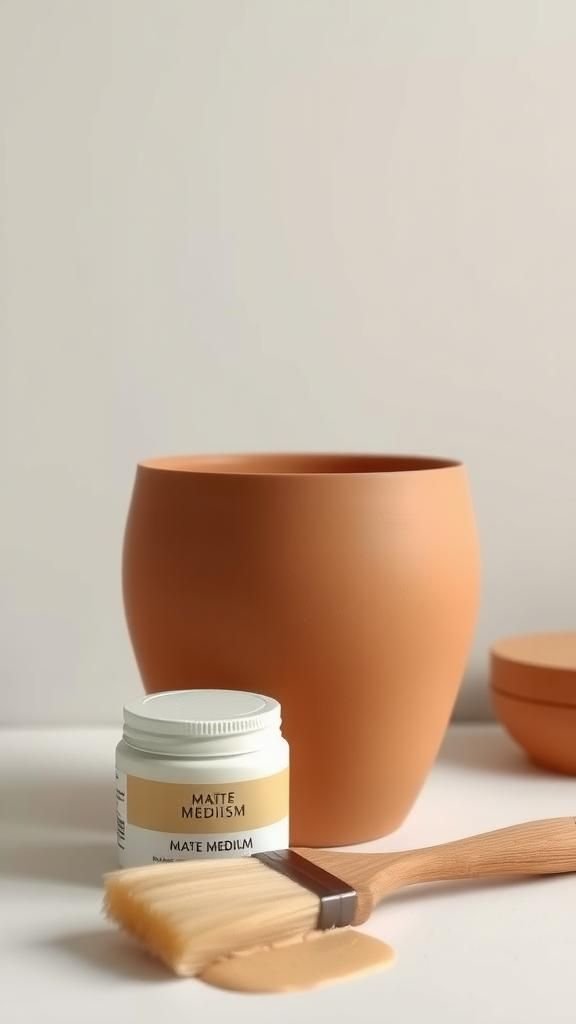
A monochrome matte finish simplifies the pot’s personality, letting form and plant take center stage. The muted hue has a soft elegance, while the barely-there sheen catches light in a restrained, pleasing way.
The overall effect is quiet and contemplative, like neutral clothing that complements rather than competes. I often reach for these when I want a cohesive look among mixed plants because the consistent tone creates visual calm.
The tactile smoothness invites handling and lends a refined presence to any tabletop.
Steps
- Select a single hue and prepare a matte medium to an even consistency.
- Brush the mixture evenly over the pot’s exterior in long, continuous strokes for uniform coverage.
- Allow the first coat to set before evaluating for any thin spots and add a second coat if needed.
- Let the finish cure fully in a dust-free spot for several hours.
Playful mismatched color block trio

Three pots, three personalities—color blocking in mismatched tones creates an energetic little family for a windowsill. Each pot’s block interacts with the others, forming a miniature chorus of color that feels spontaneous and cheerful.
The contrast between the blocks and raw clay introduces geometry while allowing the organic shapes to breathe. I enjoy arranging them in different orders and noticing how each grouping changes the mood of the shelf.
They read like a set of small accents that cheerfully nod to one another without being identical.
Steps
- Choose three complementary colors and assign each pot a distinctive block placement.
- Mask the area around each block to keep edges clean and apply color in steady passes.
- Remove masking when the pigment is tacky enough to avoid smearing and let pieces dry.
- Rearrange the pots in different groupings to explore varied visual balances once cured.
Rustic distressing for an heirloom-worn look
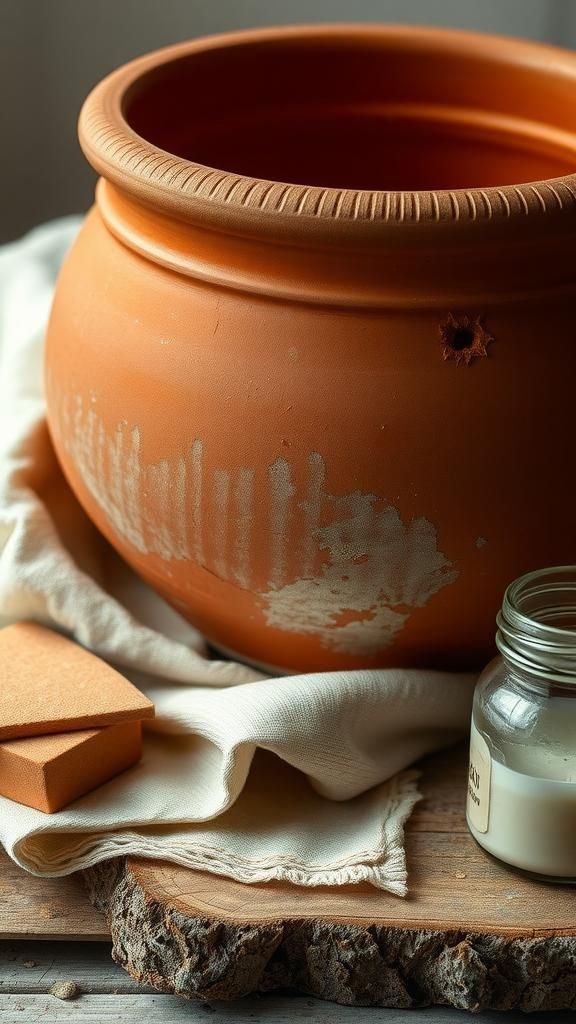
A weathered surface suggests age and a long life of usefulness, as if the pot has been passed through a few kitchen windows. Soft abrasions and rubbed-away edges reveal clay beneath, producing highlights that read as history rather than damage.
Fingerprints and uneven wear become welcome marks that tell a quiet story. These pots pair naturally with vintage linens or salvaged wood, and their worn charm often becomes a focal point when mixed among shinier pieces.
The result feels authentic and comfortable, a little like an old sweater.
Steps
- Apply a thin layer of a neutral topcoat over the pot and allow to develop slight tackiness.
- Gently rub areas with a soft abrasive pad to expose the underlying clay and create worn edges.
- Soften harsh transitions by lightly brushing a diluted wash over the distressed spots.
- Let the piece rest until all surfaces are fully dry and stable to touch.