I have a soft spot for the way paper and light come together during Lunar New Year paper lantern craft projects. My earliest memory is a kitchen table strewn with red paper, a mug of tea gone cold, and the steady hum of family conversation while a warm glow grew on the table.
These Lunar New Year paper lantern craft projects have felt like small rituals to me, moments to slow down and notice texture, sound, and color.
There is a satisfying hush when a finished lantern breathes its soft light into a room.
Classic red cylinder lantern with golden calligraphy
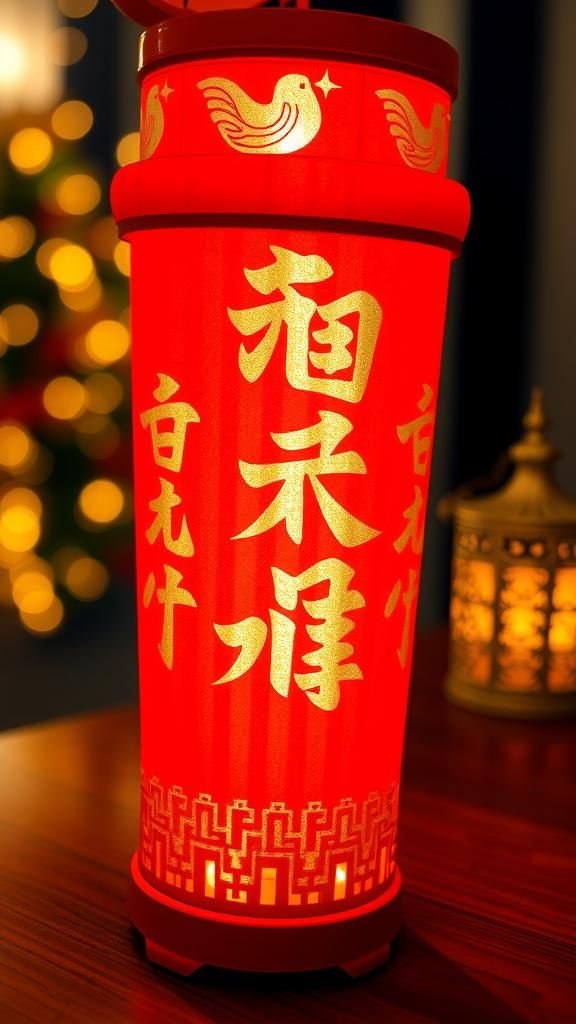
This lantern reminds me of street stalls and wrapped parcels of sticky rice cake. The red paper has a slight tooth that takes ink warmly, and the gold lettering shimmers when candlelight nudges it.
Folding the paper brings a soft rustle under the fingertips, and the scent of fresh paste lingers faintly. When the lantern is placed near a window the glow throws lazy ovals onto nearby walls, and hearing a distant firecracker, the lantern seems like a small, steady heartbeat against the night.
Steps
- Gather a sheet of red craft paper, metallic gold ink or marker, a cylindrical template, thin wire for the handle, and a battery tea light designed for crafts.
- Wrap the paper around the cylindrical template to determine size and mark the overlap before creating evenly spaced vertical slits for shaping.
- Apply gold calligraphy or decorative strokes along the middle panels and allow the ink to dry completely.
- Secure the edges to form the cylinder and install a small ring of wire at the top for the handle, placing the LED tea light inside.
- Check stability on a flat surface and hang or place where the warm glow will be visible.
Accordion-style lantern with bamboo frame
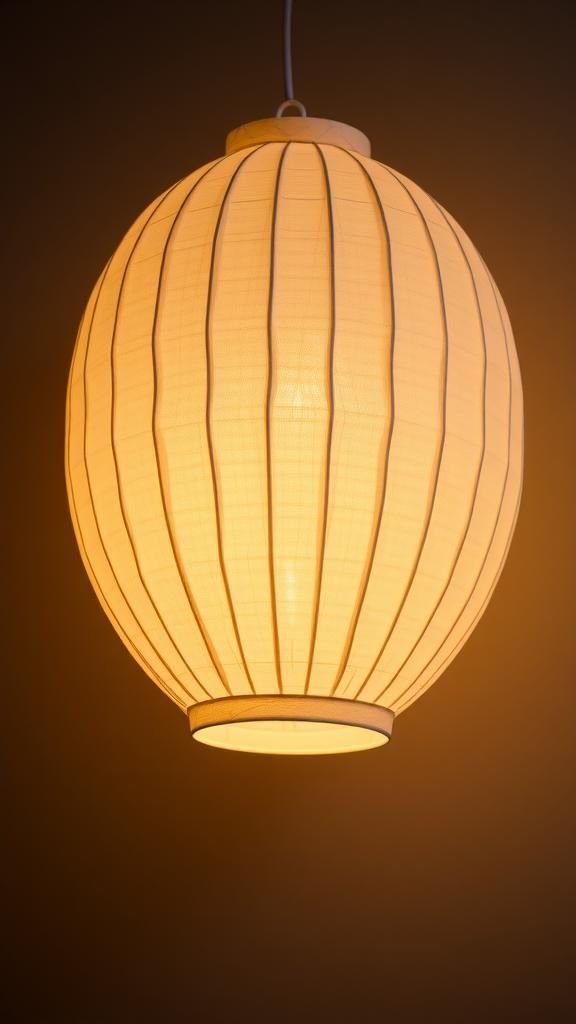
This style has a playful accordion crunch that sounds satisfying when opened and closed. Thin bamboo ribs peek through translucent paper, giving a gentle architecture to what would otherwise be a simple glow.
The tactile contrast between the warm, slightly flexible bamboo and the smooth paper edge creates a comforting rhythm while handling the lantern. Hanging it from a hook makes it sway with a soft whispering motion, and the layered shadow patterns it throws across floors can feel like a quiet, moving map of that evening.
Steps
- Prepare narrow bamboo slats, lightweight translucent paper, thin string, and a small LED light source for interiors.
- Create evenly spaced creases in the paper to form the accordion pleats and fit the bamboo ribs inside the pleated channels to give structural support.
- Fasten the ends of the bamboo to hold the pleats in a rounded form and attach a hanging loop at the top.
- Place the LED light inside and test the lantern’s sway and glow, adjusting tension on the slats if needed.
Lotus-shaped tabletop lantern for quiet celebrations
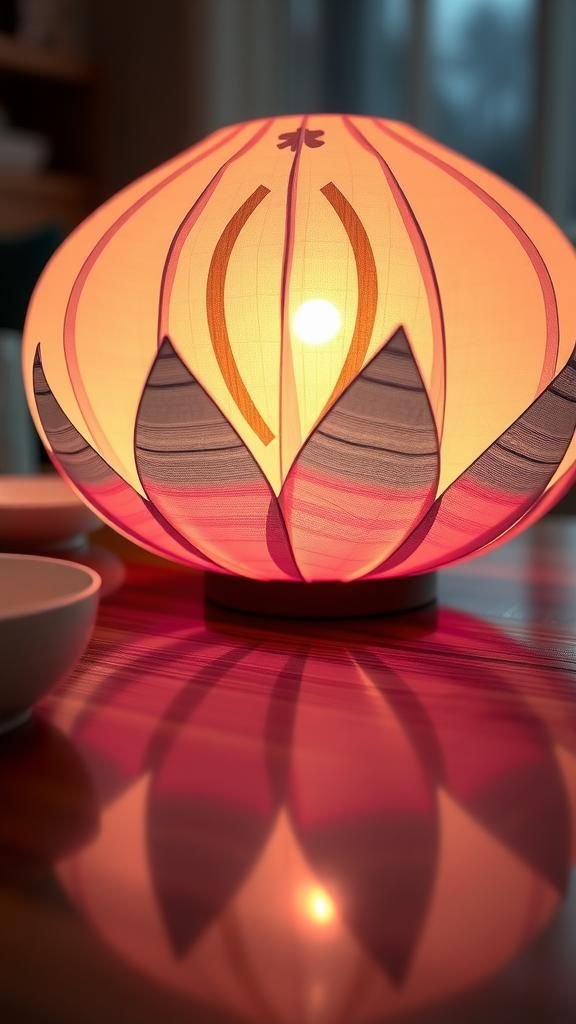
The lotus silhouette always feels calming, petals layered like a slow inhale and exhale. Petals of soft colored paper catch light at their edges so that the glow looks like something breathing.
The low, rounded profile sits well on wooden surfaces, and when clustered together the shapes nod subtly in draft, casting petals of light across a tabletop. The tactile feel of each petal is like a thin leaf, slightly velvety at the edges, and arranging them beside a teacup becomes an accidental meditation on small, careful choices.
Steps
- Collect pastel or light-colored paper, a circular base for support, small adhesive tabs, and a safe LED tealight.
- Cut petal shapes of consistent size and layer them concentrically on the base, overlapping to build the lotus form.
- Secure each petal with small adhesive points and gently curve edges to catch light.
- Place the LED tealight at the center and adjust petals for balance and even illumination.
Paper-cut silhouette lantern with zodiac symbols
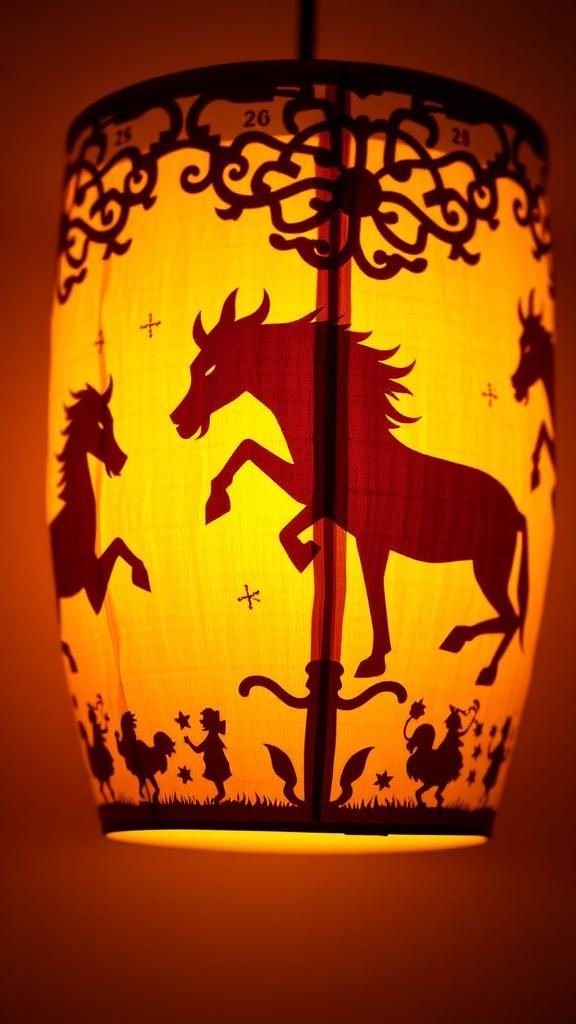
There is a delicate thrill in watching tiny silhouettes appear against light. Intricate animals from the zodiac look almost like shadow theater when the lantern glows.
The contrast between the crisp cut edges and the soft paper body creates a pleasing visual tension, while the fine rice-paper absorbs the inked outlines and holds shadow crispness. When placed near a pale wall, the silhouettes enlarge and breathe, and family members often lean in close to try to name each animal by its shadow, which evokes soft laughter and a gentle hush.
Steps
- Select thin rice paper or vellum, fine cutting tools, pencil for tracing, and templates of zodiac animals for reference.
- Transfer the chosen animal designs onto the paper, then carefully cut out the silhouettes to create negative space for light to pass through.
- Mount the cut paper onto a supportive frame or cylinder so the silhouettes sit evenly spaced around the lantern.
- Insert a safe LED light and test how the shadows project onto nearby surfaces, adjusting placement as necessary.
Mini dragon-head lantern for tiny parades
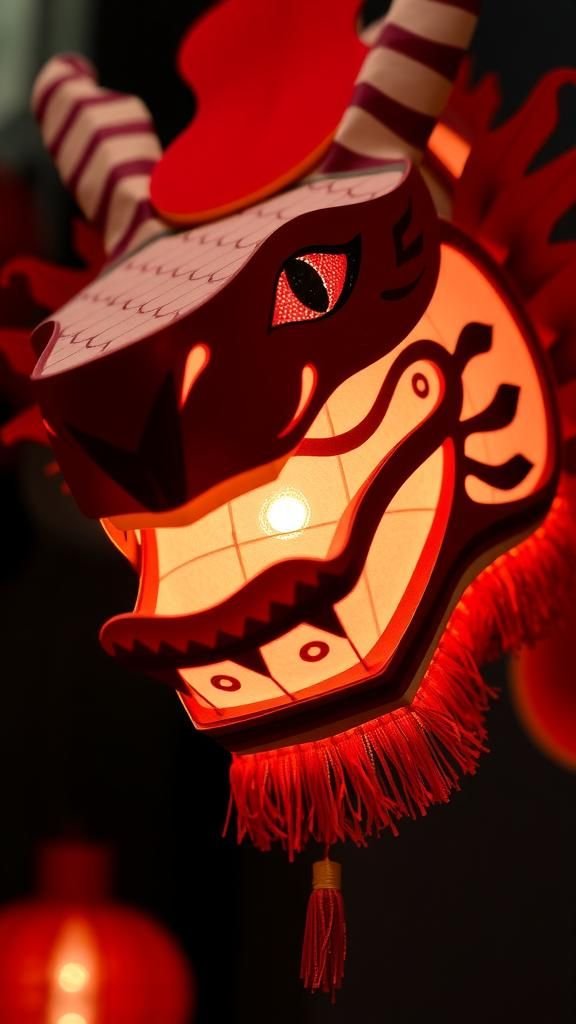
A tiny dragon head conjures parade excitement in miniature form; the painted scales and curious eyes bring a spirited personality. The snout’s curve and the fringe along the jaw catch light in playful ways.
Holding one sparks memory of being small in a crowd, craning to see bright banners and feeling the gentle tug of elders guiding a lantern. The cardboard nose has a matte texture, the hanging ribbons whisper when moved, and the overall presence feels like a pocket-sized festival companion.
Steps
- Gather colored cardstock for the head, smaller scraps for scales, thin wire or a dowel for structure, and decorative ribbons for the jaw and mane.
- Create a tapered head shape and layer scale-like pieces along the sides to suggest texture and movement.
- Affix decorative eyes and small fringe elements to give the dragon character.
- Attach a hanging loop or short handle and place a small LED inside the head cavity if internal glow is desired.
Origami koi lantern that seems to swim in light
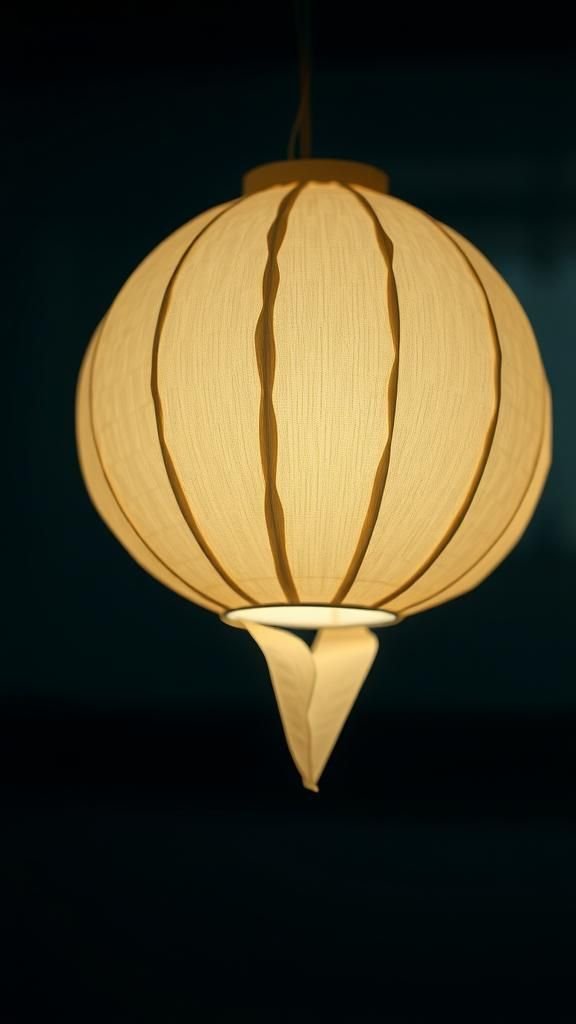
An origami koi lantern carries the hush of water into a room; folded fins catch light on crisp creases and tails fan out like a tiny current. The paper surface has a subtle sheen that reflects hints of the LED glow, and touching a fin feels like touching a folded petal.
Suspended slightly off a table, these koi seem to float in the air and cast curved reflections on nearby surfaces. Watching one sway makes the mind slow, as if listening to quiet paddling under a moonlit pond.
Steps
- Select double-sided patterned paper suitable for origami, battery-powered micro LED lights, and fine thread for hanging.
- Follow a standard koi origami sequence to fold the body, adjusting creases for a pleasing profile and well-formed fins.
- Create a small cavity or pocket to nestle a micro LED and secure it so the light illuminates the body evenly.
- Suspend the koi with fine thread at varying heights to create the illusion of swimming.
Star-shaped hanging lantern with tasseled edges

A star silhouette always invites a little wonder; the sharp points play against the soft tassel fringe in a pleasing tension. The paper points have crisp edges that throw beacons of light into a room while the fabric tassels sway quietly, making a faint rustle.
When hung in a doorway the lantern frames movement with glittering points and creates a gentle, celebratory entrance. The combined texture of paper and textile keeps the piece interesting to touch and watch, as light pools in the star’s center and flares toward each tip.
Steps
- Choose sturdy paper or light cardstock for the star panels, thin textile yarn for tassels, and a small LED for interior illumination.
- Construct the star by connecting panels along their edges to form a three-dimensional shape, leaving an opening for the light source.
- Attach tasseled yarn along the lower seams to create motion and visual contrast.
- Insert the LED and suspend the lantern from a secure point to allow free movement.
Tea-light safe rice-paper lantern with soft glow

Rice-paper has an almost skin-like translucence that makes every lantern feel intimate. The light that filters through becomes more diffuse, like a lamp behind a thin curtain, and the edges of the paper glow warmly.
The surface has a faint fibrous texture that is pleasant to trace with a fingertip. When clustered, these lanterns create pools of gentle light that invite conversation.
The quiet hum of family voices around them and the faint aroma of simmering soup make the lanterns feel like a homecoming centerpiece.
Steps
- Select durable rice-paper, a lightweight internal frame, safe battery-operated tea lights specifically labeled for crafts, and thin adhesive strips.
- Form a simple cylinder or rounded shape with the rice-paper, ensuring seams are neat and the structure is stable.
- Place the battery tea light inside at the base, checking that the light sits evenly and is not directly touching the paper.
- Set the lantern on a heat-resistant surface and arrange multiple lanterns to create an inviting glow.
Lantern garland strung across a living room wall
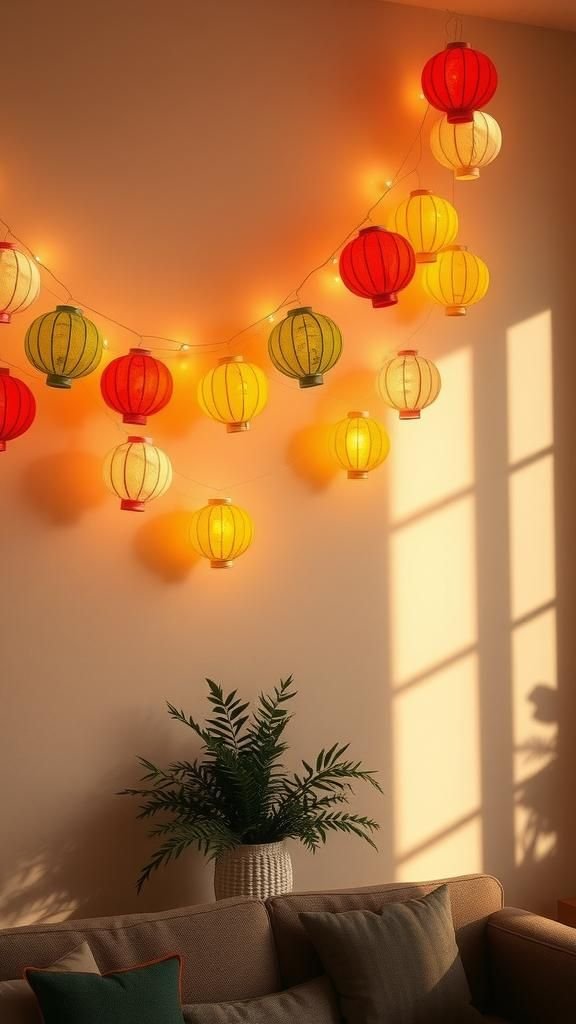
A chain of small lanterns brings the festival into everyday spaces, each tiny orb a little surprise when the lights come on. Hanging along a wall they create a rhythmic pattern of warm dots that feels cheerful without shouting.
The lightweight paper gives the garland a gentle bounce, and the thin cords hum faintly when a door opens. The variety of colors and shapes provides visual interest, and when children help arrange them there’s a kind of communal collage that makes the room feel stitched together with light.
Steps
- Gather multiple mini lanterns, a durable cord or string rated for lights, small LED bulbs or micro lights, and connectors for wiring if needed.
- Space the lanterns along the cord at regular intervals, ensuring each lamp has a secure seat and even spacing.
- Connect the lights to the power source according to the light set instructions and test the run for consistent illumination.
- Hang the garland along the desired wall or mantel, adjusting droop and spacing for a balanced look.
Wishes-in-calligraphy lantern with floating notes
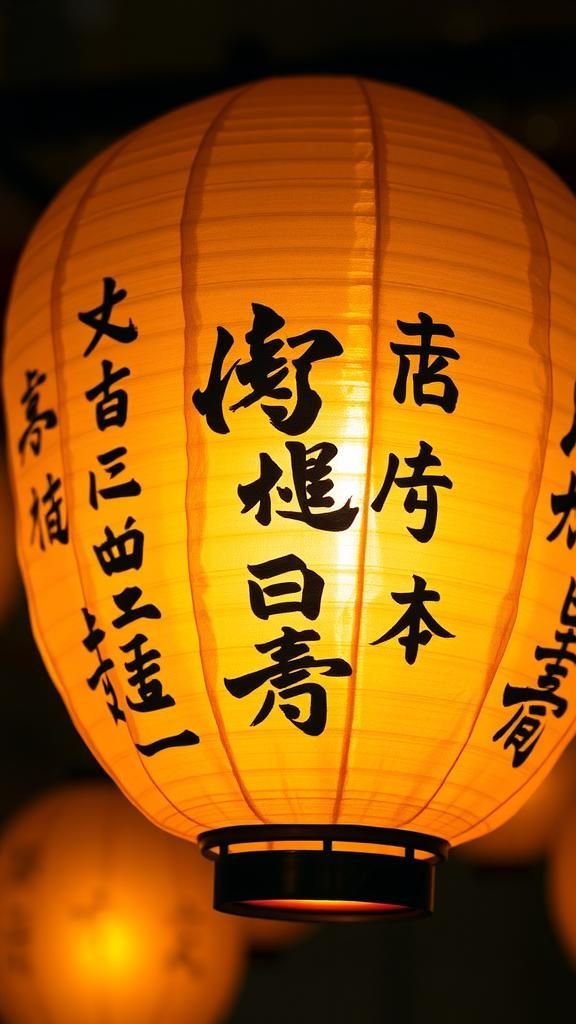
There is a gentle ceremony in letting wishes rest on paper; the inked characters have weight and a tiny intimacy. The paper panels smell faintly of ink and the brushstrokes show the motion of the hand that wrote them.
When clustered around a light source, the characters become silhouettes that sway subtly, reinforcing the feeling that the wishes are taking breath. Friends and family often pause to read them aloud, and the rustle of the notes against one another sounds like quiet applause for small hopes.
Steps
- Choose sturdy panels of light-colored paper for calligraphy, ink or brush pens, and small slits or pockets in the lantern to insert the written notes.
- Write wishes or short messages on individual strips of paper, allowing ink to dry fully.
- Slide the notes into the prepared pockets around the lantern so they hang or float slightly from the inner frame.
- Illuminate the lantern with a battery light and position it where the calligraphy can be read and admired.
Shadow-play lantern with layered cutouts and vellum
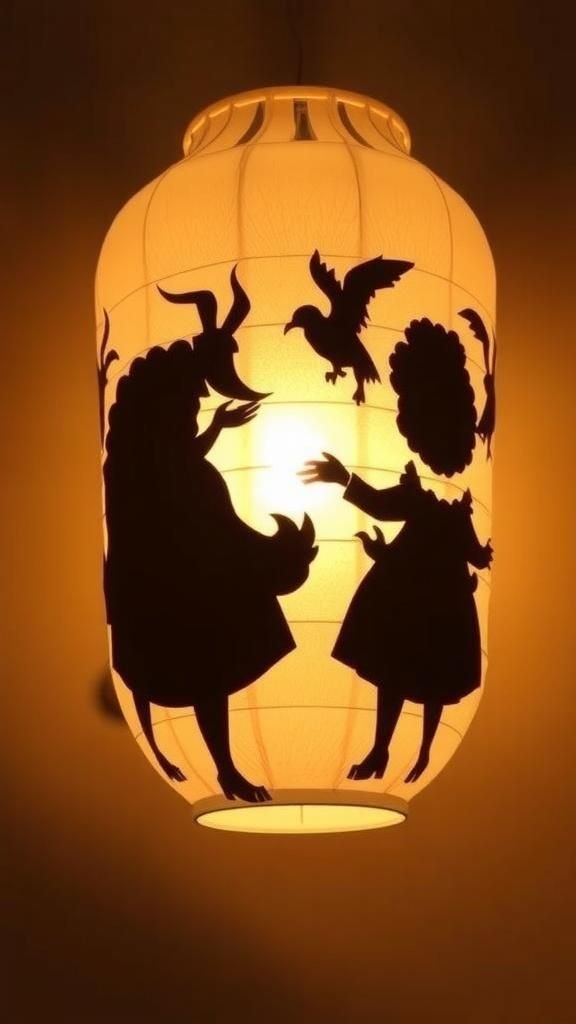
Layered cutouts against vellum create a quiet theatre of shapes; overlapping silhouettes gain depth and motion when the light shifts. The vellum softens edges and the layered paper creates a kind of three-dimensional shadow painting.
The tactile contrast between the smooth vellum and the matte paper invites lingering fingers, and the slow rotation of the lantern suggests a slow-motion story unfolding. Observers often find themselves tracing the layers with their eyes, following one shape as it slides behind another and wondering about the scene it hints at.
Steps
- Collect translucent vellum sheets, contrasting cardstock for layered cutouts, adhesives suitable for paper, and a battery-powered light source.
- Create several thematic cutouts and mount them at staggered depths onto the vellum to form overlapping scenes.
- Enclose the layered composition within a frame or cylinder so the cutouts retain their spacing.
- Place the light inside and observe how layers and shadows interact on surrounding surfaces.
Tissue-paper mosaic lantern with jewel-like colors

A mosaic lantern feels jewel-like when lit, each tissue square capturing a tiny pool of color that leaks into its neighbors. Tapping the paper surface produces a light, papery sound, and the layered translucence has a stained-glass quality that makes ordinary corners glow.
The variety of hues can feel unexpectedly lyrical when evening arrives and the lantern softens the room into warm pigments. Placing the lantern near a plant creates a playful interplay of colored light and leaf shadows that brings both objects to life.
Steps
- Assemble small squares of colored tissue paper, a lantern frame or cylinder, clear-drying adhesive, and an internal LED source.
- Adhere tissue pieces overlapping slightly to the frame to build a patchwork of color, ensuring coverage across the surface.
- Smooth edges gently and allow the adhesive to dry fully to secure the mosaic surface.
- Install the LED inside and observe the jewel-like glow produced by the layered tissue.
Fringe-and-pom lantern with playful texture

Fringe and pom-poms add a playful, tactile layer that invites smiles. The soft tassels swing with a cheerful whisper and the poms have a cushioned, almost plush feel when brushed.
Light peeks through the paper body to spotlight the fringe, creating tiny halos around each dangling element. This lantern tends to attract hands and curious fingers, and it often becomes a favorite for casual gatherings where movement and laughter are plentiful.
The combined textures give the piece a friendly, approachable personality.
Steps
- Collect lightweight paper for the lantern body, colorful yarn or fabric strips for fringe, small pom-poms, and a battery LED light.
- Attach the fringe along the lower edges of the lantern and secure pom-poms at intervals to add playful weight.
- Ensure all attachments are firmly set so they hang evenly and do not interfere with the light source.
- Place the LED inside and hang or display where movement will animate the fringe.
Clustered miniature lantern mobile for ceiling display
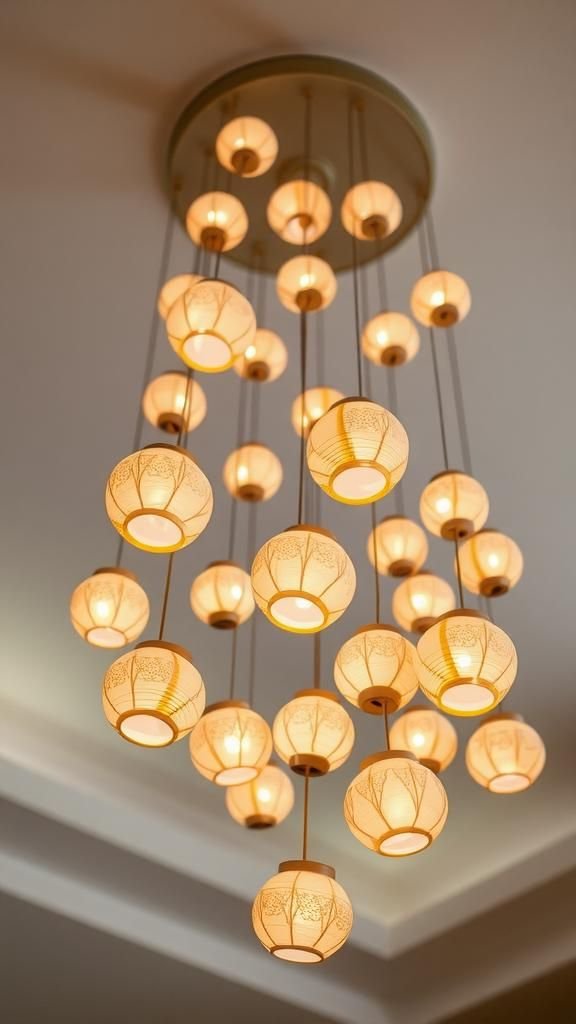
A mobile of tiny lanterns transforms overhead space into a miniature skyline; each little light becomes an island in a soft sea. The tiny orbs sway independently, creating a calm choreography above heads and drawing eyes upward.
The small scale magnifies the intimacy of each piece, and the steady, rhythmic motion produces a comforting hush. Hanging them at staggered heights gives the composition a layered depth, and the gentle clinking of tiny connectors has a musical, sleepy quality that pairs well with late-evening conversation.
Steps
- Prepare a selection of mini paper lanterns, fine thread or fishing line, a circular mobile frame, and small LED lights for each lantern.
- Suspend the lanterns from the mobile frame at varied lengths to create a balanced, tiered composition.
- Secure all knots and ensure each lantern hangs freely without tangling.
- Mount the mobile from a ceiling hook and test the visual flow as it turns gently in air currents.
Embossed-pattern lantern with tactile raised details

Embossing adds a sculptural whisper to paper, elevating patterns so they read by touch as well as sight. Raised motifs catch light differently from flat areas, creating a subtle play of shadow and highlight that rewards close inspection.
Running a finger along the ridge reveals textures that feel almost like fabric ribs. The overall effect is restrained but rich, like a quiet brocade, and the tactile invitation often encourages people to come nearer.
The lantern becomes both a source of light and a small object of curiosity.
Steps
- Choose heavyweight paper suitable for embossing, a pattern or stencil for the relief design, embossing tools, and an internal LED light.
- Transfer the pattern and carefully press or trace to raise the design on the paper surface, building consistent detail.
- Form the lantern shape around a light-friendly frame, ensuring embossed areas maintain their relief.
- Install the LED and display where close-up appreciation of texture is possible.
Recycled book-page lantern with vintage charm

Book pages bring a whisper of stories into the glow; printed type peeks through translucent seams and the faint scent of paper evokes memory. Layers of text create an interesting visual rhythm as letters fracture under light, and the edges of aged paper have a soft, warm tint that flat colors rarely match.
The lantern feels like an heirloom of words, and when placed on a shelf among old tomes it looks like a small, readable constellation. Handling one always sparks curiosity about the stories folded into its surface.
Steps
- Collect pages from damaged or discarded books, a sturdy lantern frame, archival-safe adhesive, and battery-operated lights.
- Arrange pages to overlap in an attractive pattern so printed text becomes a decorative layer across the lantern surface.
- Secure the pages to the frame carefully, smoothing edges and ensuring breathability for the light source.
- Place the battery light inside and situate the lantern where the textual texture can be admired.
Pressed-flower lantern with botanical whispers
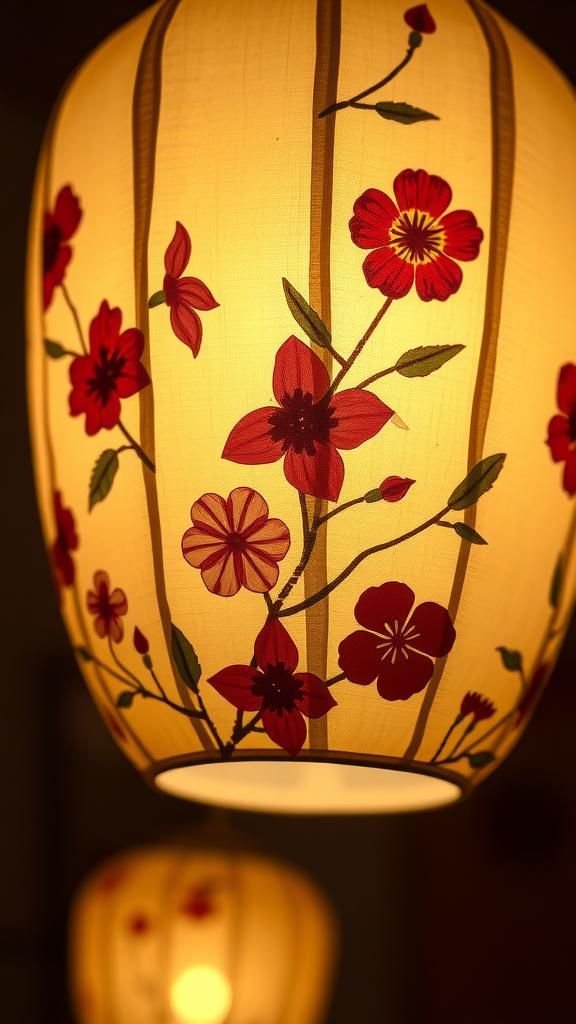
Tiny petals and fern fronds pressed between translucent paper make the lantern feel like a pocket garden. Colors of dried blooms are muted and surprisingly warm under a soft light, and the delicate veins of petals catch attention like miniature maps.
The scent of dried flowers may be faint but it links the object to outdoor afternoons and quiet walks. Displayed near a window, the botanical fragments create gentle shadow patterns that suggest seasons and memory, and the piece elicits slow, appreciative looks from visitors.
Steps
- Gather pressed flowers and foliage, translucent paper or vellum, clear-drying adhesive, and a lantern frame suitable for delicate materials.
- Arrange botanical specimens aesthetically across the surface, adhering each piece with small amounts of adhesive to avoid wrinkling.
- Ensure spacing allows the light to accentuate veins and petal edges while protecting fragile elements.
- Place a low-heat LED inside and display where the botanical details can be observed closely.
Geometric-paneled lantern with layered color fields
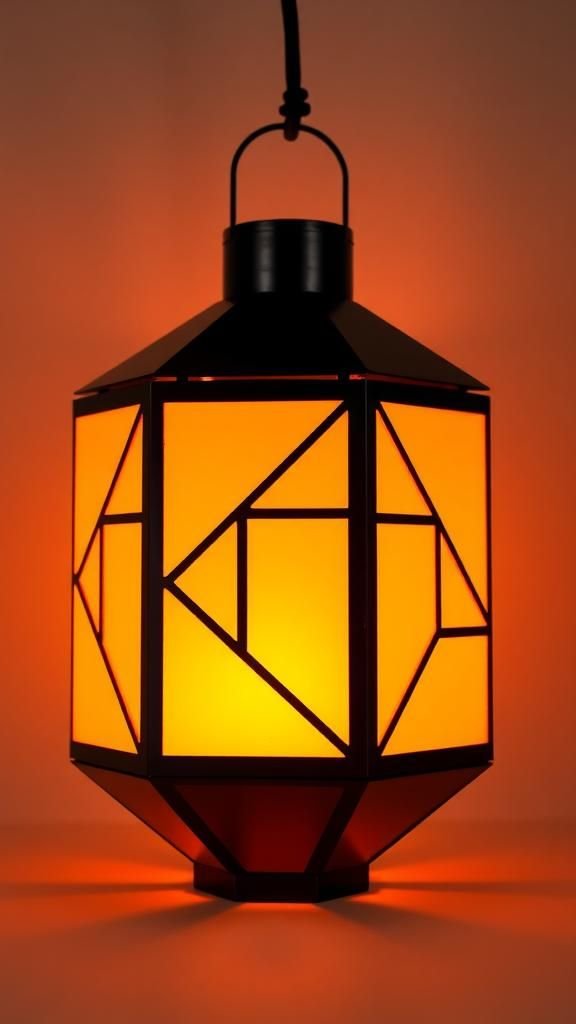
Crisp geometric panels give a modern pulse to traditional lantern shapes; triangles and rectangles meet like architectural tiles. The intersections make small pockets of color where light flares differently from each pane, producing a rhythmic mosaic of warm and cool tones.
Running a hand along a seam reveals neat edges and the reassuring stiffness of a well-built panel. This design sits comfortably in minimalist spaces, and its graphic presence lifts neutral corners into quiet focal points that reward a second look during the festival evening.
Steps
- Select sturdy colored paper or cardstock and a layout plan for geometric panels that will form the lantern surface.
- Cut panels to size and join them along edges to create a seamless outer shell around a supportive inner frame.
- Ensure joints are flush and that the inner cavity remains open for the light source.
- Insert a battery LED and position the lantern in a space where its geometry can create interesting light patterns.
Silk-and-wire ribbed lantern with soft luminous skin
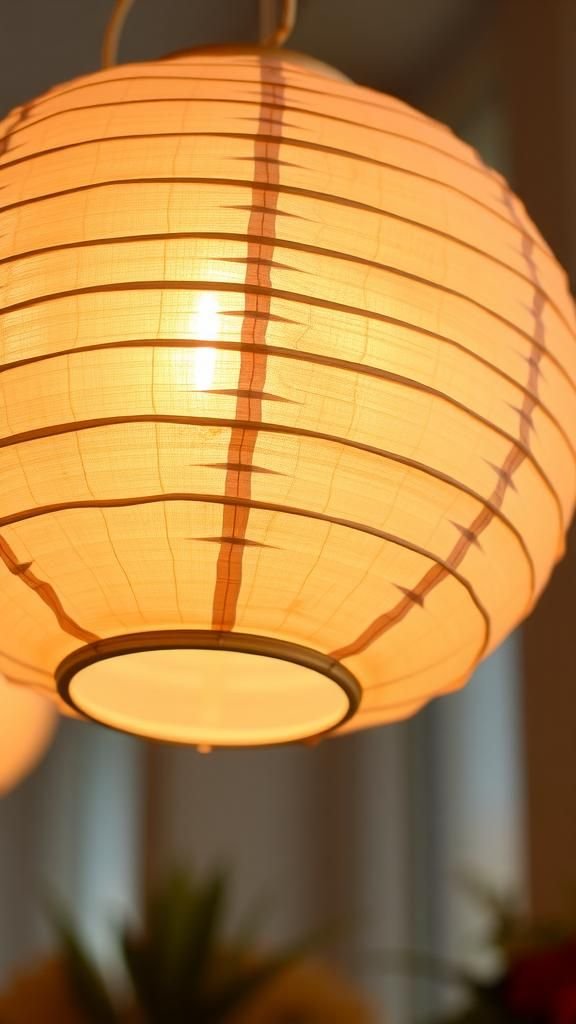
Silk stretched over wire ribs gives a lantern a warm, tactile luminosity that feels luxury-adjacent without fuss. The silk has a subtle sheen that seems to breathe under light, and the wire ribs offer a pleasing tactile skeleton that is visible as soft shadows.
The touch of silk is cool and smooth, a pleasant contrast to crisper paper versions. Hanging several at different heights creates an elegant, suspended garden of light that invites a slower pace and the softening of voices as people move beneath them.
Steps
- Obtain fine silk fabric, flexible wire for ribs, a base ring for structure, and low-heat LED bulbs suitable for fabric-covered fixtures.
- Shape wire ribs into the desired form and secure them to the base ring to create the lantern frame.
- Drape and gently secure the silk over the frame, ensuring smooth tension and neat seams.
- Place the LED light inside and hang the lantern where its subtle sheen and ribs can be appreciated.
Window-hung silhouette panels that glow at dusk

Hanging lantern panels in a window turns glass into a luminous stage as evening arrives. Silhouettes cut into the paper look dramatic when backlit by the descending dusk, and the contrast of light and shadow can feel cinematic.
The cold of the glass outside throws a crisp edge to warm indoor illumination, and people walking past notice the invite to pause. The paper surface holds the silhouettes with gentle authority, and the shifting ambient light throughout the night gives each panel several distinct moods before bedtime.
Steps
- Prepare thin translucent panels with silhouette cutouts, suction hooks or clear hanging clips, and battery lights that are safe for window installations.
- Mount each panel in the window with even spacing so the silhouettes are visible from both inside and outside.
- Fix the battery lights behind the panels to ensure even backlighting when it gets dark.
- Test the display at dusk to check silhouette clarity and make adjustments to height or spacing.
Coin-and-knot tassel lantern with nostalgic charms
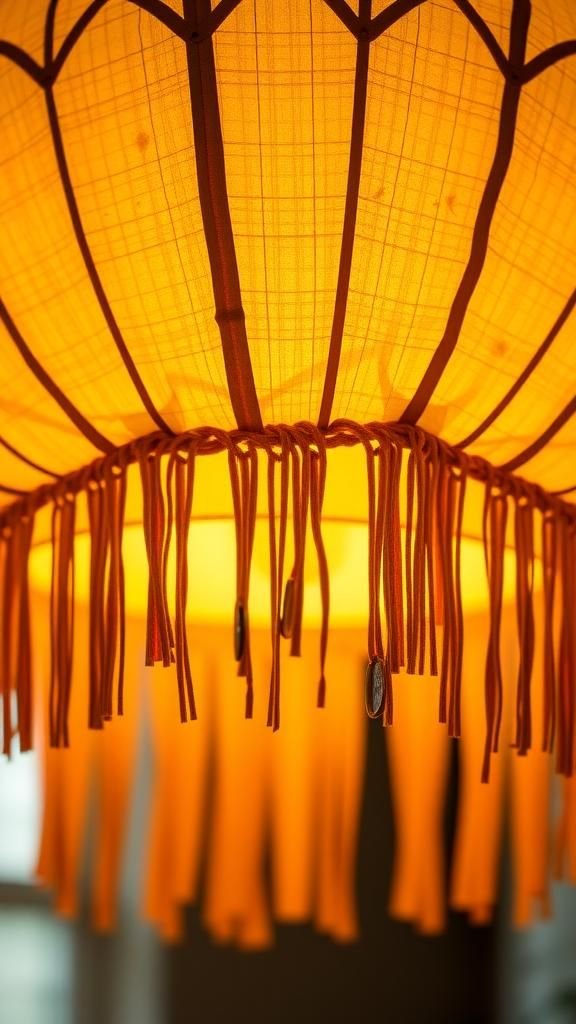
Tassels and coin charms lend the lantern the feeling of a small talisman; the soft hanks swing and the metal coins add a cheerful clink. The knotted cord feels pleasantly cool and smooth in the palm, and the dangling elements move with a light wind to create a soothing soundscape.
The metal catches glints of light, while the textile absorbs it, giving the piece both sparkle and depth. This combination often prompts conversation about tradition and family lore when guests notice the charms and ask about their symbolism.
Steps
- Source decorative coins or charms, braided cord for traditional knots, paper for the lantern body, and a secure point for hanging.
- Tie ornamental knots and attach coin charms to the ends of tassels to create charming dangles.
- Affix the tassel collection to the base or bottom edge of the lantern so they hang freely.
- Place a battery light inside and hang the lantern where the charms can move and catch light.