Heart Shaped Clay Jewelry Projects and heart-shaped clay jewelry have a way of turning small moments into wearable stories. Heart Shaped Clay Jewelry Projects, heart clay jewelry, and clay heart jewelry each bring soft silhouettes and joyful color studies to necklaces, earrings, rings, and keepsakes.
A tiny studio table once hosted a stack of mismatched tools, a favorite mug, and the first heart-shaped clay jewelry piece that found its way onto a best friend’s birthday gift. That quiet afternoon turned into a handful of new heart clay jewelry ideas and a small collection of cherished pieces.
Glossy Polymer Clay Heart Pendant With Slices

A glossy polymer clay heart pendant built from stacked slices presents a playful, modern charm. The palette spans candy brights, soft pastels, and high-contrast monochrome, with finishes that range from glossy sheen to a satin matte.
Styling leans toward casual layering with delicate chains or pairing with bold cord for a contemporary look. The piece suits everyday wear, small celebrations, and handcrafted gift giving.
Display ideas include velvet pouches, minimal kraft cards, or a simple drawer tray that emphasizes the pendant’s layered profile and reflective surfaces.
Steps
- Condition polymer clay until pliable, then create thin sheets of chosen colors with a roller or pasta machine.
- Stack sheets to form a layered block and press gently to bond, keeping layers aligned for the heart shape.
- Cut a heart silhouette from the stacked block, sand edges for smoothness, and create a hole for a jump ring before baking.
- Bake according to clay manufacturer directions, cool fully, and polish or varnish the surface for a glossy finish.
- Thread a chain or cord through a jump ring and present the pendant on a simple card or small pouch.
Marbled Heart Stud Earrings With Metallic Veins

Marbled heart stud earrings with metallic veins balance organic movement and refined shimmer. The marbling can blend soft earth tones or jewel-like contrasts, while fine metallic veins in gold or silver bring a hint of luxury.
The studs fit daywear and dress occasions, slipping easily into earring boxes or small wooden trays for gifting. Styling ideas include pairing with a coordinating pendant or keeping them as a subtle focal point.
Finish options lean toward a polished sheen or a low-lustre matte that accentuates the veining.
Steps
- Combine two or three clay colors by lightly twisting to create a marbled effect, taking care not to overblend.
- Roll the marbled clay to an even thickness and cut hearts with a small cookie cutter or cutter tip.
- Press fine metallic leaf or metallic clay accents into the surface, burnishing gently for adhesion.
- Bake according to clay instructions, cool, then apply varnish or sealer for desired sheen.
- Attach earring posts with a strong adhesive, allow to set, and package in a small earring card.
Textured Leaf-Imprint Heart Brooch For Nature Lovers

A textured leaf-imprint heart brooch channels botanical charm through subtle surface detail and organic color choices. Earthy greens, terracotta, and soft creams create a natural palette, with textures ranging from crisp leaf veins to gentle pebbling.
The brooch complements jackets, scarves, and fabric-lined brooch displays, making it an ideal handcrafted gift for gardeners or nature enthusiasts. Finishing touches might include a soft matte or a faint satin sheen to keep the impression clear.
Presentation styles favor recycled kraft boxes, small burlap pouches, or a wooden pin board.
Steps
- Roll a slab of clay to an even thickness and press a real leaf or textured stamp lightly into the surface to capture veins.
- Cut a heart shape around the imprint with a cutter and smooth the edges with a fingertip or soft tool.
- Bake the heart according to the clay’s instructions, then cool before adding a brooch finding to the back with adhesive.
- Apply a finish to protect the texture, letting the surface dry fully before packaging.
- Present the brooch on a small card with a brief handwritten note about the inspiration.
Mini Millefiori Heart Pendants With Floral Canes

Mini millefiori heart pendants showcase intricate floral cane slices within a compact heart shape, offering an old-world craft feel refreshed for modern wear. The color scope runs from vintage pastels to vibrant garden tones, with glossy finishes that emphasize tiny floral motifs.
These pendants pair well with thin chains, velvet ribbon, or clustered charm necklaces for eclectic styling. Gifts may arrive tucked inside small boxes or displayed on narrow cards that highlight the cane work.
The visual focus rests on miniature pattern clarity and polished surfaces.
Steps
- Create floral canes from thin rods of colored clay, arranging petals and centers into a cane and compressing gently.
- Slice thin sections from the cane and arrange slices into a flat mosaic on a clay base prepared for a heart shape.
- Shape the assembled mosaic into a heart silhouette, smoothing seams carefully before baking.
- Bake following the clay manufacturer’s temperature guide, cool, then sand and polish the surface for clarity.
- Attach a bail or drill a small hole for a jump ring, then add a chain for presentation.
Translucent Porcelain Heart Charm With Subtle Glow
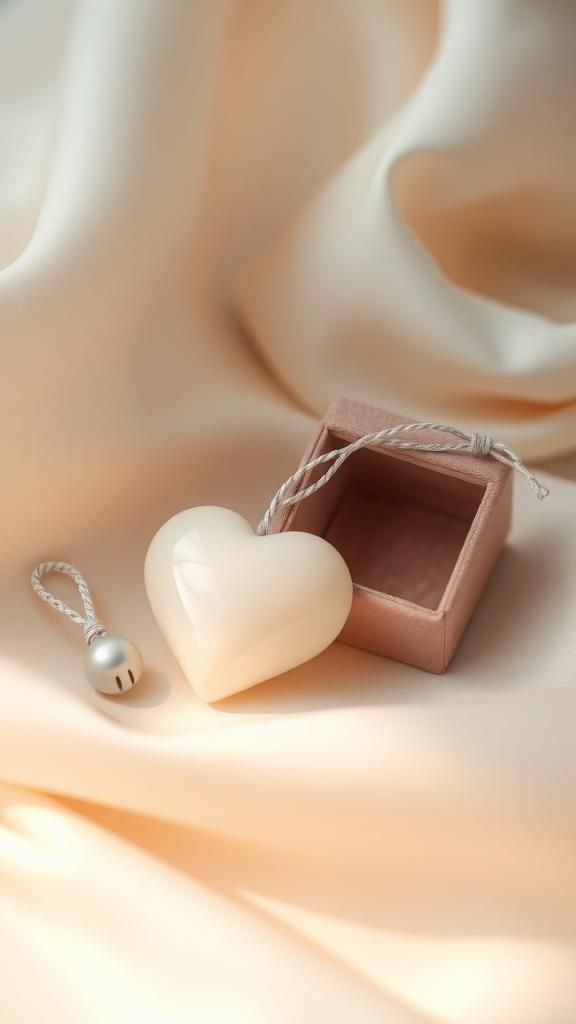
A translucent porcelain heart charm emits a gentle glow when held to light, delivering a refined and ethereal presence. The material lends itself to soft off-white, pale blush, or ice-blue tones, with delicate translucency at the edges.
Styling leans toward minimalist jewelry presentations such as single-strand necklaces and understated ear threads. Gift options include linen pouches and small glassine envelopes that complement the charm’s delicate nature.
Display choices favor shadow boxes or velvet trays that emphasize fine translucence and ceramic smoothness.
Steps
- Shape a thin heart charm from porcelain clay, keeping edges delicate for a translucent effect when fired.
- Allow the piece to dry slowly to leather-hard, refining the edge profile with a damp sponge or tool.
- Bisque fire the porcelain according to clay specifications, then perform a low-temperature glaze firing if desired.
- After cooling, evaluate translucency by holding the charm to a light source and prepare a simple cord or hardware.
- Present the charm in a small padded box to highlight its fragile, luminous quality.
Rustic Earthenware Heart Necklace With Matte Finish
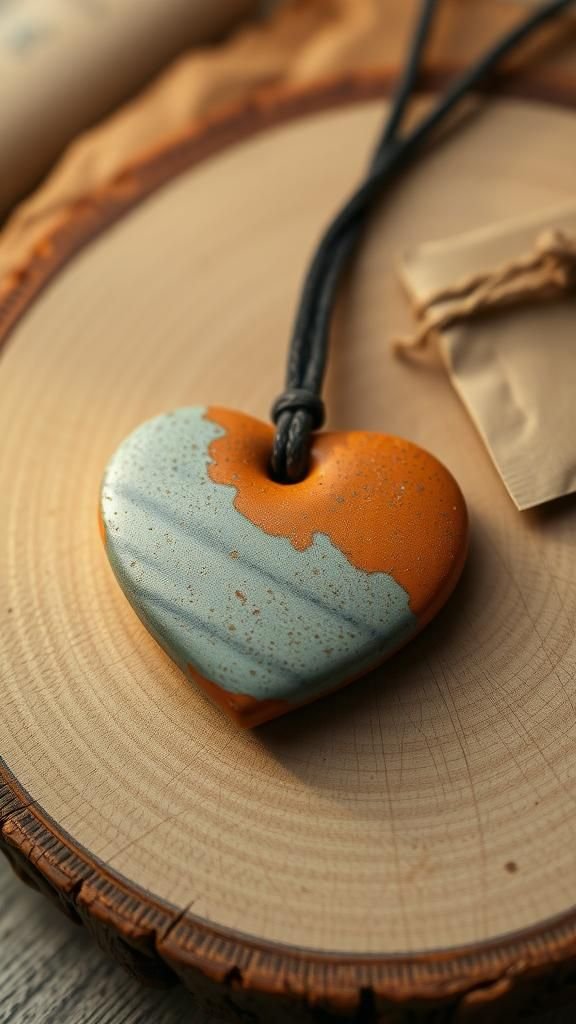
A rustic earthenware heart necklace celebrates raw clay textures and muted glazes for a grounded aesthetic. The color family favors natural ochres, deep rusts, and charcoal, with a matte finish that highlights hand-formed surfaces.
Styling pairs elegantly with layered fabrics, leather cords, or linen outfits, projecting artisan authenticity. The piece suits thoughtful gifting for collectors who appreciate handcrafted ceramics.
Display might include a simple wooden tray, kraft packaging, or a small printed card describing the clay body and glaze choice to emphasize the necklace’s tactile character.
Steps
- Hand-shape a slightly imperfect heart from earthenware clay, texturing surfaces to enhance rustic appeal.
- Allow the heart to dry slowly to avoid cracks, then bisque fire according to earthenware schedules.
- Apply a matte glaze in earthy tones or leave unglazed for raw clay charm, then glaze fire as required.
- Attach a leather cord or metal bail after firing and cooling, finishing with a knot or clasp.
- Present the necklace on a small wooden display card or in a recycled box for gifting.
Glitter-Infused Heart Earrings For Festive Occasions

Glitter-infused heart earrings sparkle with playful glamour while keeping a handcrafted soul. Fine cosmetic-grade glitter or mica swirls embedded within translucent clay creates eye-catching shimmer that catches light with movement.
Color choices span jewel tones to soft iridescents, and finishes may range from high gloss to a soft satin sheen that mutes sparkle for daytime. These earrings align well with party attire and celebratory gifting, arriving in small jewelry boxes lined with tissue.
Styling suggestions include pairing with a simple pendant or letting the earrings stand as the main statement.
Steps
- Mix translucent clay with fine glitter or mica powder until the desired sparkle is distributed evenly.
- Shape or cut heart forms, smoothing edges to create a polished silhouette prior to baking.
- Bake according to clay manufacturer guidelines and allow pieces to cool completely.
- Apply a clear varnish or gloss to enhance sparkle and protect the surface, letting it dry fully.
- Affix earring hardware such as posts or hooks, then package in a small gift box.
Minimalist Matte Heart Ring With Stone Accent

A minimalist matte heart ring offers subtle romance through a restrained shape and a single stone accent. Clay choices move toward cool grays, soft blush, or deep navy, complemented by a small bezel-set cabochon or a faceted bead for a modest glint.
Styling trends favor stacked combinations or a solitary ring worn on the index or middle finger, appealing to lovers of understated jewelry. Presentation might include a slender ring box or a small fabric roll, with finishes tuned to soft mattification that emphasizes form over shine.
Steps
- Form a narrow clay band sized to the wearer’s finger and create a small heart element for the top.
- Press a tiny bezel or setting area into the heart to accept a cabochon or bead.
- Bake the assembled ring according to clay directions, ensuring even curing throughout the band.
- After cooling, set the stone into the bezel with jewelry adhesive if needed and allow to cure.
- Present the ring in a slender box or on a fabric roll for gifting or display.
Two-Tone Ombre Heart Drops For Dramatic Contrast

Two-tone ombre heart drops create dramatic color transitions across a single silhouette, blending bold hues into softer shades for visual motion. The technique suits high-contrast pairings like deep indigo to pale sky or coral to soft peach, finished with glossy or satin surfaces.
These drops present well on elongated earring settings or pendant bails, offering statement appeal for evening wear or artful daytime looks. Gift options include long narrow boxes that echo the piece’s vertical flow and small cards that highlight the color story without overpowering the jewelry.
Steps
- Prepare two or more clay colors and blend them gradually along a bridge to create a smooth ombre gradient.
- Roll the blended section to even thickness and cut heart shapes for drops or pendants.
- Smooth edges and place holes or bails for attachment before baking as per manufacturer instructions.
- After baking and cooling, refine the surface with light sanding and apply a finish to enhance color depth.
- Attach hardware such as hooks or chains and package in a complementary long box.
Petite Photo Transfer Heart Pendant For Keepsakes

A petite photo transfer heart pendant preserves a tiny photograph within clay for a personal keepsake. The aesthetic blends nostalgic imagery with handcrafted texture, often framed by soft neutral tones or subtle color washes.
Styling leans toward sentimental wear close to the heart, ideal for memorial pieces, family mementos, or anniversary gifts. Presentation choices favor small padded boxes or linen pouches with a handwritten tag.
The pendant’s charm rests in its intimate scale and the contrast between smooth clay and printed imagery beneath a protective sheen.
Steps
- Print a small photo on compatible transfer paper sized to the heart pendant dimensions and trim carefully.
- Prepare a thin clay heart base, creating a shallow recess or smooth surface area for the transfer.
- Apply the photo transfer following the transfer material instructions, sealing the image under a clear medium after placement.
- Bake the pendant if required by the chosen clay, or cure and allow finishes to set fully before handling.
- Attach hardware and present the pendant in a small box with a soft insert for gifting.
Mosaic Heart Charm With Mixed Clay Tiles
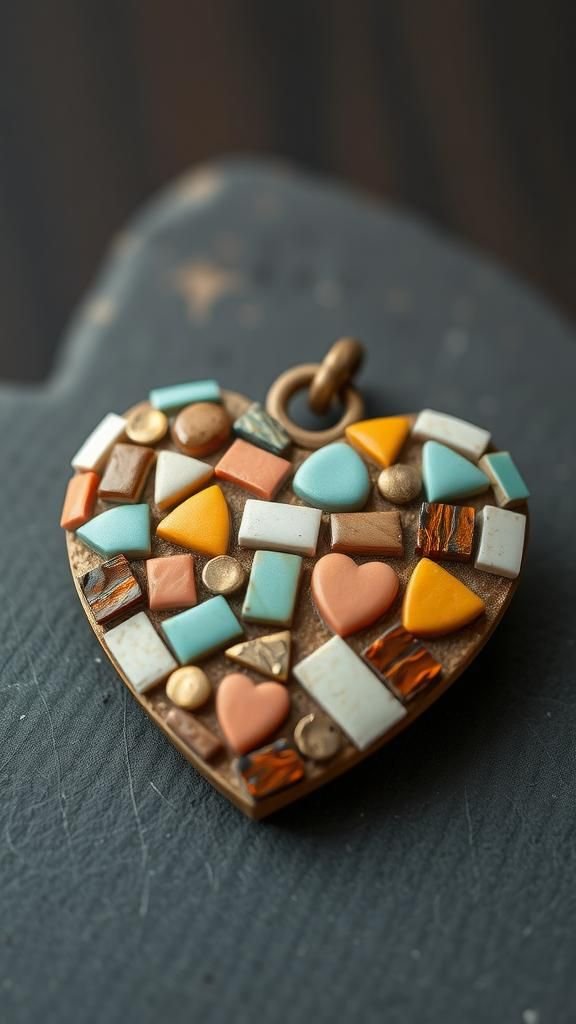
A mosaic heart charm formed from mixed clay tiles offers patchwork appeal that highlights color and texture contrasts. Small tile fragments in matte, glossy, and metallic finishes create a lively surface interrupted by thin grout lines or soft seams.
The charm suits eclectic necklaces, charm bracelets, and artisan gift sets. Careful display on color-coordinated cards or inside tiny wooden boxes accentuates the mosaic’s patterning.
The visual energy comes from the interplay of shapes, finishes, and tonal shifts rather than heavy ornamentation, creating a compact piece with a handcrafted mosaic personality.
Steps
- Create multiple small clay tile fragments in different colors and finishes and arrange them onto a flat clay base shaped like a heart.
- Press tiles gently to adhere and refine the overall heart silhouette, filling gaps as needed with thin clay strips.
- Bake the assembled mosaic heart according to clay specifications, then cool before any finishing touches.
- Lightly sand edges if desired and apply a grout-like wash or thin varnish to emphasize separations.
- Add a bail or hole for hanging and present the charm on a small gift card.
Sculpted Relief Heart Pendant With Tiny Motifs

A sculpted relief heart pendant features raised motifs such as tiny stars, dots, or floral elements that create tactile interest. Neutral backgrounds with contrasting motif colors enhance relief readability, while finishes can range from soft satin to a gentle gloss that accentuates shadows.
The pendant blends well with fine chains, cropped collars, or layered pieces for an elevated handcrafted look. Gift presentation benefits from padded boxes or fabric wraps that protect texture.
The appeal lies in micro-sculpture detail and the way light plays across raised surfaces to reveal subtle patterning.
Steps
- Shape a heart base and add small raised motifs by applying tiny clay bits or carving shallow relief into the surface.
- Refine edges and motif shapes with small tools, smoothing joins to integrate elements seamlessly.
- Bake the pendant in line with clay manufacturer guidelines and allow it to cool thoroughly.
- Apply a finish that enhances relief contrast, such as a satin varnish or a selective gloss on raised areas.
- Attach a bail or hoop and package the pendant in a padded jewelry box for gifting.
Layered Lace-Imprint Heart Earrings For Romance

Layered lace-imprint heart earrings capture delicate textile impressions pressed into clay for a romantic, vintage-inflected look. Pale neutrals, blushes, and antique white highlight intricate lace patterns, while thin layered clay creates depth and shadow.
The earrings complement soft blouses, bridal ensembles, and keepsake collections, offering a gentle statement with handcrafted nuance. Packaging options include linen pouches, small boxes with tissue, or a ribbon-tied card that echoes the lace motif.
The allure hinges on fine surface detail and the interplay between light, shadow, and pattern.
Steps
- Press a piece of lace or lace-like fabric gently into a thin clay slab to transfer the pattern.
- Cut heart shapes from the textured slab and create attachment holes or settings for earring hardware.
- Bake according to clay instructions, cool thoroughly, and apply a finish that preserves texture.
- Attach earring hooks or studs and ensure all findings are secure.
- Package in a soft pouch or small box that complements the lace aesthetic.
Vintage Foil Accent Heart Pendant With Patina

A vintage foil accent heart pendant blends metallic leaf or foil with patina effects for nostalgic character. Warm gold or copper accents sit within muted base tones, with lightly aged patina adding depth and an heirloom feel.
The pendant pairs with oxidized chains or simple cords for contrast. Gift presentations might include aged paper tags or wooden boxes that complement the antique mood.
The piece appeals to collectors of retro-inspired jewelry and those who appreciate surface depth produced by metal accents and subdued finishes rather than high shine.
Steps
- Shape a heart pendant from clay and apply thin foil accents strategically to highlight focal areas.
- Gently press foil into the surface and burnish for adhesion, leaving small intentional breaks for an aged look.
- Bake the pendant as directed for the clay type, cool fully, and apply a light patina wash to create depth.
- Seal the surface with a clear finish to protect foil and patina.
- Attach a bail or ring and present the pendant in a rustic box or on a vintage-style card.
Beaded Heart Charm Bracelet With Clay Focal Hearts

A beaded heart charm bracelet pairs petite clay heart focal charms with coordinating beads for a playful wrist statement. Clay hearts can adopt bright jewel tones or soft pastels while beads contribute sheen and rhythm.
The bracelet suits casual layering or gift sets presented in shallow trays or simple jewelry boxes. Styling leans toward eclectic stacking with mixed materials such as glass beads, metal spacers, and textile elements.
The design balance rests in rhythm and proportion, highlighting one or more clay heart charms as focal points among smaller accent beads.
Steps
- Create small heart charms from clay, bake according to instructions, and finish with varnish if desired.
- Select coordinating beads and spacer elements that complement the hearts in color and scale.
- String beads and heart charms onto a jewelry wire or elastic, distributing charms for balanced rhythm.
- Secure ends with appropriate findings or crimps and trim any excess material.
- Present the bracelet on a small card or in a shallow box lined with tissue.
Folded Paper Texture Heart Necklace With Subtle Shine
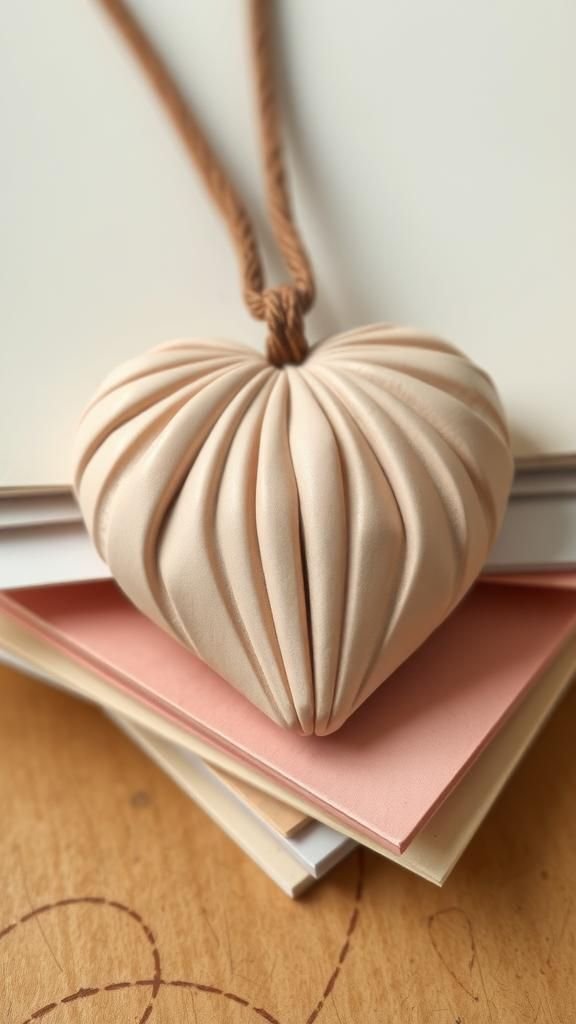
A folded paper texture heart necklace simulates creased paper surfaces in durable clay for a tactile, paper-like aesthetic. Pale neutrals and soft pastels enhance the illusion while a delicate semi-gloss finish highlights ridge lines and folds.
The necklace suits bookish wardrobes, minimalist ensembles, and thoughtful gifting presented in small kraft boxes. Styling favors simple chains or thin cords that allow the textured heart to remain the focal point.
The piece plays on contrast between fragile-looking textures and the durability of baked clay.
Steps
- Impress a folded paper texture or replicate creased lines on a clay slab with a textured tool.
- Cut a heart shape from the textured slab and refine the profile with light smoothing.
- Bake as specified for the clay, then cool and apply a semi-gloss finish to highlight ridges.
- Attach a small bail or thread a thin chain through a pre-made hole.
- Package the necklace in a kraft box with tissue to enhance the paper-like narrative.
Sgraffito Carved Heart Drops With Contrast Layers
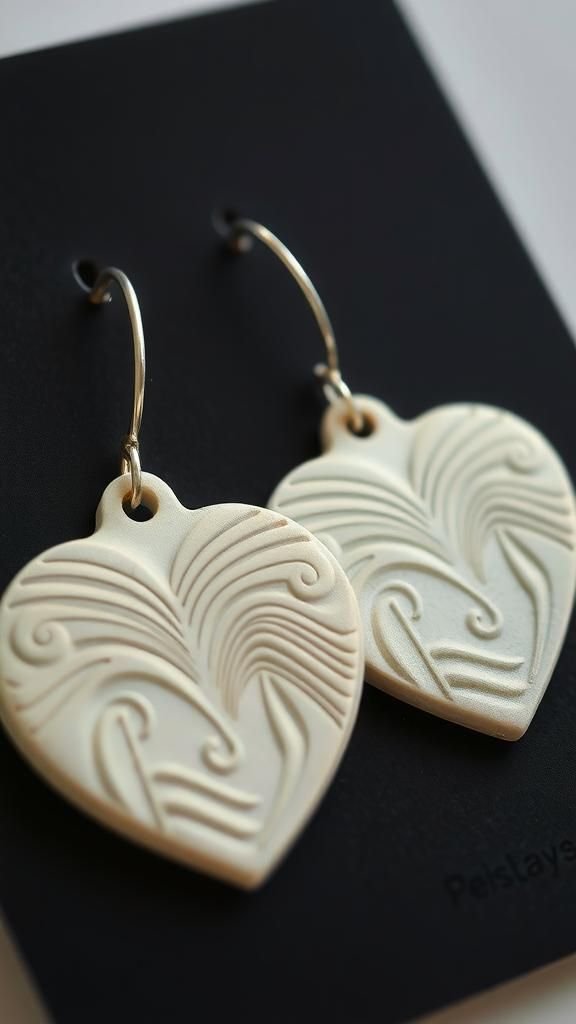
Sgraffito carved heart drops reveal contrast layers through the carving of a top clay layer to expose an underlying hue. Bold graphic motifs or delicate linework emerge against the base color, creating striking visual contrast and handcrafted character.
The drops adapt well to long earrings or pendant forms and suit styling that favors artistic silhouettes. Presentation choices include small black boxes or minimalist cards that emphasize linework.
Appreciation centers on fine surface carving and color interplay rather than ornate hardware, elevating simple forms with graphic detail.
Steps
- Laminate two contrasting clay colors into a single slab, with a darker base beneath a lighter top layer.
- Cut heart shapes from the laminated slab and carefully carve patterns into the top layer to reveal the base color.
- Smooth edges and prepare holes or bails for attachments prior to baking.
- Bake according to clay guidelines, cool, and apply a protective finish if desired.
- Attach hooks or chains and present the pieces on a minimalist card for gifting.
Quilted Texture Heart Earrings With Subtle Padding
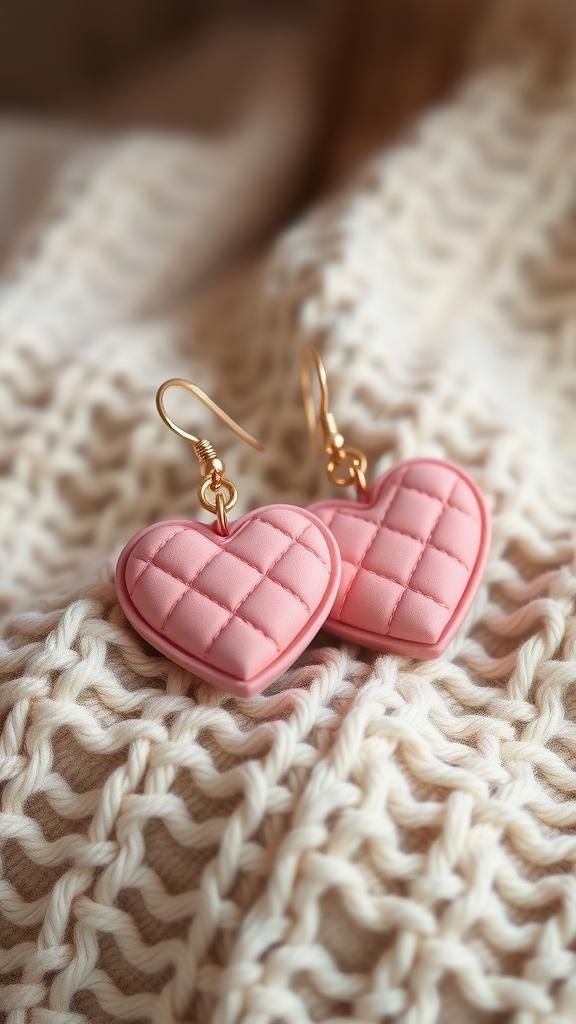
Quilted texture heart earrings mimic padded fabric quilting through gentle raised grid patterns and soft colorways. Muted pastels or warm neutrals complement the plush visual effect while matte finishes enhance the textile illusion.
These earrings pair naturally with cozy knitwear and gift packaging that echoes homey comfort, like small fabric bags or ribbon-wrapped boxes. The charm stems from tactile suggestion and a comforting aesthetic that blends textile motifs with ceramic permanence, creating jewelry that feels familiar and thoughtfully handcrafted.
Steps
- Press a soft grid or quilting texture into a clay slab and cut heart shapes from the textured area.
- Refine edges and gently round raised intersections to enhance a padded effect.
- Bake according to the clay type and let pieces cool completely.
- Apply a matte or satin finish to emphasize textile illusion and attach earring hardware.
- Package in a small fabric pouch or ribbon-tied box for a cozy presentation.
Geometric Faceted Heart Pendant With Sharp Planes
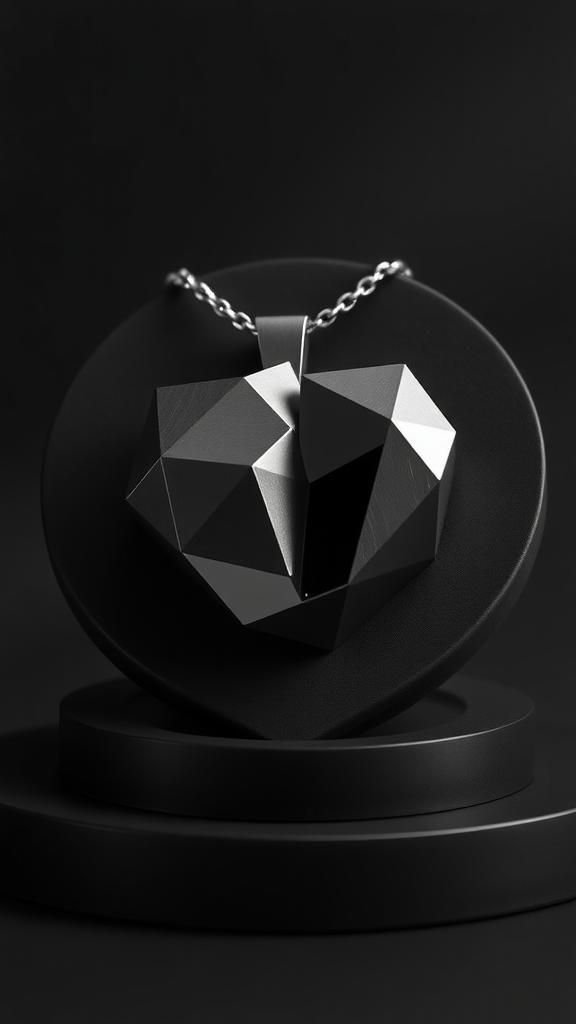
A geometric faceted heart pendant highlights clean planes and angular silhouettes that contrast with the classic heart theme. Strong color blocks in monochrome or bold hues accentuate facets, with polished finishes catching light across sharp edges.
The pendant adapts to modern wardrobes and sculptural displays, pairing well with minimal chains or stand-alone presentation on a pedestal card. Packaging in a structured box further reinforces the pendant’s modernist character.
The appeal comes from architectural form and crisp light reflections rather than intricate ornamentation.
Steps
- Sculpt a heart form with defined facets, nudging planes into sharp angles for a geometric look.
- Smooth surfaces for clean faces and ensure edges are crisp before baking.
- Bake the pendant according to manufacturer directions and cool fully.
- Polish or varnish selected facets to enhance reflective qualities and attach a bail.
- Present the pendant in a structured box or on a minimalist display card.
Tiny Stacked Heart Beads For Necklace And Bracelet

Tiny stacked heart beads offer layered color play when strung in sequences along a necklace or bracelet. The beads can alternate translucency and opaque finishes, creating subtle rhythm and depth.
Styling favors multi-strand arrangements or single-strand pieces that allow the stacked motif to repeat as a visual beat. Packaging in a long box or rolled fabric tube suits the elongated format while offering protection.
The charm lies in repetition and color relationships among small elements, making the piece versatile for casual wear and thoughtful gifting alike.
Steps
- Form many small heart beads from clay, ensuring uniform thickness for consistent stacking.
- Create holes through each bead for stringing and bake according to clay instructions.
- Select complementary beads and thread hearts onto jewelry wire or cord, arranging colors for balanced rhythm.
- Secure ends with appropriate findings and trim any excess material.
- Present the finished necklace or bracelet in a long box or fabric roll for gifting.
Charm-Style Heart Keychain With Tassel Accent
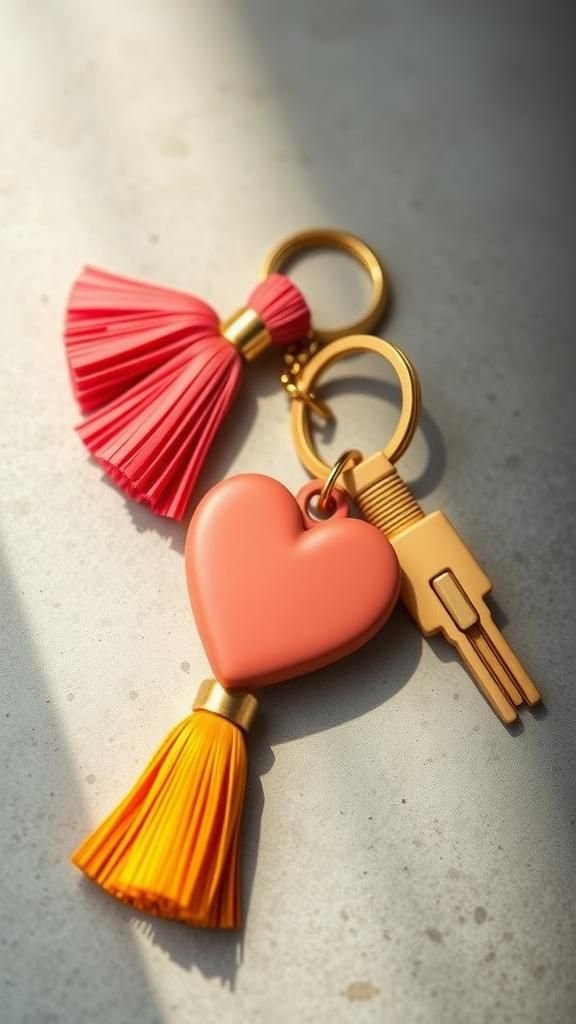
A charm-style heart keychain with a tassel accent blends practicality and whimsical charm in a small accessory. Bold color choices or muted tones each convey a different mood, with metallic rings and leather or fabric tassels adding tactile contrast.
The keychain functions as both a personal emblem and a thoughtful token for celebrations or travel companions. Packaging options include small organza bags or kraft tags attached to the ring.
The overall appeal rests on durable construction, playful accents, and the heart motif’s friendly symbolism.
Steps
- Create a sturdy heart charm from clay, ensuring it is thick enough for durability and making a hole for a split ring.
- Bake the charm per clay manufacturer guidelines and cool fully.
- Attach a split ring and add a fabric or leather tassel for visual interest.
- Optionally finish the charm with varnish to protect the surface and enhance color.
- Present the keychain on a small card or inside a drawstring pouch for gifting.