I still remember the quiet afternoon when a mismatched hoop and a bundle of dried flowers turned my kitchen table into a small, fragrant studio. Making floral hoop wreaths felt like a gentle detour from the usual routines, a way to hold a little patch of garden by a door or window.
The feel of stems and petals against metal, the hush of dried lavender, and the surprise of how a simple circle can become a room’s focal point made me keep going.
These floral hoop wreath DIY craft projects became a regular weekend habit, a soft ritual of color and texture that brightened plain walls and gifted small moments of calm. Each idea here carries its own mood, from airy boho loops to compact, scented rings that suit a cozy kitchen nook.
Lavender and brass hoop with soft scent
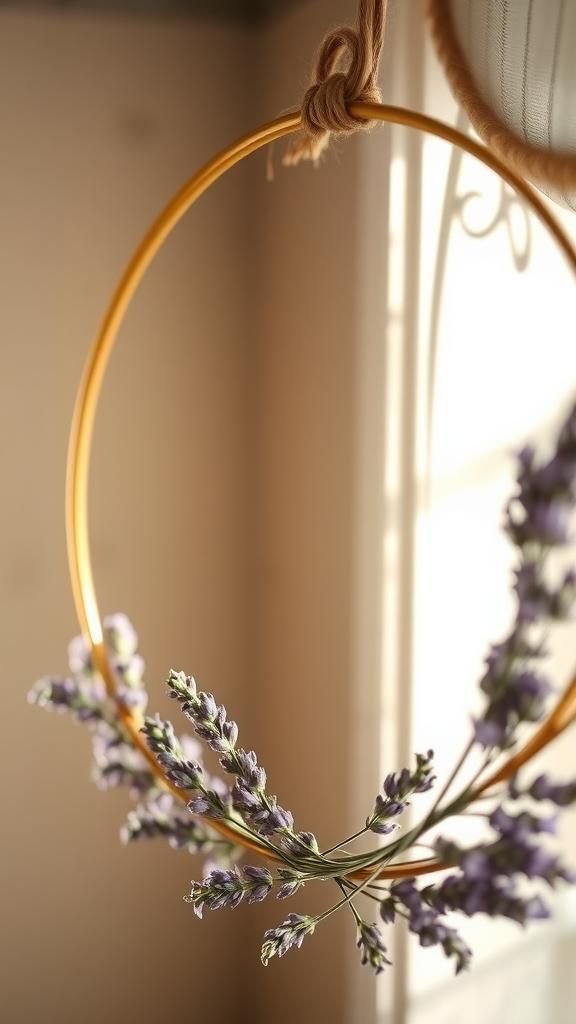
The lavender and brass hoop brings a gentle, calming scent that seems to settle the whole room. The cool gleam of a thin brass ring sets off the dusty purple of dried lavender stems, while whispers of pollen and crispness linger in the air.
I loved how the arrangement flirted with minimalism without feeling spare, and the subtle weight of the blooms made the hoop hang with a graceful tilt. It felt like carrying a small Provençal afternoon into a city flat, calming and slightly nostalgic.
Steps
- Gather a brass hoop and bundles of dried lavender stems.
- Trim stem lengths to fit the hoop and create layered groupings.
- Secure lavender to the hoop with floral wire along a curved section.
- Tuck additional sprigs to soften the joins and create fullness.
- Hang the completed hoop from a ribbon loop or wall hook.
Asymmetrical eucalyptus and silk rose statement

The asymmetrical eucalyptus and silk rose hoop feels like a calm conversation between structured greenery and soft blooms. Loose eucalyptus leaves trail along a portion of the hoop, their matte green surfaces catching light differently than the glossy, blush-toned silk roses clustered to one side.
The contrast brought a pleasing tension to the circle that felt modern yet quietly romantic. I often found myself turning it to view the way leaves overlapped, enjoying the soft rustle when a draft passed.
It reads like a small floral portrait on the wall.
Steps
- Select a metal hoop, eucalyptus stems, and a few silk roses.
- Arrange eucalyptus along one side of the hoop for a flowing line.
- Cluster silk roses at an offset point and bind them to the hoop.
- Wrap floral tape or wire neatly to conceal attachment points.
- Adjust leaf positioning for a natural, cascading look.
Succulent and moss mini garden ring
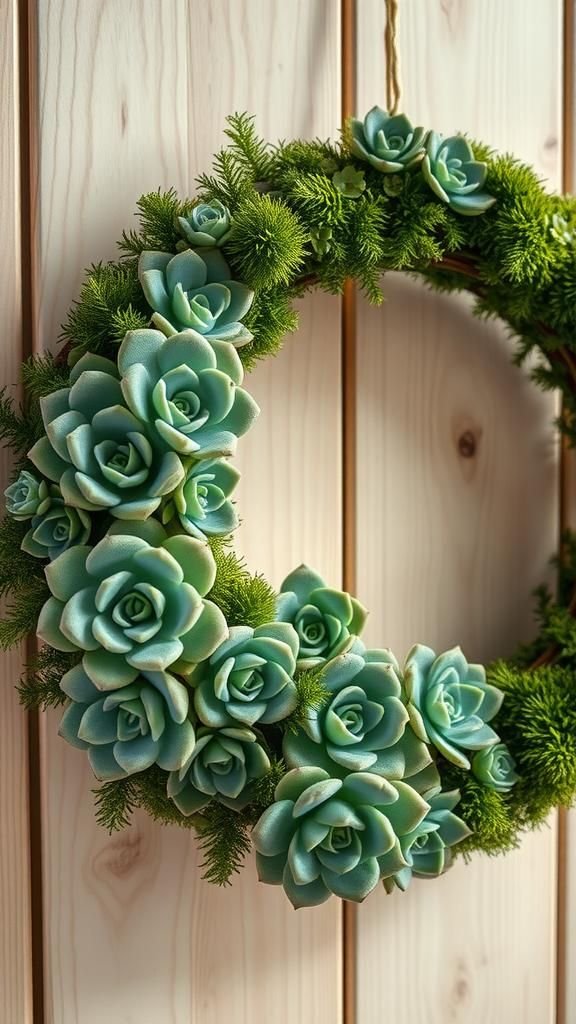
A succulent and moss hoop feels like a tiny, suspended terrarium that invites slow appreciation. The fleshy leaves of assorted succulents offered a satisfying variety of greens and blues, while soft patches of cushiony moss provided a plush backdrop.
I enjoyed how the succulents’ weight made the hoop feel grounded, and the contrast of matte moss against waxy leaves was pleasing to the eye. Placing it close to a window turned the composition into a living vignette, where light shifted across the rosettes and revealed subtle color shifts throughout the day.
Steps
- Choose a sturdy hoop and prepare small pouches of sphagnum moss.
- Nest succulent rosettes into the moss pouches and secure them to the hoop.
- Fill gaps with additional moss for a lush appearance.
- Mist carefully to settle the moss and succulents.
- Hang the hoop where it receives bright, indirect light.
Dried wildflower meadow on rustic hoop
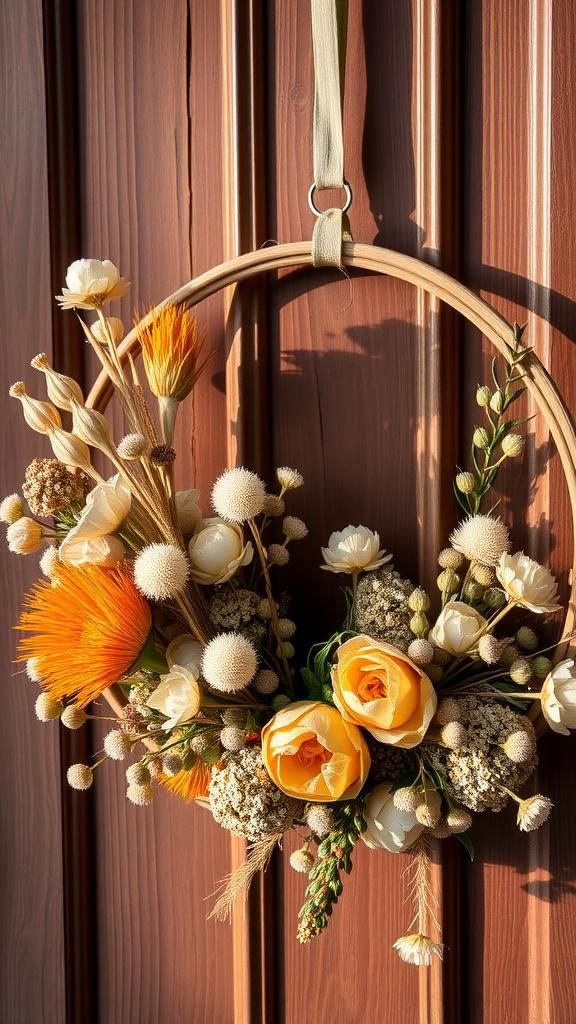
The dried wildflower meadow hoop felt like a pressed memory of a summer afternoon. Tiny seedheads, papery daisies, and strawflower blooms clustered in haphazard abundance, their muted palette of ochre, cream, and faded rose working together like a weathered painting.
I liked how the stems created a softened silhouette against a doorway, and the brittle, papery textures made a quiet, tactile promise when brushed. It brought a casual, collected look to a hallway, as if someone had gathered a handful of field edges and honored them with a simple circle.
Steps
- Collect assorted dried wildflowers and a wooden or metal hoop.
- Group flowers into small bundles and secure them evenly around the hoop.
- Overlap bundles to create a meadow-like fullness.
- Fill any sparse areas with smaller seedheads.
- Display the hoop on a neutral wall to let textures stand out.
Mini hoop trio for thoughtful gifting

A set of three mini hoops felt like small, thoughtful parcels to pass along. Each tiny loop carried its own personality: one with delicate baby’s breath, another with a single preserved rose, and the third with a sprig of rosemary that smelled faintly herbal.
I enjoyed arranging them together as a cluster on a kitchen wall, where their small scale created intimacy. Their lightweight presence invited playful placement around hooks and knobs, and each little ring seemed to tell a short, quiet story when noticed in passing.
Steps
- Gather three small hoops and a selection of miniature flowers or herbs.
- Create small bundles tailored to each hoop’s size and aesthetic.
- Affix the bundles to the hoops with thin wire or thread.
- Add small loops for hanging to the back of each hoop.
- Arrange and hang the trio grouped together for a cohesive display.
Tropical orchid and palm leaf bold circle

The tropical orchid and palm leaf hoop felt exuberant and theatrical without tipping into loudness. Large, glossy palm fronds provided a dramatic backdrop while a few vivid orchid blooms punctuated the composition with jewel-like color.
The contrast between broad leaves and delicate petals made the whole piece feel sculptural and generous. I remember the way the orchids’ satin sheen caught late afternoon light, throwing tiny highlights across the palm’s ridged surface.
It read like a postcard from a warmer climate when hung near a bright window.
Steps
- Select a sturdy hoop, tropical palm leaves, and faux or fresh orchid stems.
- Position larger palm leaves as the base and secure them to the hoop.
- Cluster orchids where they will provide focal color.
- Anchor all stems with floral tape or wire for stability.
- Hang in a bright spot to highlight leaf shine and bloom color.
Autumn berry and twig hoop with warm hues

The autumn berry and twig hoop felt like a small harvest celebration. Twigs provided woody structure and an appealingly irregular silhouette, while clusters of tiny berries in burnt orange and deep cranberry added lively pops of color.
I enjoyed the tactile contrast between smooth berry skins and coarse twig bark, and the overall warmth made the hoop feel ready for cool evenings. Hanging near a mantel, it seemed to echo the crackle of a fire, inviting faint memories of cider and wool blankets without overstating the season.
Steps
- Gather flexible twigs, berry stems, and a hoop frame.
- Weave or bind twigs around the hoop for a rustic texture.
- Add berry clusters at intervals to introduce color highlights.
- Secure elements with wire and tuck ends to avoid snagging.
- Place above a mantel or entry for a seasonal accent.
Winter pine, citrus, and Textured evergreens
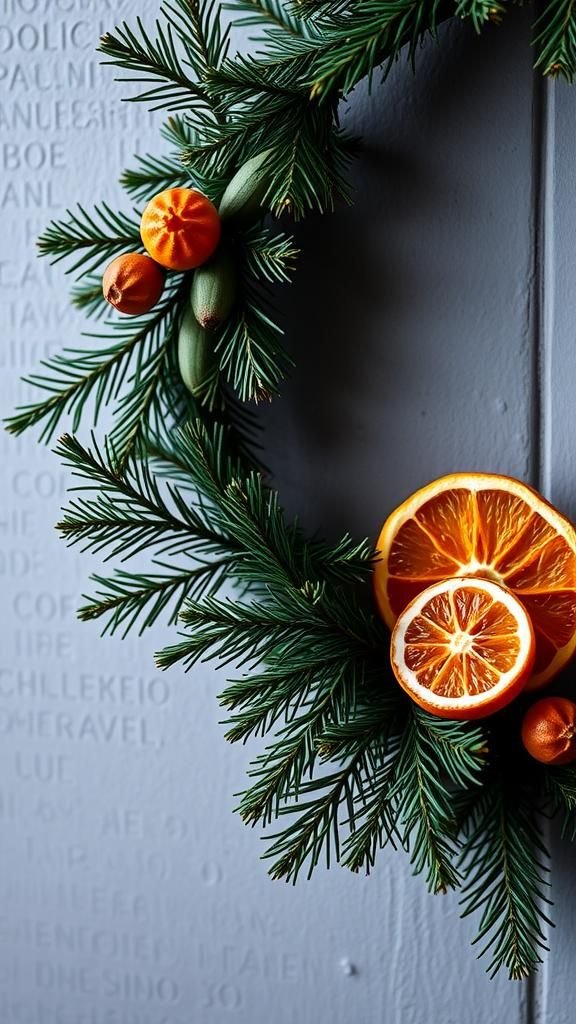
The winter hoop with pine and citrus felt brisk and refreshing, like a sniff of cold air mixed with warm kitchens. Dark evergreen sprigs created a dense, textured base while dried citrus slices offered sunny orbs of color and a faint, tart scent.
I liked how the citrus’ translucent edges caught light and how the pine needles provided contrast in both color and shape. The arrangement seemed to brighten a dim hallway, bringing a brisk clarity that felt clean and welcoming on frosty mornings.
Steps
- Collect evergreen sprigs, dried citrus slices, and a sturdy hoop.
- Layer evergreen pieces around the hoop for a dense foundation.
- Position citrus slices as bright accents and secure firmly.
- Tuck in additional sprigs to soften transitions.
- Hang where cool light enhances the citrus translucence.
Spring bud cluster with pastel ribbons

A spring bud hoop felt cheerful and lightly optimistic, as if a window had been left open to let sunlight in. Tiny buds in soft pastels clustered along one arc of the circle while a trailing satin ribbon introduced movement and sheen.
The petals seemed to hold the promise of fuller blooms, and the gentle palette read like a breath of newly opened mornings. I found that the ribbon’s soft rustle brought a playful energy to the piece, and it brightened a small corner in a way that felt refreshingly light.
Steps
- Choose small spring buds, pastel ribbons, and a medium hoop.
- Cluster the buds along a chosen section of the hoop.
- Tie the ribbon to the hoop and allow it to cascade.
- Arrange petals for balanced color flow.
- Hang near a window to catch subtle ribbon movement.
Boho pampas grass halo with airy texture

The boho pampas grass hoop introduced an airy, featherlike statement that felt weightless and free. Pale plumes fanned out from a simple hoop, creating a soft halo that invited touch.
I enjoyed the way it diffused light and cast delicate shadows, and the muted beige palette blended easily into many spaces. The piece had an effortless, relaxed quality that read as both modern and grounded, and it brought a breezy energy to a living room corner without overwhelming surrounding decor.
Steps
- Select fluffy pampas grass plumes and a large hoop.
- Position plumes around one side of the hoop for a fan effect.
- Secure stems discreetly and trim uneven ends for balance.
- Fluff the plumes to create an airy silhouette.
- Suspend the hoop where natural light enhances plume texture.
Minimal single-bloom modern hoop display

The minimalist single-bloom hoop felt like a breath of modern calm. A solitary flower anchored to a thin metal ring created a striking, uncluttered focal point that emphasized form and negative space.
The bloom’s silhouette became the star against a simple background, and I appreciated the quiet confidence of so little giving so much presence. It made an ordinary wall feel curated, as if a small museum object had been chosen for attentiveness rather than abundance, offering a moment of contemplative stillness whenever noticed.
Steps
- Choose a single striking bloom and a thin metal hoop.
- Position the bloom at a chosen point on the hoop.
- Secure the stem neatly and conceal the fastening.
- Adjust bloom angle for optimal silhouette.
- Hang on a plain wall to emphasize negative space.
Vintage lace and faded garden rose romance
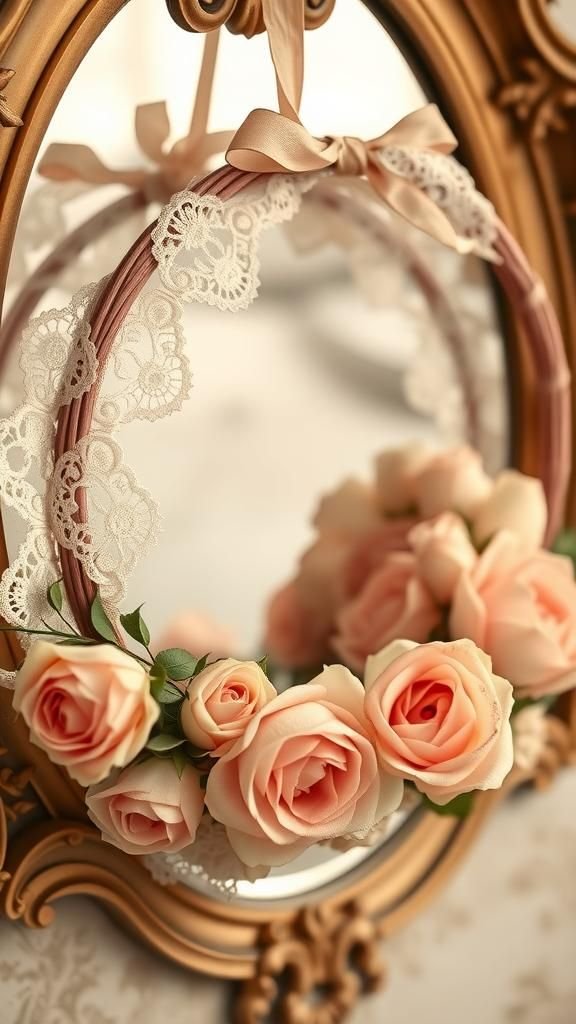
The vintage lace and faded garden rose hoop carried a soft nostalgia that felt like a hand-written letter. The lace introduced delicate patterns and a whisper-thin translucence while the faded roses added a gentle, historic charm.
I remembered running fingers along the lace edges, appreciating how textiles and florals sang in different registers. When hung near antique frames, the hoop created a little window into another era, softening hard corners and inviting a slower kind of appreciation that seemed almost heirloom-like in its quiet presence.
Steps
- Select vintage lace strips and preserved or dried garden roses.
- Drape lace and position roses on the hoop in a balanced cluster.
- Anchor elements with fine wire or thread to keep the lace in place.
- Let lace tails trail softly for a romantic effect.
- Hang beside antique frames or mirrors for a cohesive vignette.
Herb-scented kitchen hoop with rosemary and thyme

The herb-scented kitchen hoop felt like a tiny pantry memory strung into a circle. Rosemary and thyme sprigs introduced a green, herbaceous scent that seemed to nod toward soups and stews simmering nearby.
The fresh, resinous quality of the rosemary paired with the softer, earthy thyme created a layered aroma that brightened a cooking space. I found the hoop especially pleasant hung above a spice rack, where the scent mingled with olive oil and citrus notes, evoking the simple comfort of an afternoon spent prepping a familiar meal.
Steps
- Gather fresh rosemary and thyme sprigs and a medium hoop.
- Form small bundles and secure them around a portion of the hoop.
- Layer herbs to create a balanced scent profile.
- Allow herbs to dry partially to extend fragrance retention.
- Hang near the stove or spice area to enjoy the aroma while cooking.
Monochrome white blossom for serene spaces

A monochrome white blossom hoop conveyed a serene, hushed elegance that calmed high-energy rooms. Petals in varying shades of white and cream layered together to create a soft, cloudlike surface that reflected light gently.
The uniform palette emphasized shapes and shadows, inviting quiet inspection of petal edges and subtle tonal shifts. I enjoyed its capacity to blend with many styles while still holding a refined presence, and it often became the backdrop for small, contemplative moments like reading by a lamp or sipping tea in a softened corner.
Steps
- Select white and cream blossoms, fresh or preserved, and a hoop.
- Cluster flowers densely to create a cohesive monochrome surface.
- Fill minor gaps with small buds to maintain tonal continuity.
- Secure everything with fine wire and conceal fastenings.
- Place in a calm room to enhance the serene effect.
Pressed flower resin hoop with translucent charm

The pressed flower resin hoop felt like a wearable window into a preserved season. Delicate flattened blooms suspended within glossy resin caught light in a way that made colors glow softly from within.
The smooth surface contrasted with the fragile veins of petals, creating a jewel-like quality that seemed both modern and tender. I enjoyed holding it up to sunlight and watching tiny inclusions and air bubbles play with reflections, as if a small piece of summer had been pocketed and polished for everyday viewing.
Steps
- Arrange pressed flowers on a hoop mold and prepare clear casting resin.
- Pour resin in layers to encapsulate the flowers with even coverage.
- Allow each layer to cure according to resin instructions for clarity.
- Sand and finish edges for a smooth, polished look.
- Attach hanging hardware once fully cured and set.
Children’s painted flower hoop with playful colors
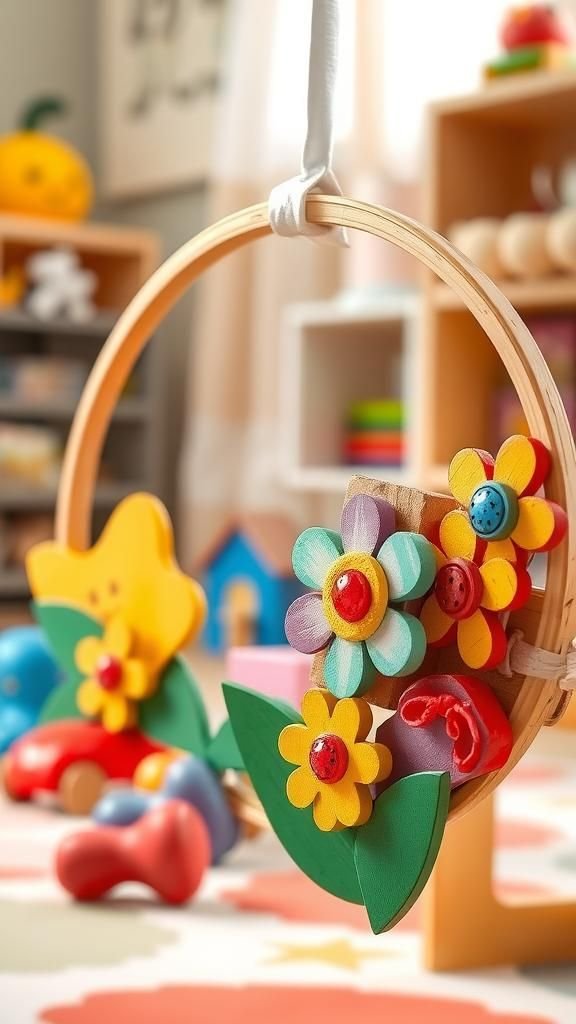
The children’s painted flower hoop felt joyful and spontaneous, full of imperfect brushstrokes and proud, bright colors. Small handmade blooms and painted wooden accents added a childlike exuberance that was impossible not to smile at.
I loved how each mark told a story of concentration and giggles, and the overall piece brought a lightness to a playroom wall. It wasn’t about refined technique but about the personality and energy that younger makers poured into it, creating an honest, enlivening presence wherever it was displayed.
Steps
- Prepare a hoop and child-safe paints for decorating small wooden or paper flowers.
- Paint simple flower shapes and let them dry completely.
- Attach painted flowers to the hoop with glue or tape suitable for crafts.
- Add colorful ribbons or yarn for extra movement if desired.
- Display at child-eye level to celebrate the maker’s work.
Sunflower summer hoop bursting with cheer
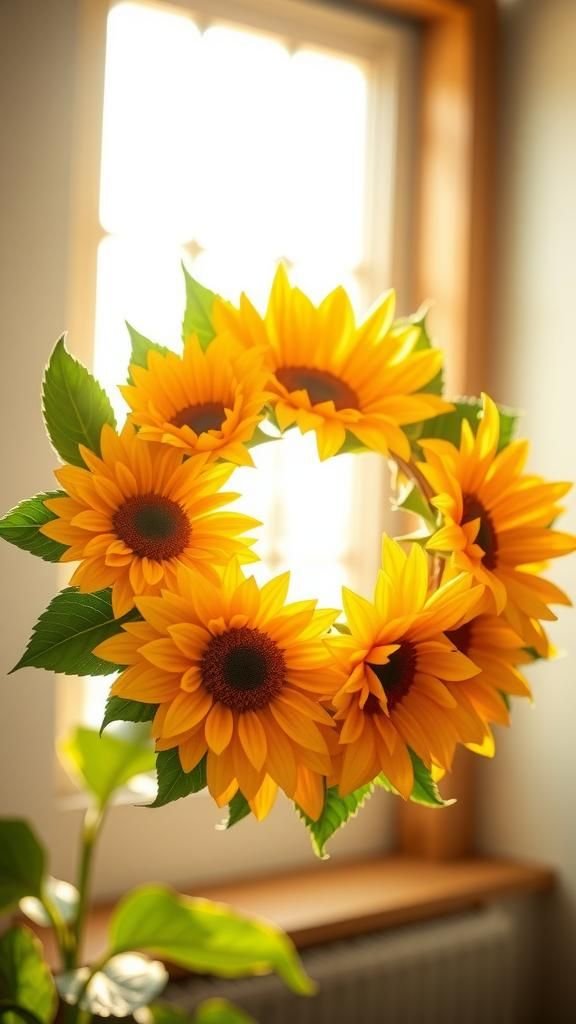
A sunflower summer hoop brought immediate warmth and a carefree spirit to a space. Large, golden heads dominated the composition, their dark centers anchoring a sunlit palette that felt energetic and open.
I enjoyed how the blooms’ radial patterns echoed the hoop’s circle, creating a satisfying visual echo. Hung near a sunny window, the arrangement seemed to amplify daylight and conjure lazy afternoons in wide fields.
It read like a bright postcard of high summer, cheerful without fuss and impossible to overlook with a grin.
Steps
- Choose large sunflower heads and a robust hoop to support their weight.
- Position the sunflowers evenly or clustered depending on the desired look.
- Reinforce stems and secure them firmly to the hoop.
- Add greenery or filler blooms to soften transitions if needed.
- Place in a spot with good light to echo its sunny mood.
Moonlit night-bloom hoop with tiny fairy lights
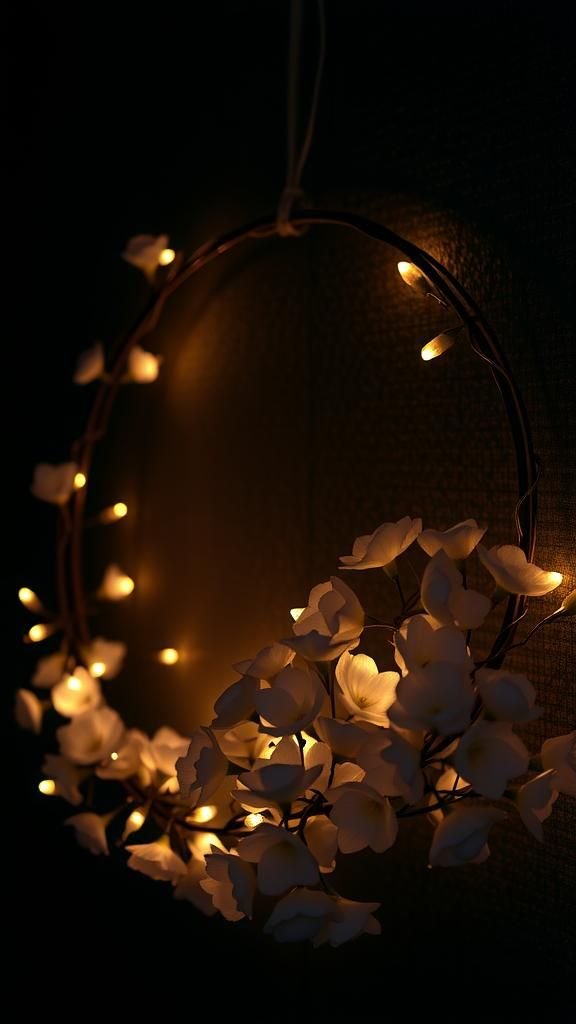
The moonlit night-bloom hoop had a quiet, slightly theatrical charm when dusk settled in. Pale blooms that opened late in the day seemed to glow against a ring threaded with tiny warm-white lights.
The soft illumination made petals appear almost silvered, and the gentle twinkle added a small, cozy magic. I liked how it transformed an evening corner into a contemplative nook, with the interplay of soft light and pale blossoms creating a soothing, contemplative atmosphere that felt perfect for late-night reading or quiet reflection.
Steps
- Select night-blooming flowers or pale faux blooms and a sturdy hoop.
- Wrap a thin strand of battery-powered fairy lights around the hoop.
- Attach blooms in clusters where light will accentuate petal shapes.
- Conceal the battery pack behind foliage for a clean look.
- Switch on the lights at dusk to enjoy the soft glow.
Pallet wood and floral mixed-media hoop fusion
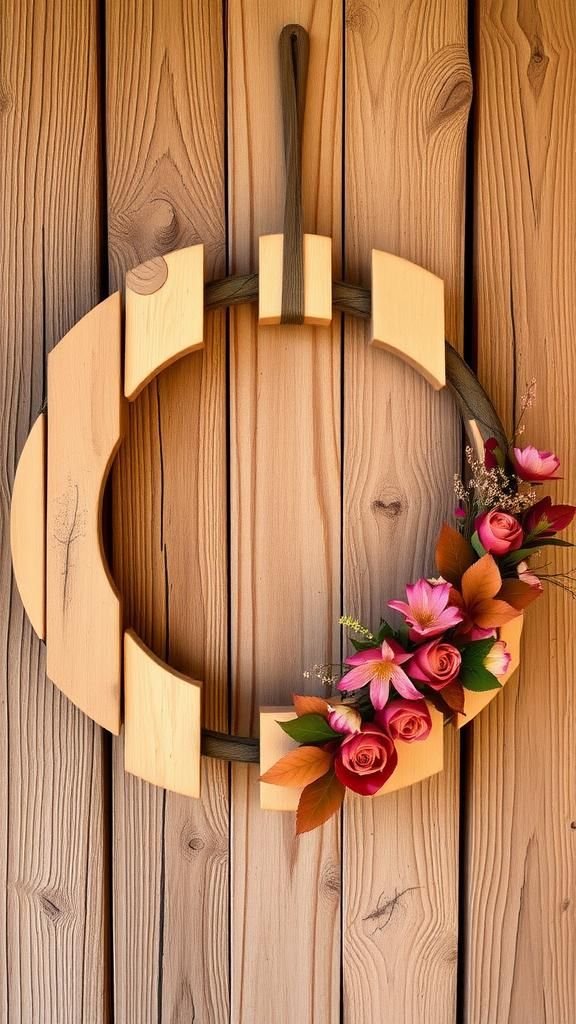
The pallet wood and floral mixed-media hoop felt pleasantly tactile, marrying reclaimed textures with living elements. Narrow slats of weathered wood introduced grain and history while lively flowers threaded through offered color and life.
The juxtaposition of rough wood and soft petals made each material sing its own note, and I liked how the piece suggested a small domestic story of repair and care. Hanging it in an entryway made visitors pause to appreciate the handworn surfaces, the floral accents lending warmth to the wood’s lived-in character.
Steps
- Prepare thin reclaimed pallet wood pieces and a metal hoop base.
- Arrange wood pieces around part of the hoop and secure them firmly.
- Add fresh or dried floral accents into gaps and along edges.
- Stabilize the composition with wire or twine as needed.
- Mount on a textured wall to showcase the mixed materials.
Geometric metallic hoop with tiny bloom clusters
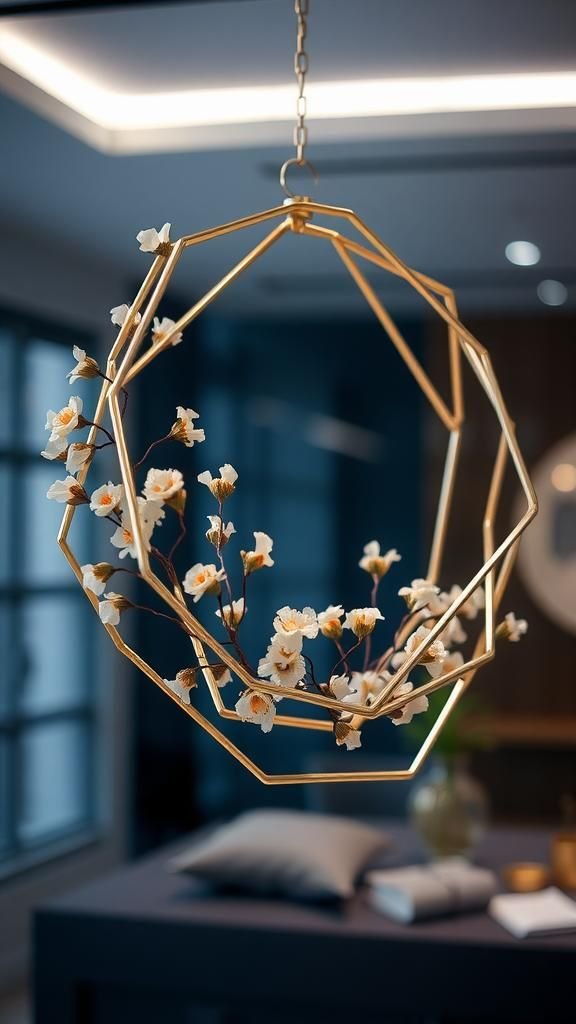
The geometric metallic hoop offered a crisp, contemporary twist on floral decoration. Clean lines and a structured form provided a modern backbone while small clusters of delicate blooms softened the composition at specific points.
I appreciated the balance between linear metal and organic flower shapes, and the metallic finish added a subtle urban edge. Placed against a monochrome wall, the hoop felt like a study in contrast, where minimalist architecture and gentle botanical notes met in a visually pleasing conversation.
Steps
- Select a geometric metal hoop or paired rings for structure.
- Prepare tiny bloom clusters and position them at intersecting points.
- Secure clusters with thin wire to maintain the geometric silhouette.
- Polish metal edges and conceal fasteners for a sleek finish.
- Hang on a plain wall to emphasize shape and contrast.
Wedding favor mini hoops with delicate charm

The wedding favor mini hoops felt intimate and celebratory, small tokens that carried floral warmth. Each tiny ring held a petite arrangement of soft blooms and a loop for hanging, offering guests a keepsake that could be displayed long after the day.
I remember imagining them tied to place settings, their gentle color palette echoing table linens and candles. They had a handcrafted sincerity that invited gentle handling, and their scale encouraged close looking, creating small moments of appreciation among larger festivities.
Steps
- Assemble several small hoops and a selection of diminutive flowers.
- Create tiny floral clusters suitable for the hoop size.
- Attach clusters securely and add a hanging loop or ribbon.
- Add small tags if desired for personalization.
- Arrange at place settings or in gift boxes for guests.