I have a soft spot for mornings of dyed shells, spilled glitter, and paint-splattered aprons. Easter Egg Decorating Craft Ideas have felt like tiny experiments that brighten a quiet weekend and coax out playful, hands-on creativity.
I still remember a kitchen table smudged with dye where a clumsy hand made one of my favorite patterns.
These Easter Egg Decorating Craft Ideas mix nostalgia and fresh twists. Each approach here is written like a note passed between friends, full of textures, colors, and small surprises that made me smile while crafting.
Marbled swirls with shaving cream and dye
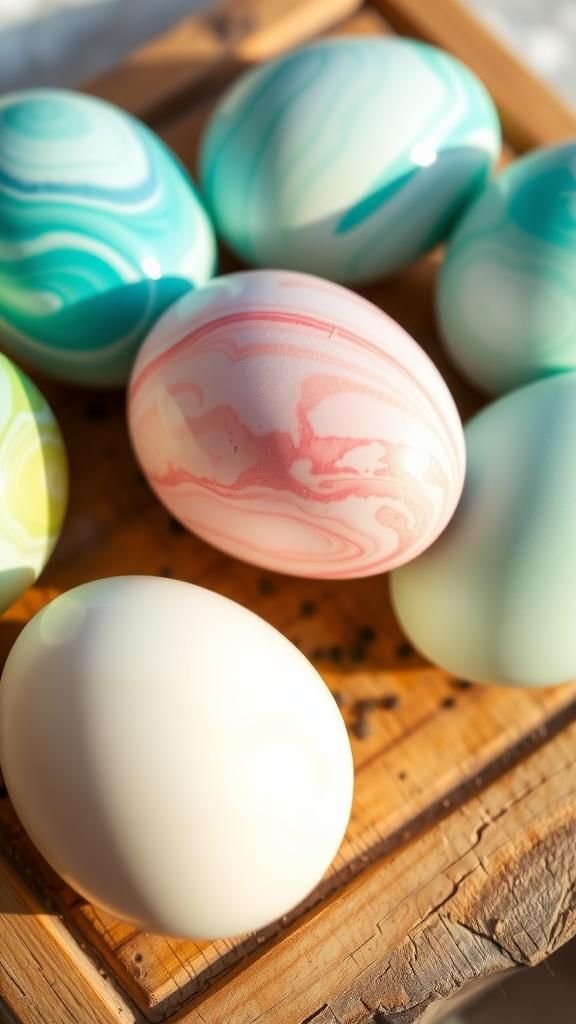
I adore the soft chaos of marbled eggs, where colors seem to float on a creamy surface and then cling to a shell in delicate ribbons. The scent in the air is faint and soapy, and the colors blur into unexpected patterns that always feel unique.
Holding a finished egg feels like cradling a tiny, glossy planet. There is a playful mess to the process and a satisfying reveal when the pattern emerges, bright and unpredictable against the smooth white shell.
Steps
- Prepare a shallow tray and spread a thick layer of shaving cream across it, smoothing the surface gently.
- Drop several dye colors onto the cream and swirl them lightly with a skewer until the pattern looks pleasing.
- Press an egg horizontally into the patterned cream, lift and scrape off excess with a ruler to reveal the marbled surface.
- Rinse the egg under cool water to remove remaining cream and set aside to dry on a soft towel.
Pressed floral motifs on delicate shells

Tiny flattened blooms pressed between paper take on a fragile, dreamy quality when paired with an egg. The translucent petals catch light and create a botanical cameo that feels both vintage and fresh.
There is a quiet satisfaction in spotting a leaf vein or tiny stamen preserved against a smooth surface. The color palette leans soft; earthy greens, muted pinks, and cream tones make each egg feel like a miniature garden specimen, perfect for a basket that wants a touch of botanical calm.
Steps
- Gather small dried flowers and leaves, selecting specimens that lie flat without bulky stems.
- Arrange blooms gently on a clean egg surface, pressing them into a thin clear adhesive layer to keep them positioned.
- Apply a smooth transparent top coat to hold petals down and create a glossy finish that highlights veins and textures.
Gold leaf accents for luxe holiday eggs
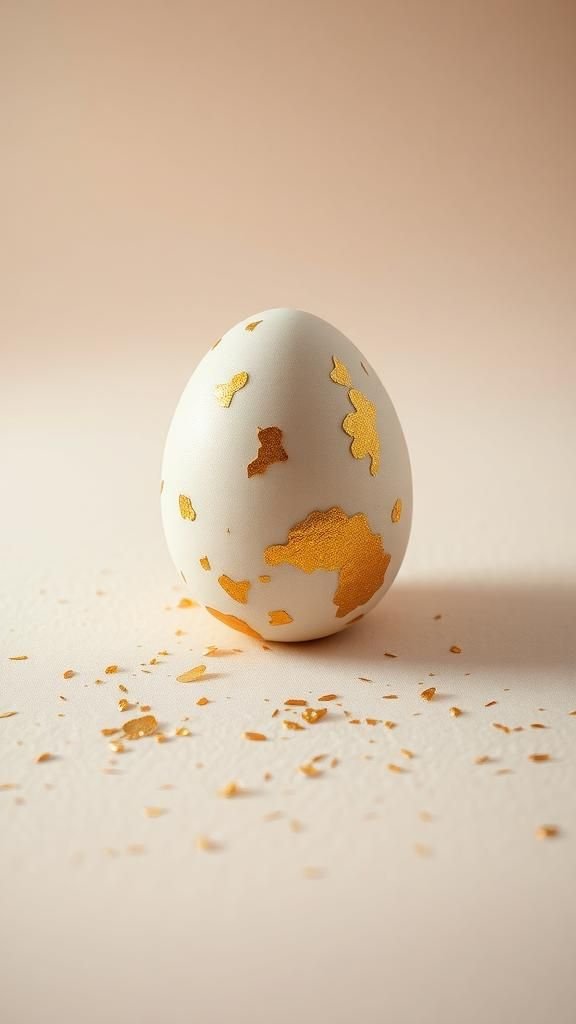
Tiny sheets of gold bring an elegant flash that lifts a simple shell into something celebratory. The gold clings in irregular fragments, catching light with a soft, warm gleam that contrasts with matte paint or natural shells.
Handling the finished egg reveals subtle ridges where the leaf rested, and each reflective flake seems to tell a small story of careless glamor. These eggs feel like little heirlooms, warm against the palm, their metallic patches offering quiet, sophisticated sparkle at any brunch table.
Steps
- Lightly apply a tacky adhesive where hints of gold are desired, allowing a slight skip for an organic look.
- Lay thin gold leaf sheets onto the tacky areas, pressing gently so they adhere and the edges lift naturally.
- Brush away excess leaf with a soft brush and finish with a satin top coat to secure the metal and soften shine.
Speckled robin-style eggs with earthy tones
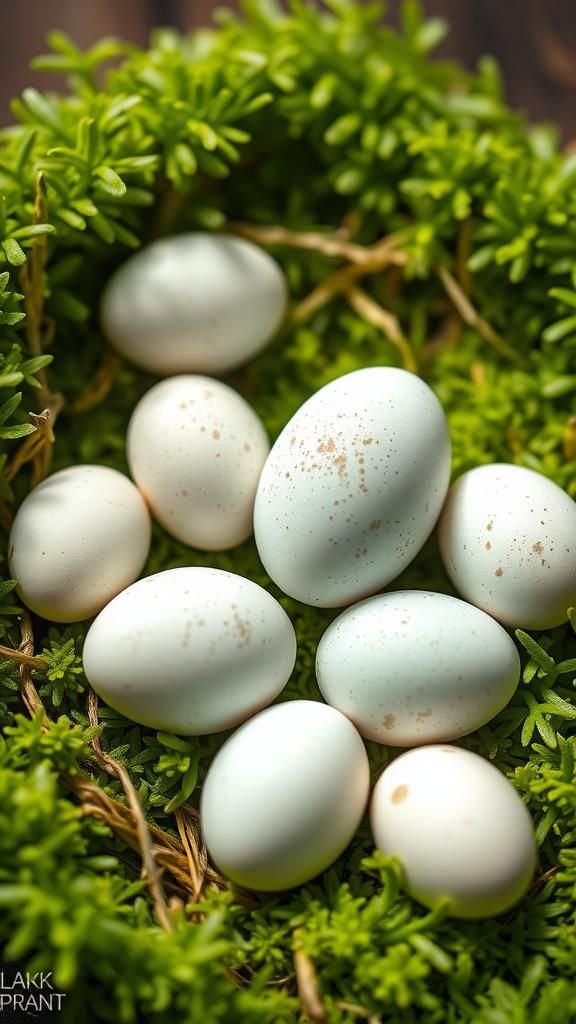
There is something whimsical about tiny freckles scattered across a pale shell, evoking spring nests and woodland walks. The speckles range from chocolate brown to deep charcoal, each dot irregular and full of personality.
A close look suggests a fine rain of pigment frozen mid-air, and the temperate colors feel grounded rather than sugary. These eggs sit well among moss and twigs, their little spots offering a rustic charm that recalls frosty mornings and slow, quiet crafts with a cup of tea.
Steps
- Prepare a muted base color on the eggs and allow them to dry completely.
- Flick a darker concentrated pigment onto the surface with a stiff brush held over the egg to achieve irregular speckling.
- Let the eggs rest upright until all specks have settled and the surface feels dry to the touch.
Washi tape geom patterns for crisp edges

Washi tape brings a graphic, almost architectural feel to small oval canvases. Strips of patterned paper tape create clean bands and bold angles without heavy tools, producing sharp lines and surprising juxtapositions.
The tactile layering of opaque and translucent patterns gives each egg a playful rhythm, and the snap of patterned edges feels oddly soothing. These eggs have a scrapbook warmth, like tiny collages, and they carry a cheerful, handmade vibe that brightens a simple bowl or table centerpiece.
Steps
- Select coordinating washi tape patterns and plan a layout of stripes, chevrons, or intersecting angles on the shell.
- Smooth tape pieces carefully onto the egg, trimming excess with small scissors for crisp edges.
- Seal gently with a clear finish to protect the paper and maintain the tape’s textured look.
Chalkboard eggs for doodles and messages
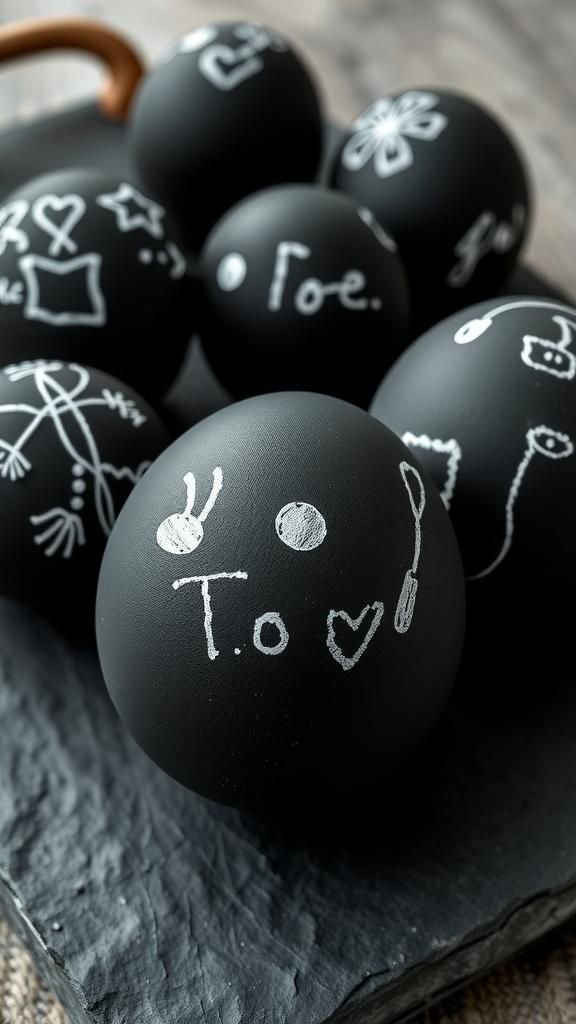
Matte black shells invite quick scribbles that feel intimate and informal, like notes left on a fridge. The chalky surface absorbs soft strokes and the white lines sit in pleasant contrast, whether delicate doodles or short greetings.
Handling one of these brings back schoolroom textures with a grown-up twist; the surface looks velvety under fingertips. They fit well alongside pastel baskets, offering a moment of handmade humor or a tiny reminder tucked into greenery.
Each chalk mark feels fleeting yet charming.
Steps
- Apply a matte black base coat and allow the eggs to dry until a smooth, velvety finish appears.
- Draw doodles, simple icons, or brief messages with white chalk or a chalk marker for sharper lines.
- If desired, spray a very light fixative from a distance to keep delicate chalk marks in place without losing matte texture.
Soft watercolor washes for dreamy shells

Watercolor on eggs creates gentle gradients and soft granulation that mimic skies at dawn. Colors bleed into each other in airy, translucent layers, leaving behind a luminous, slightly cloudy surface.
There is a contemplative pleasure in watching pigments soften and blend, the shell absorbing each wash like a quiet canvas. These eggs feel light, with color pools that shimmer under a lamp.
They make a calm display when grouped together, as if a handful of pastel clouds had condensed into little ovals.
Steps
- Lightly wet the egg surface and apply diluted watercolor pigments, allowing hues to blend and form soft gradients.
- Layer additional washes once the first layer is dry to intensify color or create subtle textures.
- Finish with a gentle spray of protective varnish to preserve the delicate watercolor effect.
Lace-wrapped eggs with vintage textile charm
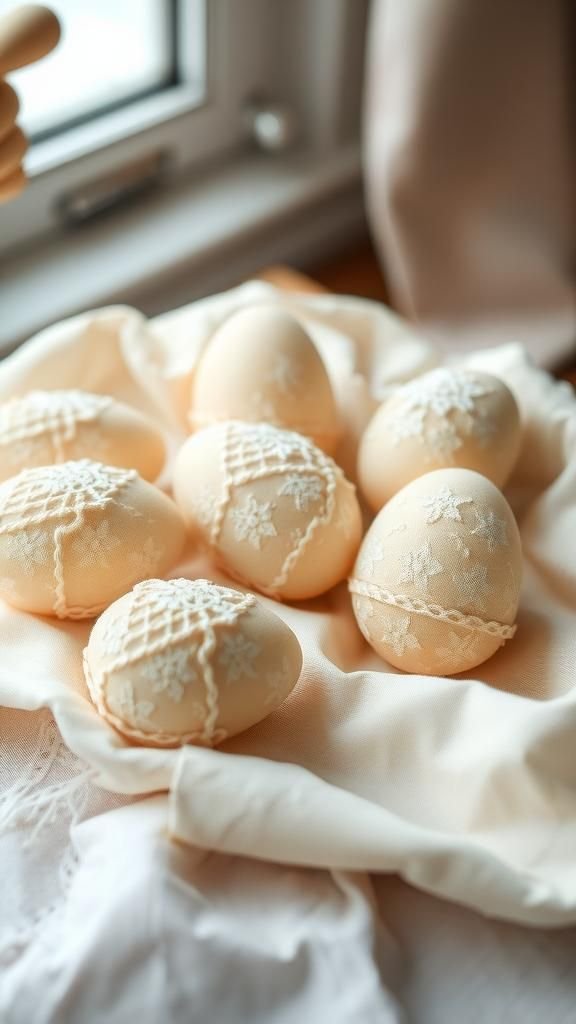
Thin scraps of lace give eggs a romantic, heirloom feel. The lace suggests old tablecloths and quiet attics, its tiny loops and floral motifs casting subtle shadows on the shell.
When placed among linen and wooden bowls, these eggs look like relics from a long afternoon tea. The texture contrasts soft fabric against smooth porcelain-like shells, and the muted color palette favors creams, ivories, and soft taupes.
Handling a lace-wrapped egg feels gentle, almost like holding a small keepsake.
Steps
- Select delicate lace lengths and position them around the eggs to frame the natural curvature.
- Secure lace gently with a thin adhesive strip or thread so the fabric hugs the shell without puckering.
- Tuck any loose edges under a neat seam and let the arrangement rest until fully settled.
Confetti-filled translucent eggs for joyful shimmer

Clear shells that trap tiny flashes of color feel like miniature parties. When light passes through the transparent surface, confetti bits scatter light in playful, jewel-like reflections.
Picking one up yields a faint rattle, a tiny celebration held within a fragile orb. These eggs are tactile and bright, the confetti offering a contrast between smooth glassy edges and sparkly interior specks.
They bring an energetic, celebratory note to a table, as if each egg contains a compact, colorful burst of cheer.
Steps
- Prepare clear plastic or blown glass eggs and fill them partially with small confetti pieces or sequins.
- Seal openings securely to keep confetti contained, ensuring a smooth finish at seams.
- Shake gently to distribute the confetti and arrange eggs so light can pass through for sparkle.
Silhouette decals for dramatic contrast designs
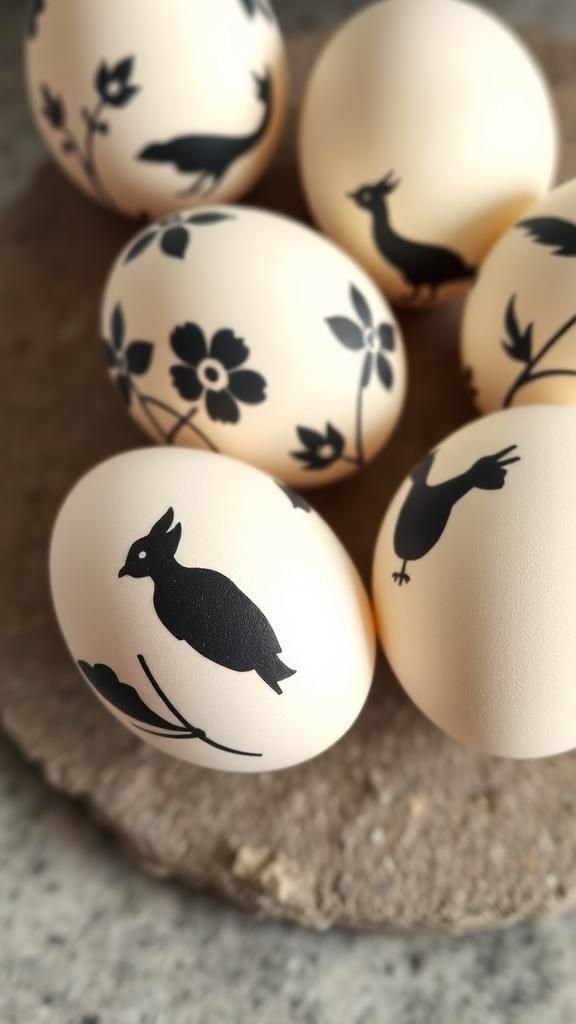
Bold silhouettes on an egg create instant graphic drama. A single dark figure—floral, animal, or geometric—set against a soft background reads like a tiny print on porcelain.
The contrast is crisp and satisfying, and the negative space around the shape adds calm. These eggs have a storyteller quality, hinting at scenes or symbols in miniature.
Placed against natural materials, the stark motifs stand out like little stamps, each one offering a simple, striking focal point in a basket of softer hues.
Steps
- Choose a simple silhouette design and transfer it onto the egg surface using a fine decal or stencil.
- Fill in the silhouette carefully with a contrasting color to achieve a crisp edge.
- Remove any stencil remnants and apply a clear finish to protect the sharp contrast.
Natural onion-skin dyes with autumnal hues

Onion skins yield warm, earthy tones that feel grounded and quietly nostalgic. The resulting colors—burnt amber, soft rust, and golden brown—offer a comforting, organic palette.
There is a cozy satisfaction in seeing an egg emerge with a mottled, layered surface that hints at time and warmth. These eggs pair beautifully with wooden bowls and woven fibers, blending into a rustic arrangement that looks lived-in.
The scent during dyeing is faintly vegetal, and the finished shells glow with sunlit warmth.
Steps
- Simmer onion skins in water to extract deep amber and rust-colored dyes, straining the liquid once richly colored.
- Submerge eggs in the warm dye until the desired depth of color develops, checking occasionally.
- Remove eggs and let them rest on a soft cloth to dry, revealing natural mottling and warmth.
Metallic marker doodles for joyful hand-drawn flair

Fine metallic lines feel lively against eggshells, catching light with a subtle shimmer that adds personality. Doodles range from tiny stars and dots to looping scribbles that look like micro calligraphy.
The metallic pigments bring a playful shimmer without overpowering, and the drawn textures invite a closer look. There is a casual intimacy to handwritten marks, like a secret message or a tiny celebration.
These eggs look modern and personal at once, perfect for scattered placement among fresh greenery.
Steps
- Select metallic markers in gold, silver, and bronze tones for a cohesive palette.
- Sketch small motifs, patterns, or lettering directly onto dry shells with steady, light strokes.
- Allow the ink to set fully and consider a thin protective coat to maintain metallic sheen.
Tie-dye rubber band eggs with unexpected color blends

Bands create playful resist patterns that yield rings, stars, and bursts as dyes seep around constraints. The layered colors often bleed into surprising blends at the edges, producing muted rainbows and vintage tie-dye nostalgia.
The tactile bands leave faint ridges and shadow lines that add character, and the combination of saturated hues with soft transitions feels joyful and lively. Each egg becomes a small study in accidental color mixing, a handheld piece of improvisational art that invites touch and curiosity.
Steps
- Wrap eggs gently with thin rubber bands in a random or planned pattern to create resist areas.
- Submerge wrapped eggs in varied dye baths to build layered color intensity.
- Remove rubber bands after dyeing and rinse eggs to reveal crisp resist lines and blended colors.
Decoupage napkin scenes with layered paper textures
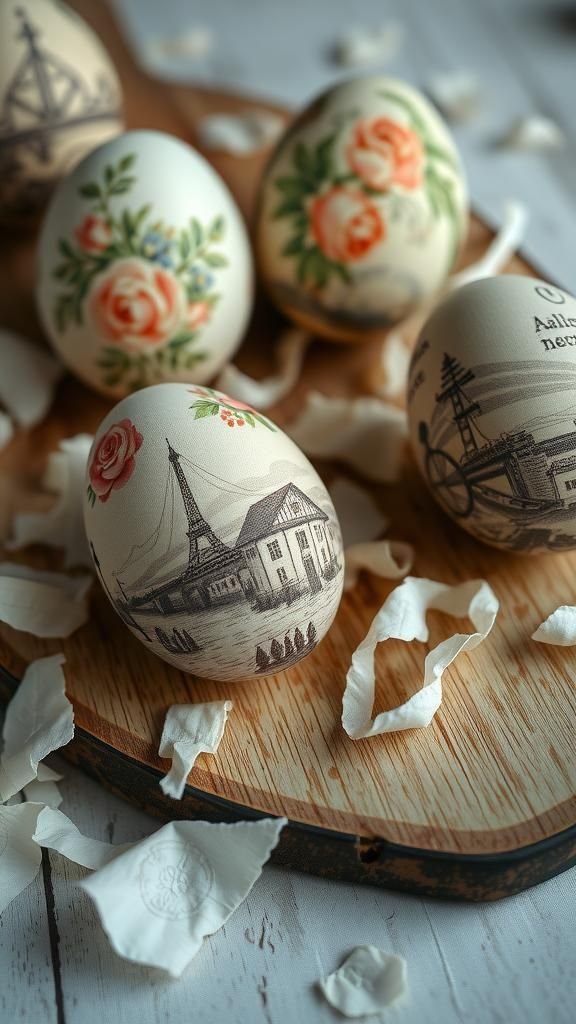
Thin printed napkins offer delicate scenes and motifs that can be layered to form tiny narrative vignettes on a shell. The paper fibers soften around curves, and small overlaps create a collage effect with charming seams.
There is a tactile satisfaction in seeing a full scene fold gently across an egg, the printed ink lending a graphic presence while the paper edges remain whisper-thin. Grouped together, napkin-decorated eggs read like a collection of tiny postcards, each with its own little story and texture.
Steps
- Separate printed napkin layers and select small motifs that fit the egg curvature.
- Lay motifs onto the shell and press gently with a thin layer of decoupage medium to integrate paper fibers.
- Smooth seams carefully and apply additional medium over the surface to achieve a unified, slightly glossy finish.
Stenciled geom repeats in crisp contrasting tones
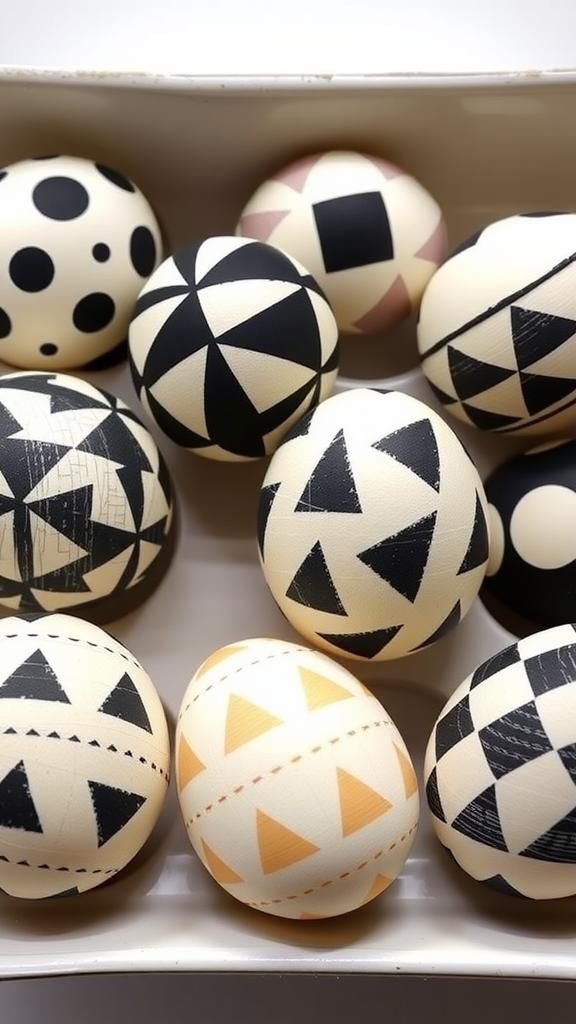
Repeating geometric stencils lend an orderly, graphic quality that feels modern and playful at once. Crisp triangles, diamonds, and concentric shapes form rhythmic patterns that wrap the shell like tiny textiles.
The contrast between soft curved surfaces and sharp angles creates a pleasing tension, and the repeated motifs invite the eye to travel around the egg. These feel both structured and lively, great for someone who enjoys balance between color and pattern without fuss.
Steps
- Position a small geometric stencil onto a dry egg and secure it lightly so the edges remain tight.
- Apply a contrasting pigment over the stencil area, building opacity gradually to maintain crisp lines.
- Remove the stencil carefully and repeat the motif around the egg to form a repeating pattern.
Embroidery-inspired stitched fabric covers on eggs

Tiny embroidered patches translate familiar needlework into three-dimensional charm when draped over an oval form. The threadwork brings tactile ridges and tiny knots that feel handcrafted and intimate, each stitch tracing flowers or tiny motifs.
Colors range from soft pastels to lively jewel tones, creating a cozy, textile-rich presence. Holding such an egg is like holding a small craft pillow; the layered threads suggest warmth and time spent, evoking afternoons with needle and tea and slow, steady concentration.
Steps
- Embroider small motifs onto thin fabric scraps using simple stitches and coordinating thread colors.
- Drape the embroidered fabric gently over an egg, securing edges beneath with thin invisible thread or adhesive dots.
- Smooth the fabric to match the shell’s curve so the stitched pattern reads clearly on the surface.
Glitter-dipped bases for subtle sparkle on stands

A wash of fine sparkle hugging the bottom of an egg feels like dawn caught in a shimmer. The glitter settles into a soft gradient that catches light without overwhelming, lending a festive whisper rather than a shout.
There is a tactile contrast between the smooth shell and the gritty shimmer at the base, and the result looks refined enough for a table setting. Placed on small stands, these eggs offer a quiet gleam that shifts as the room light moves, lending a fleeting brilliance.
Steps
- Apply a thin band of adhesive to the lower portion of each egg where sparkle is desired.
- Dip or roll the adhesive area into fine glitter, tapping off excess to create a soft gradient edge.
- Allow adhesive to cure fully and gently brush away loose particles for a neat finish.
Ink-dipped silhouettes with stark monochrome drama

Deep inky dips produce bold, saturated bands and silhouettes that feel striking against pale eggs. The saturated pigment forms sharp edges that read like calligraphic strokes or simple landscape horizons.
There is a tactile coolness to the inked area and a strong visual rhythm when multiple eggs are grouped. These pieces feel decisive and artistic, as if each one is a small page from a sketchbook.
The contrast is satisfying, and the boldness brings a gallery-like quality to a casual display.
Steps
- Dip one end or a central band of the egg into concentrated ink to create bold, saturated marks.
- Allow the ink to settle and form a crisp edge, blotting lightly if necessary to maintain shape.
- Let the eggs dry upright until the ink cures and the surface feels steady to the touch.
Minimal brushstroke accents for elegant simplicity
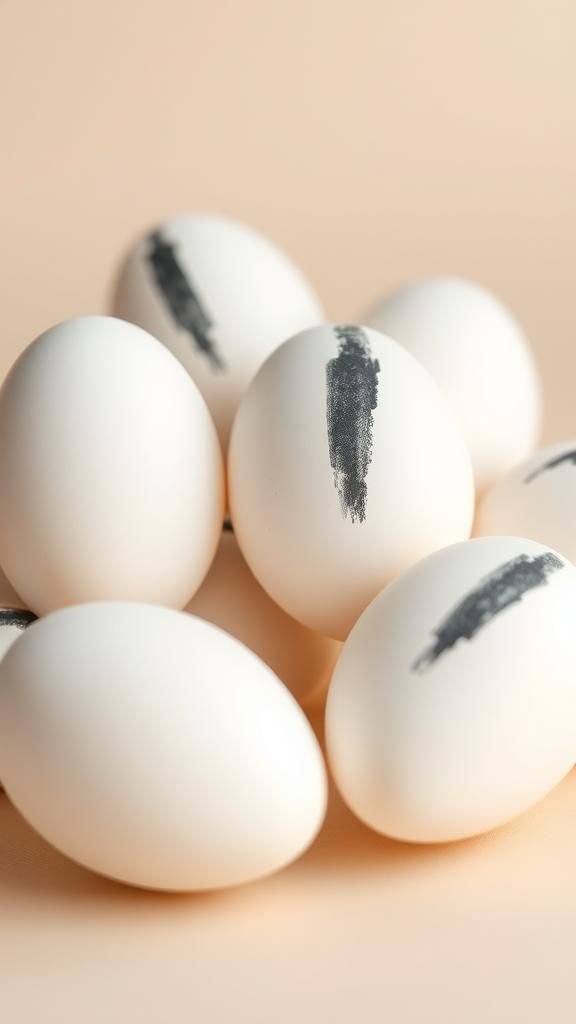
A single flowing brushstroke across an egg communicates restraint and style. The sweep of pigment varies in opacity, leaving delicate streaks that suggest motion.
This pared-back approach celebrates negative space, where the blank areas around the stroke feel as meaningful as the mark itself. The eggs have a quiet, modern elegance, offering a calm counterpoint to more ornate styles.
They pair well with neutral settings, allowing the motion of the stroke to become the visual anchor of a simple display.
Steps
- Load a flat brush with a moderate amount of paint and draw a single expressive stroke across the egg’s curve.
- Allow slight variations in pressure to create dynamic opacity and texture within the brush mark.
- Let the paint dry undisturbed and consider a soft matte sealer to protect the brushstroke while preserving its texture.
Paper quilling spirals for playful dimensional detail

Thin strips of curled paper form tiny coils and scrolls that sit like miniature sculptures on an egg. The layered spirals create shadow and depth, and their repeating loops feel almost hypnotic.
Colorful quilled shapes inject a lively, handcrafted energy, and the contrast of paper texture against a smooth shell is delightfully tactile. These eggs read like three-dimensional folk art, each coil catching a hint of light and casting small, animated shadows as they rotate in a bowl.
Steps
- Curl thin colored paper strips into tight coils and arrange them into small floral or spiral clusters.
- Affix clusters gently onto the egg surface in balanced groups to form a decorative motif.
- Allow the paper elements to settle and rest until securely positioned and dry to the touch.
Shell mosaic tiles for textured geometric mosaics

Tiny ceramic or porcelain tile fragments arranged on an egg create a tactile mosaic that catches and reflects light. The tesserae offer a miniature cityscape of texture, with grout lines forming subtle relief.
Each fragment retains its glaze, producing a patchwork of sheen and shadow that feels ancient and handcrafted. These eggs carry an artisanal quality, reminiscent of sunlit patios and tiled courtyards.
Holding one reveals the small raised edges and cool ceramic feel beneath a thumb, a compact mosaic to treasure.
Steps
- Gather small tile fragments or broken ceramic pieces in coordinating colors and shapes.
- Arrange fragments onto the egg in a mosaic pattern, filling gaps to create a cohesive surface.
- Apply grout gently between pieces, wiping away excess to reveal crisp tile edges and texture.