I get a little giddy every March when green starts popping up around the house; crafting shamrocks from felt has become my favorite way to welcome that fresh, leafy energy. St Patrick’s Day shamrock felt crafts have a cozy, tactile charm that makes small decorations feel personal and warm.
There is something about the soft woolly texture against my fingertips and the way different greens layer together that feels quietly festive.
Over the years those Shamrock Felt Crafts have turned into gifts, table accents, and little reminders to slow down and enjoy simple making.
Soft felt shamrock brooch with layered texture
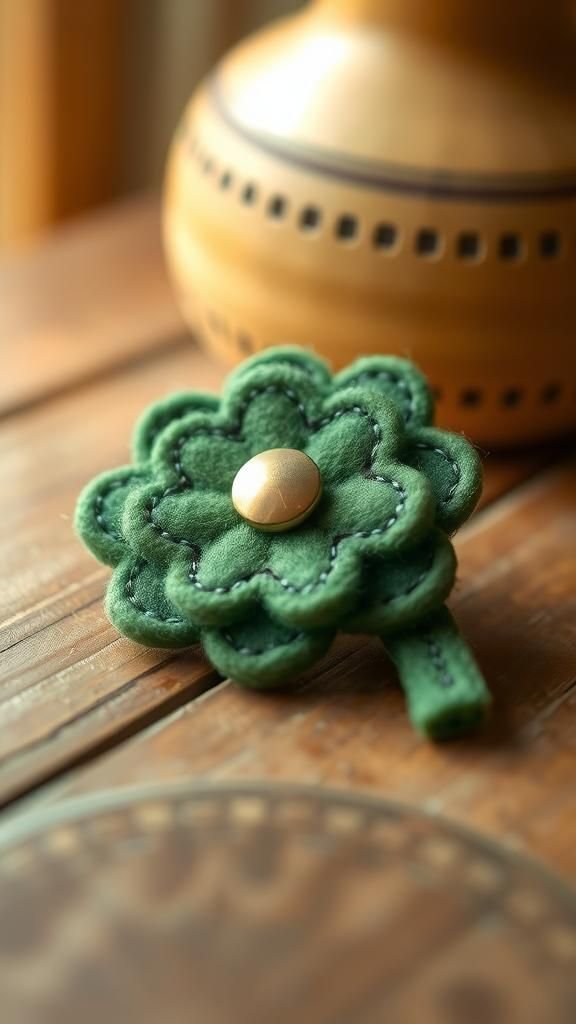
I made a tiny brooch once that lived on my denim jacket for weeks; the layered shamrock felt created a lovely contrast between matte wool and a little glossy button at the center. The felt had a plush, almost velvety feel that warmed my hands while sewing.
Thread stitches peeked like delicate veins and the green tones blended like leaves catching morning sun. I remember smiling when a stranger complimented it, and it became a small, wearable bit of spring that felt cheerful without being loud.
Steps
- Trace a three-lobed shamrock shape onto two contrasting felt pieces and cut them out.
- Stack the felt layers slightly offset and stitch around the outer edge with matching thread.
- Sew a small decorative button or bead at the center and attach a brooch pin to the back.
- Secure all threads with tight knots and trim any loose ends for a neat finish.
Felt shamrock garland for mantel or doorway

A string of little shamrocks brought life to my mantel; each felt piece swayed when someone walked by and caught the light differently. The collection had an almost musical rhythm as the shapes overlapped, with greens ranging from mossy to lime.
Sewing tiny running stitches along edges added a homespun feel, and the garland smelled faintly of crafting room wool. I liked how the shadows from the shamrocks made the wall look textured and how guests paused a moment to touch a leaf, smiling at the simple detail.
Steps
- Cut multiple shamrock shapes from assorted greens of felt, varying a few sizes for interest.
- Arrange the shamrocks along a length of twine and space them evenly.
- Stitch or tie each shamrock to the twine, securing firmly so they hang flat.
- Hang the garland along a mantel or across a doorway and adjust spacing as desired.
Plush shamrock keychain with stitched edges
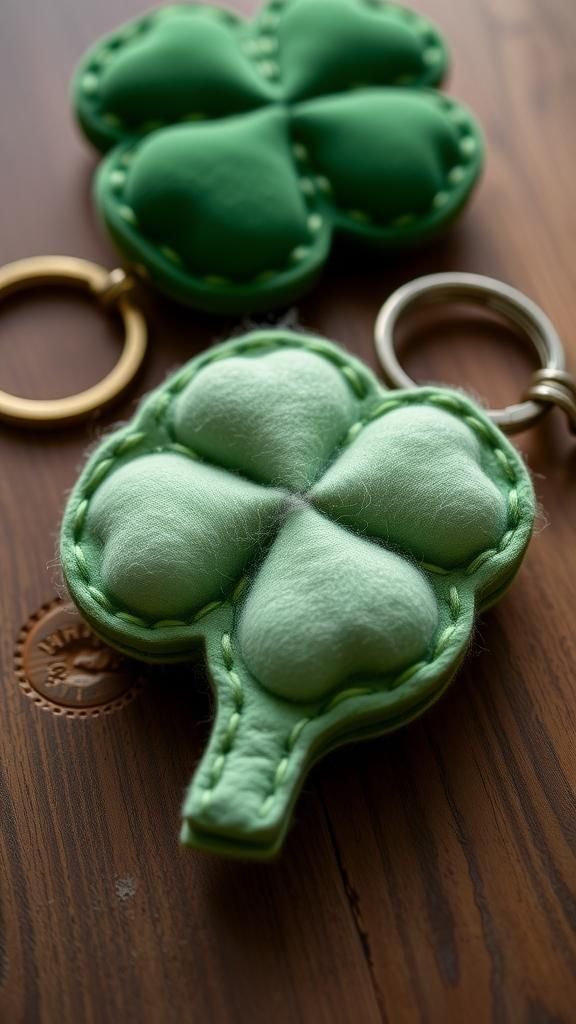
The keychain lived in my pocket for an entire month and felt comforting when I reached for my keys; the felt was soft and slightly fuzzy along the edges. The stitched border had a tactile rhythm under my thumb.
Tiny stuffing made the shamrock mildly squishy, a small fidget that calmed me in queues. I liked the contrast of green felt against the metal ring and how the scent of fabric lingered faintly.
It became a small, portable reminder of spring whenever I left the house.
Steps
- Trace a shamrock shape twice onto felt and cut both pieces out.
- Place the two pieces together and stitch around the edges leaving a small opening.
- Fill lightly with polyester stuffing, then finish stitching closed.
- Attach a metal key ring to the top through a small ribbon or stitched loop.
Mini shamrock magnets for fridge cheer

I made a set of tiny shamrocks that brightened the refrigerator door; each one felt like a miniature landscape with varied greens and tiny stitched veins. The magnets liked to cluster around a family photo, creating a playful scene.
The felt surface offered a muted softness against the shiny metal backdrop and the magnets provided a satisfying click when repositioned. I enjoyed how these small accents could shift the mood of the kitchen, making morning routines feel a touch greener and unexpectedly pleasant.
Steps
- Cut small shamrock shapes from felt in a range of green shades.
- Decorate centers with tiny stitched veins or seed beads if desired.
- Affix small flat magnets to the back of each shamrock with strong adhesive.
- Allow adhesive to set fully before placing magnets on the fridge.
Layered shamrock coaster set with contrast stitching
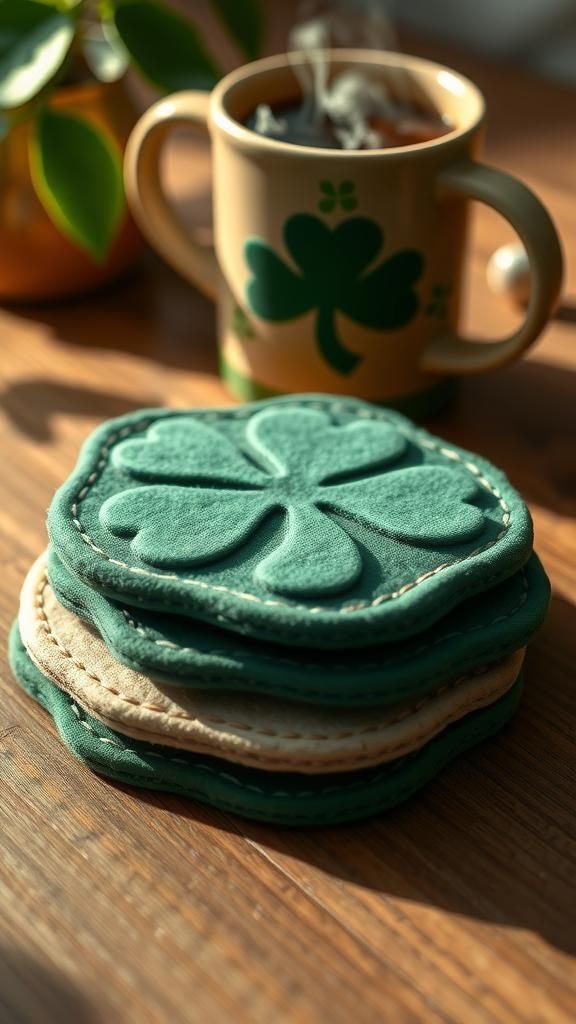
A set of felt shamrock coasters made quiet afternoons feel thoughtful; the layered felt absorbed a faint chill from a ceramic mug and the edges softened over time. Contrast stitching outlined each lobe like miniature topography lines.
The thickness created a cushioned surface and the greens complemented wooden tabletops beautifully. I noticed how the coasters collected tiny thread crumbs and lint, which became part of their lived-in look.
Guests admired the way the colors paired and I enjoyed the small ritual of placing a cup on a handmade leaf.
Steps
- Cut two or three layered shamrock shapes per coaster from felt and stack them.
- Stitch around the outer edge with contrasting thread to join layers.
- Optionally add a thin layer of batting between layers for extra cushioning.
- Trim any loose threads and test coaster stability with a mug.
Shamrock hair clips that whisper springtime
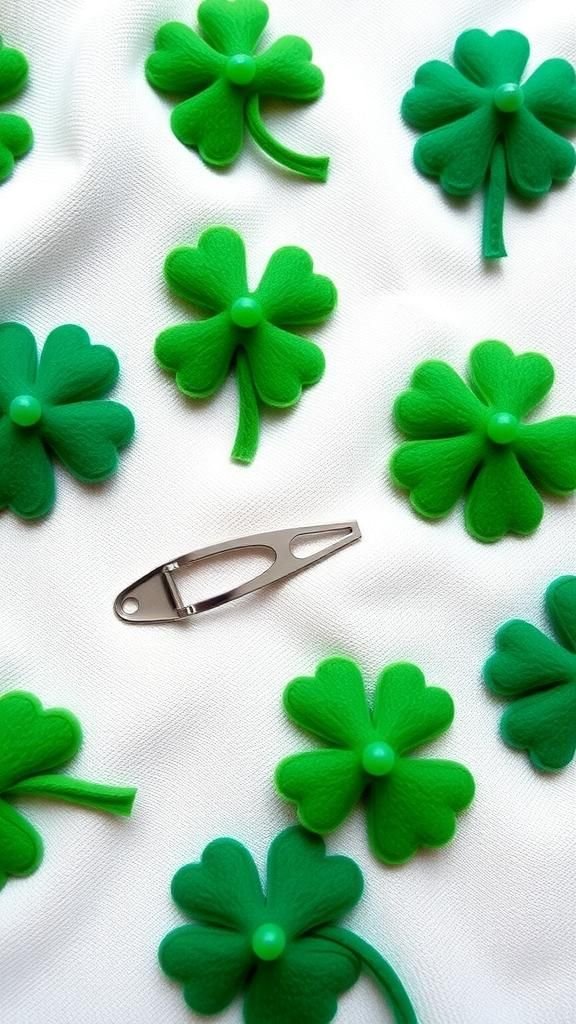
A couple of these lived clipped to a scarf and brightened my outfit without shouting. The soft felt sat quietly against fabric and the tiny stitches caught light like little ridges.
The greens read as natural, like young leaves, and the weight was pleasantly light so clips stayed put. I remember tucking one behind my ear during a walk and feeling a small lift in mood.
The tactile fuzz of the wool against the palm created a familiar comfort that made me want to craft more.
Steps
- Cut small shamrock shapes from felt and add decorative stitching or seed beads.
- Glue or stitch the shamrocks onto metal alligator clips or hairpins.
- Allow adhesive to dry completely before using the hair clips.
- Test the clips on different fabric weights to ensure a secure hold.
Shamrock napkin rings for a cozy table setting

I swapped ordinary napkin rings for felt shamrocks at a small dinner and the table felt playful and quiet at once. The felt had a comforting matte look against folded linen and the shamrocks created a cluster of greens across the table.
The tactile softness contrasted with ceramic plates and the little stitched veins added handmade charm. I liked how napkins peeked through the leaves, and how guests lingered a moment longer at the table, smiling as they noticed the tiny details that felt both festive and familiar.
Steps
- Cut medium shamrock shapes from felt and add surface stitching for detail.
- Wrap a felt or fabric ring around a folded napkin and secure the shamrock to the ring.
- Reinforce attachments with extra stitches for durability.
- Place finished napkin rings at each setting and adjust leaf positioning.
Shamrock appliqué for denim or tote bag

Adding a felt shamrock appliqué to a worn tote transformed it into something personal and spring-ready. The felt contrasted against coarse canvas, and the edges puckered slightly in a way that felt lived-in.
Thread stitches created a visible line of care that looked like a small signature. I enjoyed the way the appliqué softened the bag’s silhouette and how the greens brightened dull fabric.
Each time I grabbed the tote, the shamrock reminded me of a quiet afternoon at the craft table and brought a friendly smile.
Steps
- Trace a shamrock onto felt and cut out the shape.
- Place the felt shamrock on the desired spot on the denim or tote and pin or baste lightly.
- Stitch the shamrock around the edges with a secure stitch, adding decorative veins if desired.
- Trim any excess threads and press gently for a smooth finish.
Three-dimensional shamrock ornament with puff

The little puffy shamrock ornament dangled from a kitchen hook and caught the light like a soft green charm. The three-dimensional form felt satisfying in the hand, plump and slightly springy.
Tiny seams and hand-stitched veins added character and the felt smelled faintly of fabric and room air. Seasonal lights nearby reflected softly off the skirt of the ornament, creating gentle highlights.
I found myself smiling when I reached for a mug and brushed against it, enjoying that small tactile connection to a quiet holiday mood.
Steps
- Cut two matching shamrock shapes from felt.
- Stitch around the edges leaving a small opening, then stuff lightly with polyester fill.
- Close the opening with small stitches and add a ribbon loop for hanging.
- Attach a small charm or bead to the ribbon if desired for extra detail.
Shamrock garland with tiny felt pom-poms

I once paired felt shamrocks with miniature pom-poms and loved the playful rhythm that resulted. The pom-poms added playful bounce and a fuzzy contrast to flat felt leaves, creating a tactile duet.
The garland moved gently in drafts, the pom-poms swaying like tiny buds between leaves. The range of green tones read like a small patch of garden at the window and the craftsmanship felt humble and joyful.
It brightened a small corner and invited casual touch, which felt oddly consoling on gray afternoons.
Steps
- Cut multiple shamrocks from felt and prepare small matching pom-poms.
- Arrange shamrocks and pom-poms along a length of twine or thin ribbon.
- Secure each shamrock and pom-pom to the twine at regular intervals with knots or stitches.
- Hang the garland and adjust spacing so pieces sit evenly.
Embroidered shamrock hoop art for wall display

A small hoop with a felt shamrock felt like a tiny framed moment that belonged on a hallway peg. The felt acted as a soft canvas, and embroidered veins added delicate linear detail that caught light.
The wooden hoop contrasted with green tones, framing the leaf like a miniature artwork. Hanging it felt like inviting a hush of green into the space.
I often paused to look at the stitches and felt a sense of calm, as if the piece offered a subtle, handcrafted pause in the flow of daily life.
Steps
- Place a felt shamrock inside an embroidery hoop and tighten until taut.
- Embroider veins and decorative stitches on the shamrock using contrasting thread.
- Trim excess felt around the hoop and secure the back with neat stitches or glue.
- Add a ribbon or small hook for hanging and display on a wall.
Shamrock bookmark to tuck into well-loved books

A felt shamrock bookmark rested between pages and left a small green tab peeking from a novel; the soft edge barely added bulk but felt comforting when I closed the book. The felt was gentle against paper, and the slim shape slipped easily into margins.
Tiny stitch detailing along the stem caught the light and made the bookmark feel handcrafted. I liked finding it months later, slightly softened at the edges, evidence of many returns to quiet reading.
It felt like a tiny pact between maker and reader to take a breath.
Steps
- Cut a slender shamrock shape from felt, keeping proportions narrow to slip between pages.
- Sew a decorative edge stitch around the perimeter and add a stitched vein or bead if desired.
- Attach a thin ribbon or tassel to the top of the bookmark for easy locating.
- Slide the bookmark into a book and adjust ribbon length so it peeks out attractively.
Shamrock table runner made from linked felt leaves
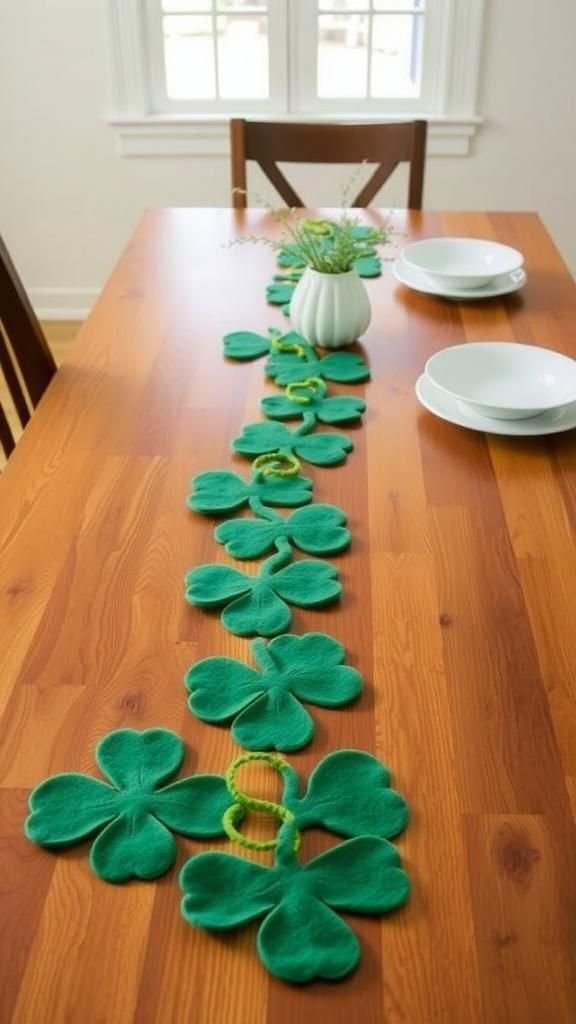
A table runner composed of linked felt shamrocks turned Sunday brunch into a small celebration; the runner moved with the tablecloth and created a soft green path down the center. Each leaf overlapped slightly, creating a layered impression like rippling foliage.
The felt absorbed light in a soft way and the stitched joins added a handmade seam running the length of the table. I enjoyed how simple crockery seemed to gain a seasonal lift and how leftovers looked more festive beneath the green trail of leaves.
Steps
- Cut multiple identical shamrock shapes from felt and decide on a repeating arrangement.
- Overlap the shamrocks slightly and stitch them together along touching edges.
- Continue linking shamrocks until the runner reaches desired length.
- Lay the runner on the table and smooth any joins for an even appearance.
Shamrock mobile that sways with soft breezes

Hung near an open window, a felt shamrock mobile created a calm, rhythmic movement that felt almost meditative. The soft felt leaves rotated lazily and cast gentle shadows on the wall.
Each shamrock balanced on thin threads, and their muted greens created a quiet gradient against the light. I noticed the faint rustle as they brushed, and the mobile added a sense of slow motion to the room.
It became a small focal point during afternoon tea, a soft reminder to watch tiny motions and breathe.
Steps
- Cut several shamrock shapes from felt in varying sizes and shades.
- Attach each shamrock to different lengths of thin thread or fishing line.
- Tie the threads to a circular hoop or driftwood piece, spacing pieces for balance.
- Hang the mobile from a ceiling hook where it can catch gentle breezes.
Shamrock-wrapped gift tags for small presents

Tiny shamrock felt tags turned ordinary parcels into moments of attention. The felt added a soft corner to crisp wrapping paper, and small embroidered details felt intimate.
I liked tucking a hand-written note beneath the leaf and seeing the texture against kraft paper. Wrapping felt quieted the edges of the box and the greens created a fresh contrast.
I found myself lingering over parcels longer than usual, pausing to smooth a stitch or admire the way light fell across the wool fibers before handing the gift over.
Steps
- Cut small shamrock shapes from felt and write a name or short note on one side with fabric pen if desired.
- Punch a small hole near the top of the shamrock and thread twine or ribbon through it.
- Tie the felt shamrock to the wrapped gift, letting it sit flat against the package.
- Secure with a bow or knot and trim extra twine for a tidy look.
Shamrock embroidery patch for jacket personalization

A felt shamrock patch on a jacket pocket felt like a quiet signature. The felt softened the denim and the embroidery added tiny pictorial veins that caught the light.
Each stitch felt deliberate and the green palette blended well with worn fabric. I noticed how the patch aged slightly with washes, gaining a softer edge that felt like history.
The patch gave an everyday garment a small story to tell, and I enjoyed the ease of glancing down to find a tiny green reminder of slow, handmade afternoons.
Steps
- Trace and cut a shamrock from felt, then embroider decorative veins and border stitches.
- Position the patch on the jacket and pin or baste to hold in place.
- Sew the patch around the perimeter with strong thread and secure all knots.
- Check stitching integrity after wear and reinforce if necessary.
Felt shamrock garland with tiny bells attached

Adding small bells to a shamrock garland introduced a soft, bright jingle that made passing by feel like a tiny celebration. The felt muffled the sound just enough so it never became loud, and the bells chimed delicately with movement.
Greens ranged from deep forest to leaf-sprout hues, and each bell sat like a dew drop between leaves. The combination felt nostalgic, reminiscent of simpler holiday trimmings.
I enjoyed hearing the faint chime during evening walks through the house; it created a quiet soundtrack to domestic life.
Steps
- Cut multiple shamrocks from felt and choose small bells to complement the colors.
- Attach bells to the twine between shamrocks using small knots or stitches.
- Secure each shamrock to the twine and space bells so they jingle freely.
- Hang the garland in a doorway or along a banister where it can move.
Shamrock fridge towel with stitched leaf corner
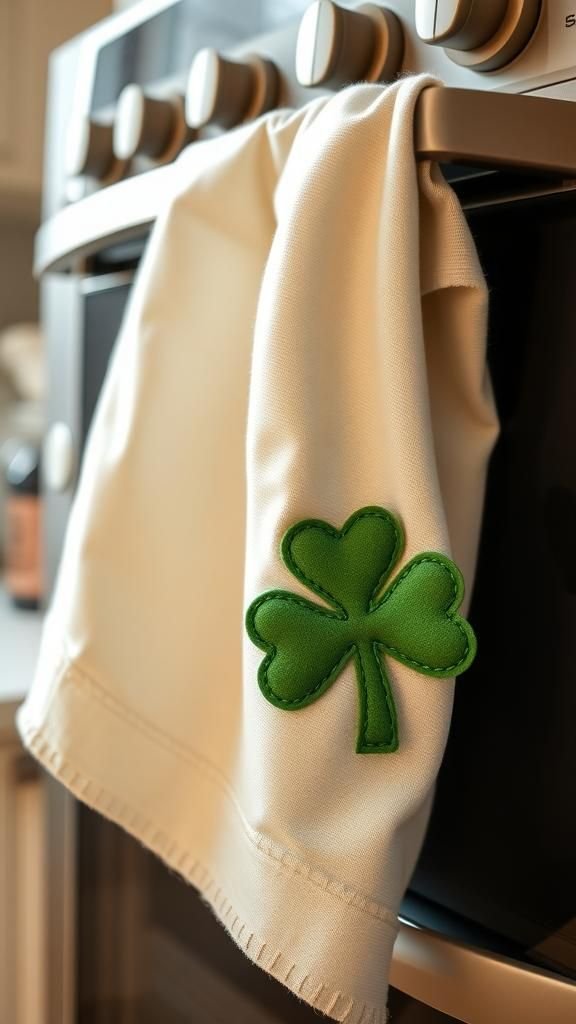
A kitchen towel with a felt shamrock at the corner made routine tasks feel considered. The soft green leaf sat against linen and the edge stitch added a tidy border.
I noticed the contrast between absorbent towel fabric and the matte felt, and the small patch added a gentle visual anchor near the sink. The shamrock took on faint kitchen scents over time, becoming part of the room rather than a pristine ornament.
It was a small, domestic pleasure to reach for a towel that carried a familiar handmade mark.
Steps
- Cut a shamrock shape from felt and add decorative stitches along the veins.
- Place the shamrock at the towel corner and pin or baste into position.
- Sew the shamrock securely onto the towel with neat stitches around the edge.
- Trim any loose threads and launder gently before regular use.
Shamrock wine charms for casual gatherings

I strung tiny felt shamrocks onto loops for wine charms at a small dinner and they added a sense of playfulness. Each charm had a soft texture that contrasted with glass stems and the colors made place settings feel coordinated.
The charms were light enough not to wobble the glass and the stitches around the perimeter created a subtle handcrafted look. Guests enjoyed finding the charm that matched their personality, and I liked how the soft felt softened the ritual of toasting into something more relaxed and personal.
Steps
- Cut small matching shamrock shapes from felt and decorate with tiny stitches or beads.
- Attach each shamrock to a metal ring or loop of twine to create a charm.
- Slide charms onto wine glass stems carefully before guests arrive.
- Collect charms after the event and store flat to preserve shape.
Shamrock candle mat for cozy surface protection

A felt shamrock used as a candle mat felt quietly protective beneath a votive, softening the glow and adding a green halo. The felt absorbed a faint heat and the edges provided a buffer between candle and tabletop.
I enjoyed how the warm light pooled at the leaf center and how shadows from the shamrock lobes created soft patterns. The texture felt homey and the piece sat well among books and mugs.
It made small moments of candlelight feel thoughtful and grounded rather than decorative in a loud way.
Steps
- Cut a larger shamrock from thick felt to serve as a heat-resistant mat.
- Add decorative stitching around the edge to prevent fraying and for visual interest.
- Place the candle mat on a stable surface and center the candle on top.
- Monitor candle placement and never leave lit candles unattended for safety.
Shamrock pocket plush for little ones

A small pocket-sized shamrock plush became a quiet comfort for a child who liked soft objects during car rides. The felt was gentle against skin and the plush size fit easily into a small hand.
Simple embroidered eyes or a stitched vein added friendly personality and the sewing left soft ridges that invited touching. I observed how the plush acquired tiny impressions over time, a map of moments shared.
It felt like a tiny companion that held small secrets and made waiting in a checkout line a little kinder.
Steps
- Cut matching shamrock shapes from soft felt and sew decorative facial or vein details on one side.
- Stitch the pieces together around the edge leaving a gap for stuffing.
- Fill lightly with fiberfill and finish stitching closed.
- Inspect seams for security and tuck into a pocket or small bag.