I’ve always loved the weight and texture of chunky blankets but wasn’t keen on managing needles and intricate stitches. Over a few slow afternoons, I tried a handful of no knit chunky blanket DIY projects that felt more like play than work.
Each method brought its own rhythm and cozy payoff.
These no knit chunky blanket DIY projects became my go-to gift idea and a way to unwind. There’s something soothing about watching bulky strands gather into a soft, warm mass, and I enjoy how each piece ends up with its own imperfect charm.
Fleece tie-no-sew chunky fringe blanket
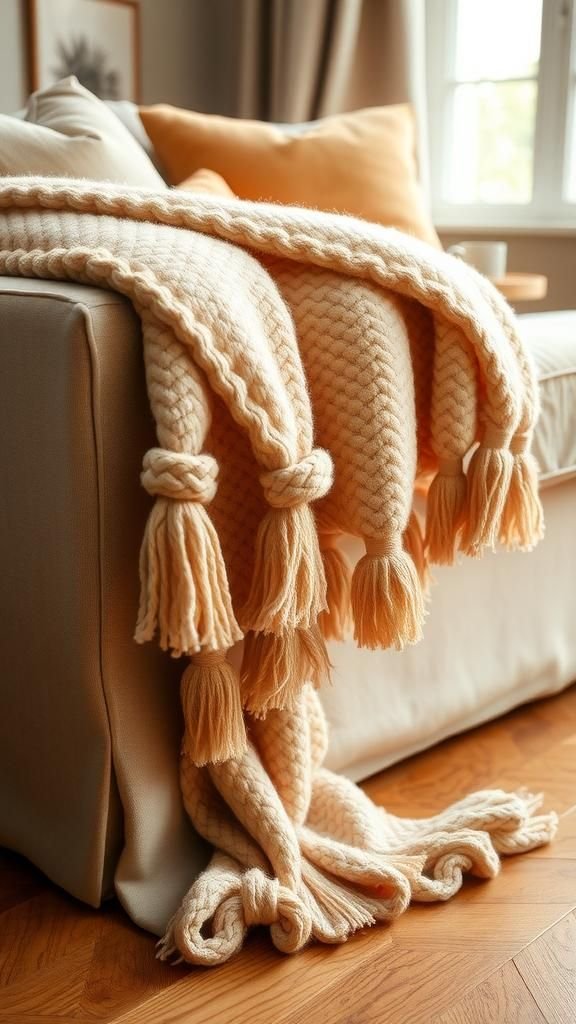
I remember sinking into the sofa with a huge pile of fleece strips and the room filling with that soft, warm fabric smell. The texture felt pillowy under my palms and the knotted fringe along the edges added playful movement.
Colors blended into a cozy patchwork that looked lived-in from the start. It had the kind of rough-hewn charm that made me want to curl up with tea and a book.
The blanket sat heavy across my lap, warm and inviting, with a casual, handmade look that brightened the room.
Steps
- Gather large sheets of fleece in complementary colors and lay them flat on a clean surface.
- Cut strips along the long sides to create fringe, keeping widths even for a uniform look.
- Knot corresponding strips from two layers together along the perimeter to join panels and form the blanket.
- Tidy the fringe by trimming ends to an even length for a neat final edge.
Braided roving blanket without needles
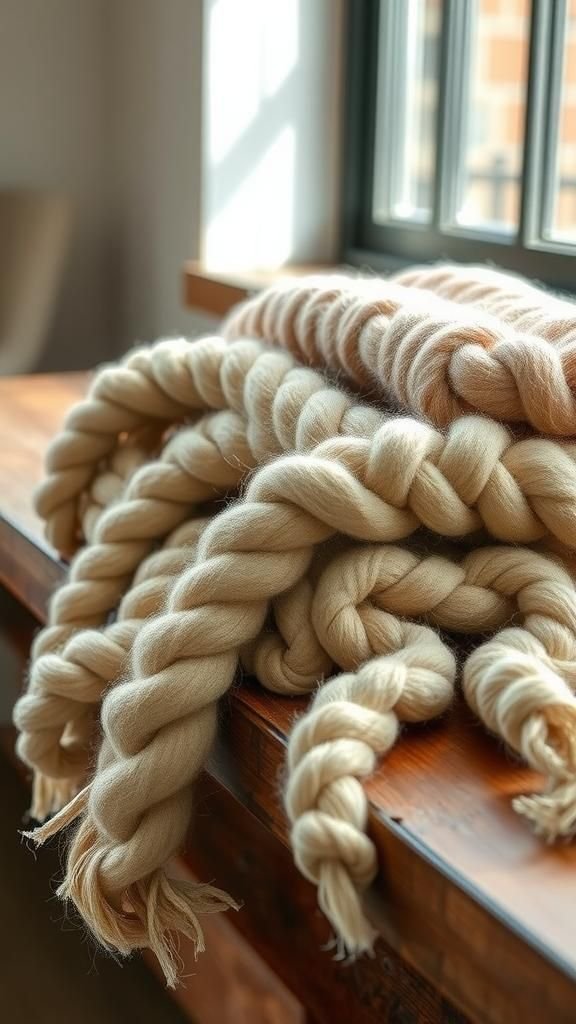
Working with unspun roving feels almost like holding clouds; it’s airy until it’s shaped, then quietly dense. The braids created broad, rope-like strands that came together into a blanket with soothing undulations.
There was a faint, earthy wool scent that took me back to markets and rustic studios. The finished piece had a natural, tactile quality—heavy enough to feel grounding but soft enough to mold around shoulders.
Watching the braids thicken into a blanket felt meditative, an easy rhythm that calmed my mind on a slow afternoon.
Steps
- Lay out long lengths of wool roving and divide into equal sections for braiding.
- Braid three roving sections tightly to form thick ropes, tying ends to secure.
- Arrange the braided ropes side by side and seam them together by threading roving through loops along adjacent ropes to join.
- Smooth the surface by gently patting and arranging braids evenly for consistent texture.
T-shirt yarn chunky knot blanket idea
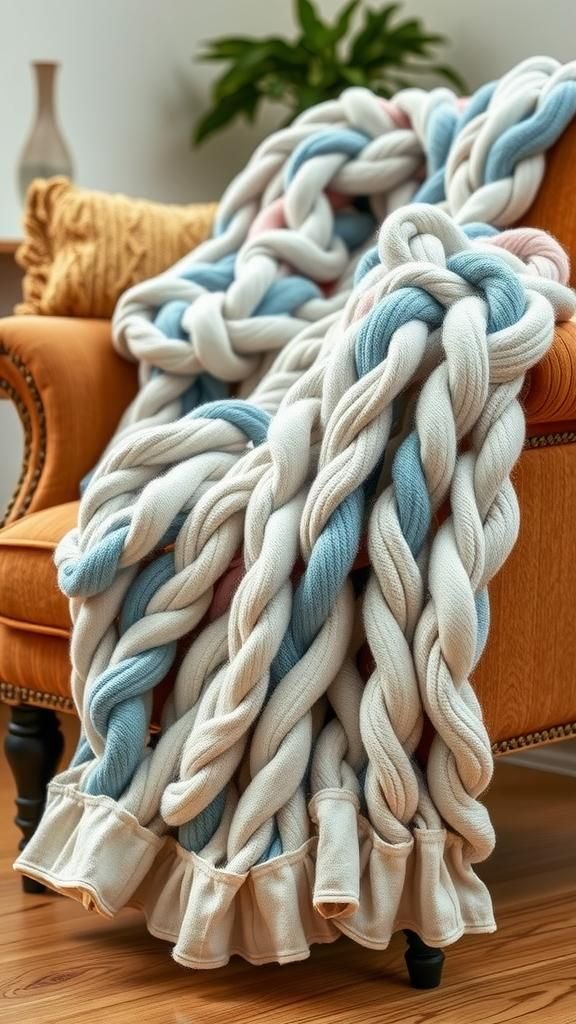
Turning old tees into chunky yarn felt strangely satisfying and a little addictive. The recycled fabric had a soft, lived-in feel and the edges curled into a gentle texture that made the blanket look cozy even during work-in-progress.
The surface carried subtle variations in stretch and dye that gave it a casual, homey personality. Draping it over a chair, I liked how the weight settled and how the tangled loops created a tactile surface that invited touch.
There was an honest, thrifted charm to the whole thing that I appreciated.
Steps
- Pull old cotton T-shirts into long continuous strips to form thick yarn, tying ends to extend length as needed.
- Create a backing by laying a sturdy fabric or mesh base and knot the T-shirt yarn through the base in rows to build blanket density.
- Continue knotting rows until the blanket reaches desired size, ensuring even tension for consistent texture.
- Trim stray threads and tuck any loose ends into the backing for a cleaner finish.
Finger loop chunky roving blanket project
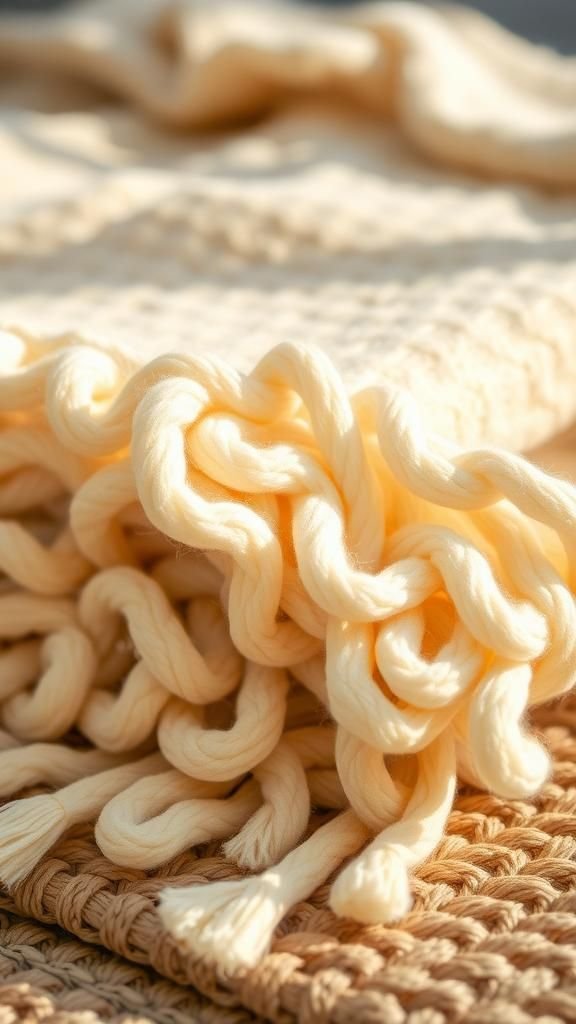
There’s an intimacy to working directly with your hands and wool roving; it connects you to the material in a way that tools sometimes get in the way of. Finger looping produced wide, soft loops that sat proud against the surface like gentle hills.
The blanket felt almost sculptural, with rounded forms and a mossy softness that begged to be touched. It warmed quickly on chilly evenings and had a gentle weight that felt reassuring.
Each loop carried a slight irregularity that made the whole piece feel handcrafted and personal.
Steps
- Arrange long lengths of wool roving on a clean surface and form initial anchor loops for the first row.
- Use fingers to pull and loop roving through anchor points, creating consistent large loops across the row.
- Continue adding rows of finger loops, aligning each row snugly against the last to build blanket thickness.
- Secure final row by twisting and tucking end lengths into the backing to lock loops in place.
No-sew chunky jersey fleece patchwork
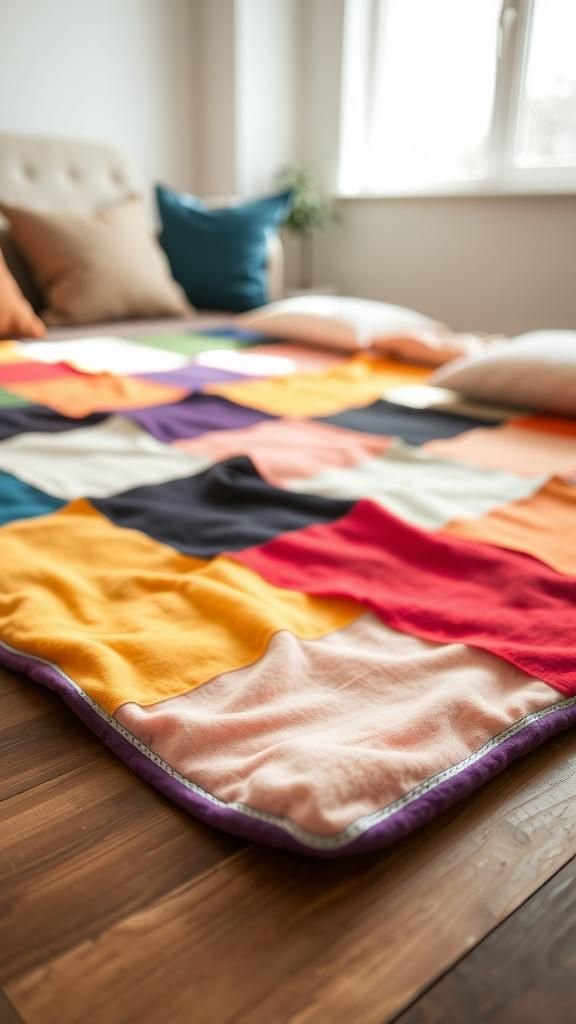
Stitching-free patchwork felt like collage with fabric—the fleece patches had a gentle nap that caught light differently across the surface. The seams were tactile bands of gathered fabric that created subtle ridges, and the overall feel was compact and pillowy.
Choosing color blocks became a quiet pleasure, mixing saturated jewel tones with soft pastels to create a lively but cozy spread. Sitting under it, the blanket felt like a hug with a bit of structure, and I liked the way the edges framed the room in soft color.
Steps
- Cut fleece panels to the same dimensions while keeping edges neat and consistent for joining.
- Lay panels in the chosen layout and knot or tie adjacent panels together through slits along edges to form a flat seam.
- Work across rows, ensuring knots are secure and seams align for an even blanket surface.
- Finish the outer edge with a row of tied fringe for a cohesive border.
Chunky macramé throw with wool accents

Macramé brought a rhythmic quality to making blankets, with knot patterns that read like textured embroidery on a grand scale. The wool accents threaded through the macramé lent warmth and fullness, turning decorative panels into something you could wrap around your shoulders.
The interplay of knot geometry and plush yarn created visual interest and a pleasing handfeel. I found the repeating patterns almost hypnotic; the finished throw hung with a gentle drape and had a comfortable, bohemian elegance that complemented a relaxed sofa or window seat.
Steps
- Prepare a sturdy backing or loom and cut strong cotton cords to desired blanket width plus extra for knots.
- Create macramé knot rows across the width, incorporating chunky wool strands intermittently for volume and contrast.
- Continue knotting in repeating patterns until the piece reaches the chosen length, maintaining even tension.
- Finish with a secure border of knots and trim any excess fiber for a tidy edge.
Chunky pom-pom blanket for cozy texture
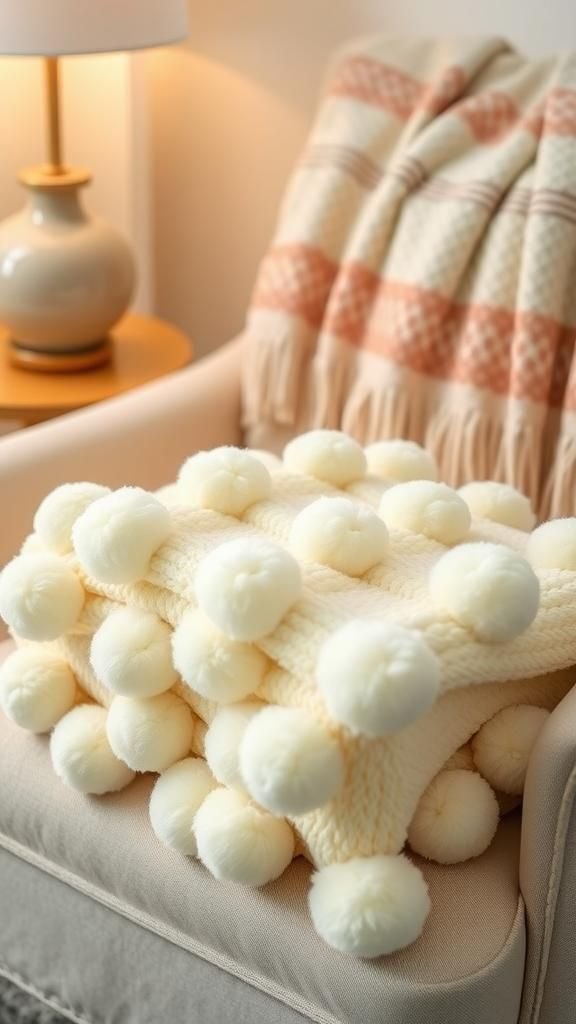
Making pom-poms in soft, oversized forms felt playfully indulgent; the little bursts of fluff gave the blanket a lively, tactile surface. Each pom-pom had its own personality—some dense and round, others slightly loose and feathered—creating a pleasantly irregular field of softness.
The base fabric stayed flat while the pom-poms added dimensionality, almost like a field of small clouds. Settling under it produced a cheerful, enveloping warmth and the occasional gentle rustle as the pom-poms brushed together.
It reminded me of playful afternoons rearranging cushions and throws.
Steps
- Create large pom-poms from chunky yarn by wrapping around a circular template, then secure and trim to round shape.
- Prepare a sturdy base fabric or mesh and arrange pom-poms in the desired layout.
- Sew or knot pom-poms onto the base at regular intervals to achieve even coverage.
- Fluff and trim pom-poms to achieve a uniform roundness across the blanket.
Chunky fleece braided ladder blanket idea
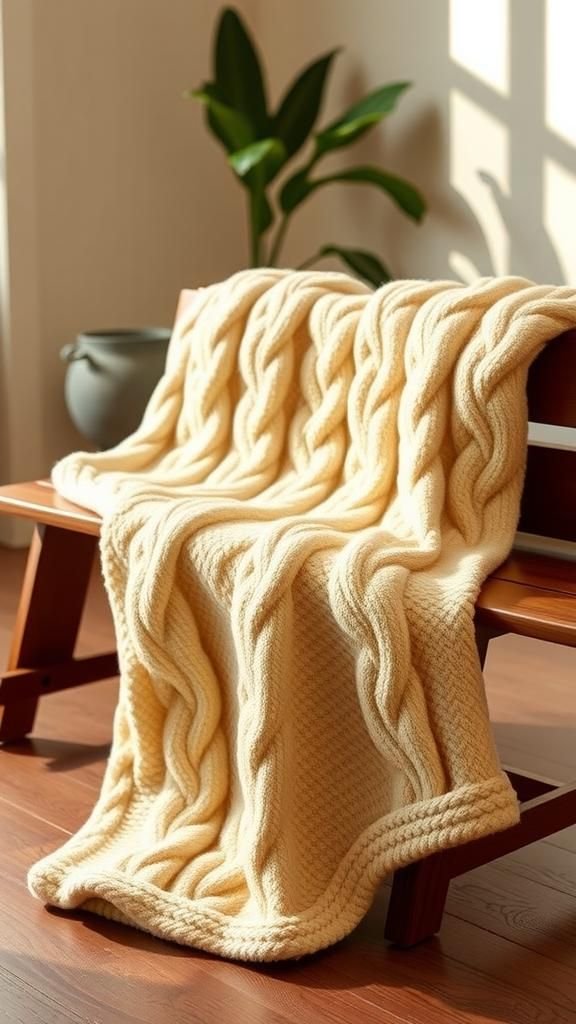
The braided ladder effect gave the blanket rhythmic bands that caught light like ripples. Fleece plaits felt both sturdy and yielding under the hand, creating an inviting surface for draping.
The braided lanes created shallow valleys that added subtle visual movement across the piece. I liked how the colors interlaced, producing a casual, handcrafted vibe that blended with worn-in furniture.
When folded at the foot of the bed, it offered a burst of texture and warmth; when spread, it had a pleasantly substantial feel without stiffness.
Steps
- Cut wide fleece strips and braid them in sets to form thick plaited ropes for ladder rungs.
- Lay braided ropes side by side and join them along edges using overlapping loops of fleece to bind the ladder structure.
- Adjust spacing between braids to maintain consistent pattern across the blanket.
- Secure outer edges with a final row of knots or a tidy seam strip to hold the ladder form.
Rya knot tufted chunky blanket style
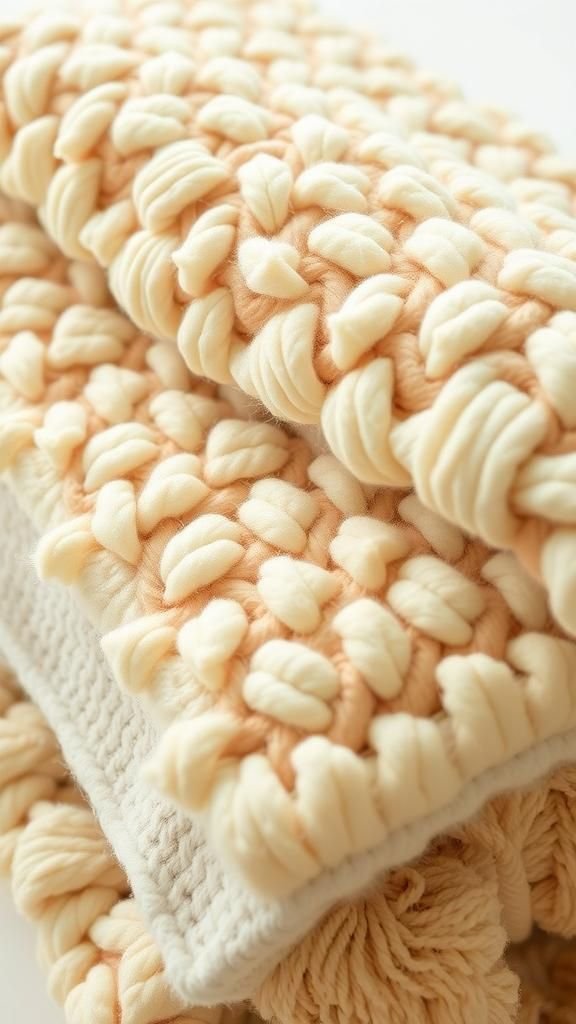
The rya knot technique produced a shaggy, tactile surface that felt indulgently plush under fingertips. Each tuft stood up like a tiny pillar of wool, creating depth and a playful bounce when the blanket was shifted.
The aggregate texture had a relaxed, handmade look, and the slight irregularities in tuft length made it feel organically warm. Sitting with it over my lap felt like nestling into a dense, woolly field.
The visual density translated into a comforting thermal weight perfect for chilly evenings, with a rustic, inviting character.
Steps
- Cut wool or chunky yarn into equal lengths for tufts and prepare a sturdy fabric backing with a grid of holes.
- Tie each tuft into the backing using rya knots through the holes to create dense coverage.
- Work methodically across the backing, varying tuft colors or lengths for pattern and texture.
- Trim tuft ends evenly once the entire surface is covered to achieve a controlled shag effect.
Looped yarn no-hook chunky blanket method
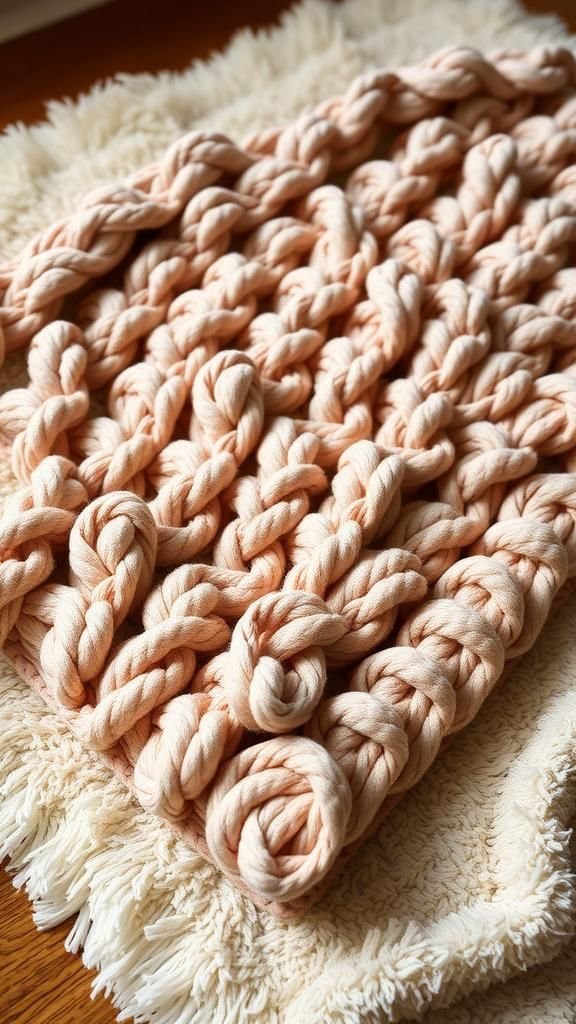
Creating loops without tools felt intuitive and immediate; the yarn slipped between fingers and formed soft, rounded arches that made a pleasing array across the surface. The blanket had a plush, cushioned feel and a slightly bouncy elasticity that invited stretching and nestling.
Color bands shifted gently as the loops flowed into one another, and the completed piece had a quilted, tactile quality that felt like a warm nest. Watching it grow row by row brought a steady calm to an otherwise busy day, and the finished blanket sat heavy and comforting.
Steps
- Form a foundation edge by anchoring a length of chunky yarn across a stable base or rod.
- Pull loops of yarn through the foundation with hands to create uniform large loops in rows.
- Continue looping across and down the blanket area until the desired size is reached, keeping loop size consistent.
- Secure the final row by tying off and weaving in loose ends to stabilize the edge.
Chunky felted wool square mosaic blanket
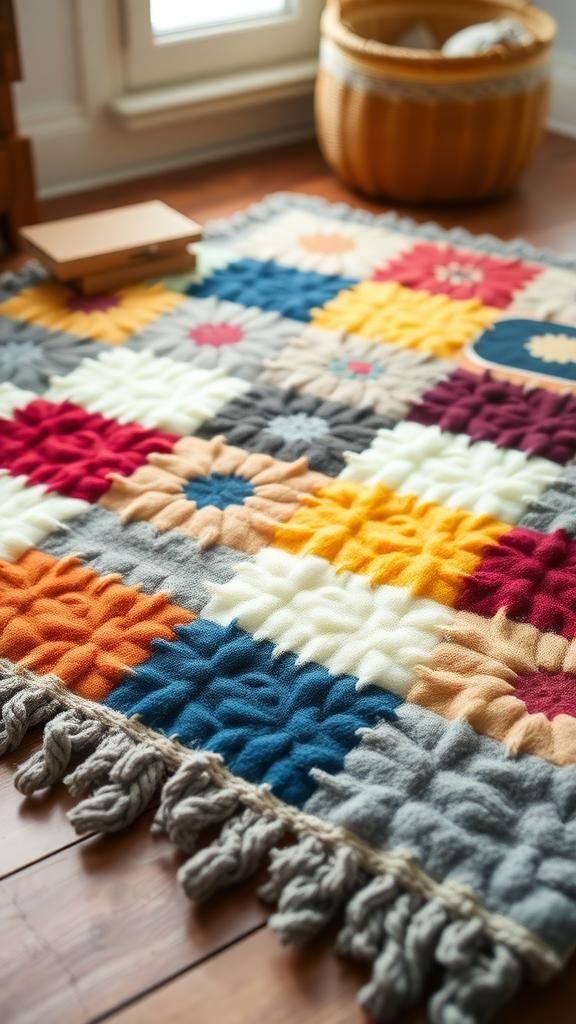
Felted wool squares brought a tactile, almost rustic solidity to a chunky blanket. Each square had a slightly fuzzy surface and a dense, matte finish that contrasted nicely when stitched together.
The seams formed subtle ridges that read like quiet borders between patches of color. Layering different hues made a geometric tapestry that felt warm and substantial.
The blanket carried the pleasant scent and weight of wool, settling around legs with a satisfying thermal hug. The overall look was artisanal and durable, inviting use on cool mornings.
Steps
- Create felted wool squares by wet-felting wool roving into compact shapes, ensuring even thickness.
- Arrange squares in the chosen mosaic layout and join them edge to edge with strong wool yarn or by felting edges together.
- Reinforce seams to maintain blanket stability and ensure even alignment across the piece.
- Block the finished blanket to flatten and even out the surface for a tidy overall appearance.
Rope-style chunky braided blanket concept
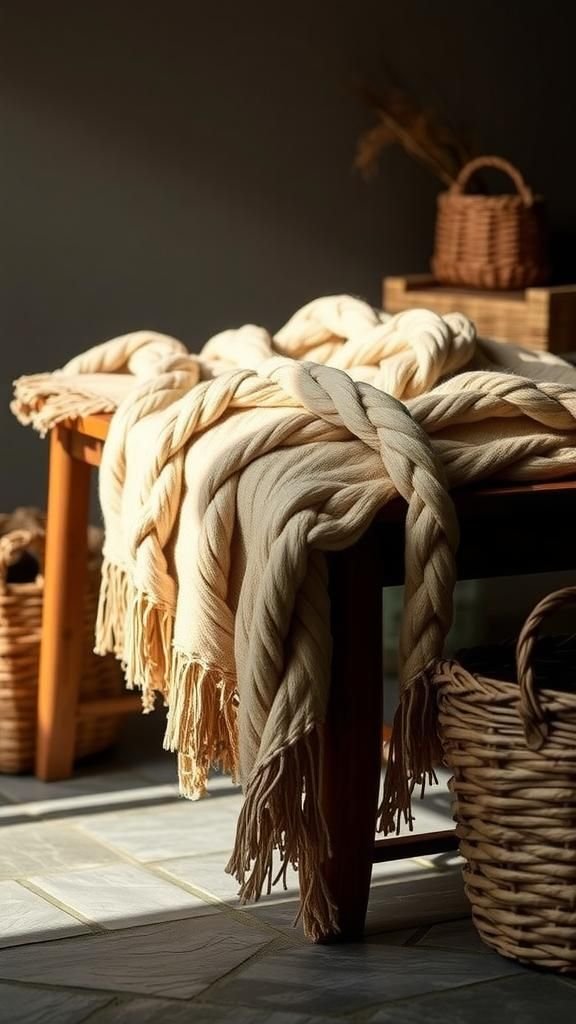
Working with rope-like yarn produced long, sculptural strands that felt robust and comforting. The braids lay like broad planks across the blanket, each showing a clear twist and a pleasing weight.
The surface had a tactile rhythm and a steady, organic look that suited minimalist settings. Touching the blanket offered a mix of slight resistance and gentle give, a sensory balance that felt grounding.
Draped over the arm of a sofa, the braided bands created visual interest through shadow and depth, suggesting simplicity and warmth at once.
Steps
- Prepare multiple lengths of thick rope-style yarn and braid them tightly to form wide, sturdy plaits.
- Lay braided plaits parallel and join them along adjoining sides by weaving short yarn pieces through adjacent braids to secure.
- Continue adding plaits and joining until the blanket reaches the desired width and length.
- Finish edges with a neat binding strip or a row of knots to hold the structure together.
No-sew sherpa-lined chunky throw idea
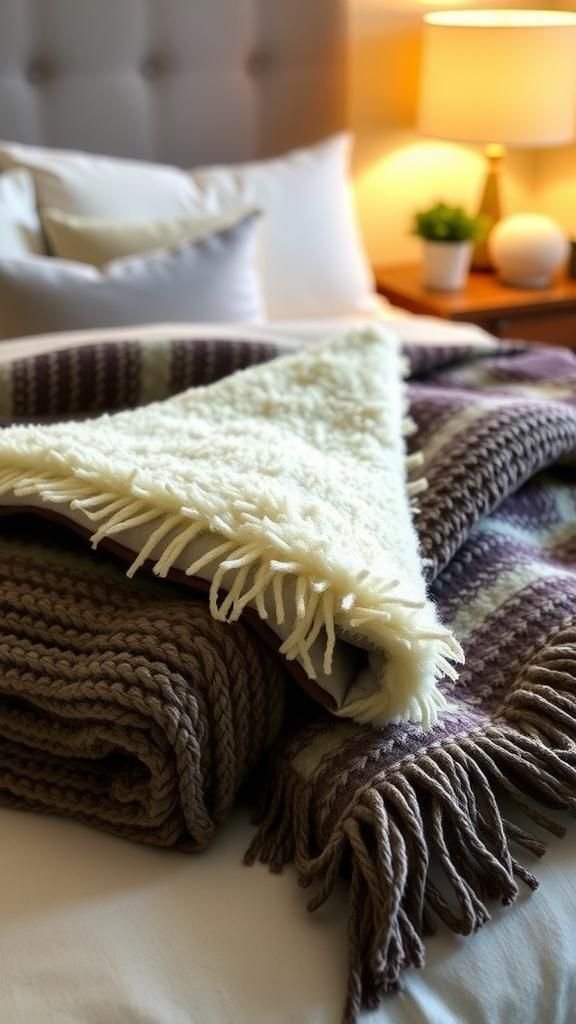
Combining a plush sherpa lining with a chunky outer layer created a luxurious interior that felt like a warm cloud. The outer side held bold, large-scale texture while the sherpa interior stayed fluffy and comforting against the skin.
The contrast between smooth backing and textured face made each fold reveal a soft white pile that brightened darker hues. It had a comforting heft and gave the room an inviting, hygge-like presence.
Curling up beneath it felt indulgent yet homey, a simple way to introduce tactile contrast.
Steps
- Cut chunky outer fabric and a sherpa lining to the same dimensions while leaving margin for final edging.
- Align outer layer and sherpa lining with right sides facing and secure edges by knotting or binding with a strong cord.
- Work along the perimeter to close the layers and create a tidy border that holds the lining in place.
- Turn or smooth the blanket so the sherpa sits evenly inside and address any loose areas with additional ties.
Chunky fringe layered blanket with texture
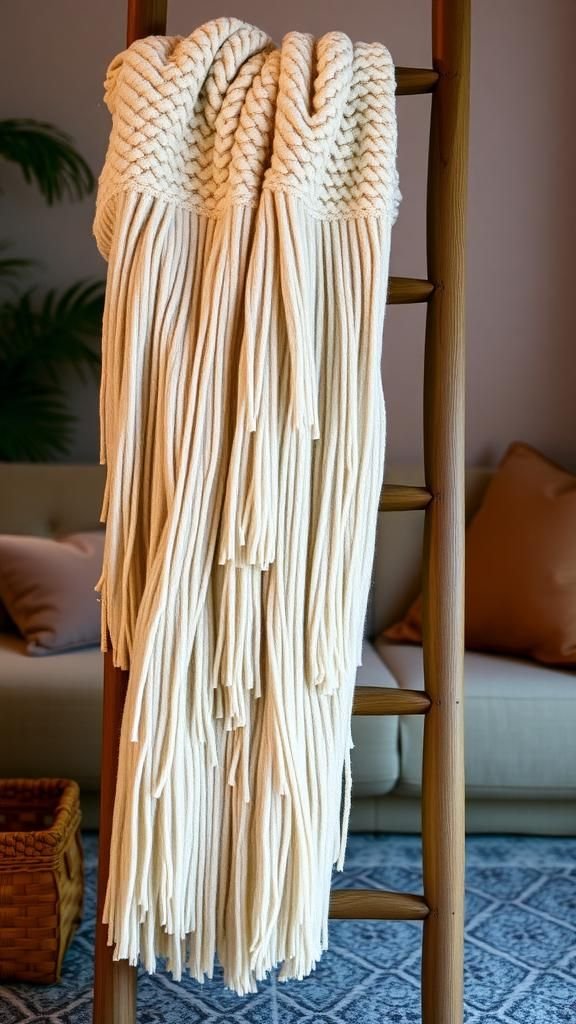
Layered fringe introduced motion and playful rhythm across the blanket surface. Each tier of fringe created a soft band that shimmied slightly when shifted, adding a lively element to the otherwise heavy fabric.
The tactile edges felt satisfying against skin and the overall density created an enveloping warmth. Color gradation across fringe layers gave the piece depth and a casual handcrafted flair.
It became a favorite for movie nights; the fringe draped and shifted with every movement, creating a gentle, comforting presence that made settling in easier.
Steps
- Prepare base fabric panels and cut multiple sets of fringe strips in graduated lengths for layering.
- Attach fringe layers to the base by tying or securing along overlapping rows to build texture and density.
- Continue layering fringe rows until the surface reaches the desired fullness and visual depth.
- Trim outer edges for a polished look and adjust fringe alignment for even drape.
Chunky quilted blanket from thick fabric strips

Sewing together wide fabric strips created a cozy, quilted feel without delicate patchwork. The strips formed bold bands with visible seams that added structure and definition.
The tactile seams were raised and reassuring, and the overall surface felt plush and supportive. Colors and textures contrasted in a satisfying way—matte cotton beside velvety chenille—so every fold revealed a new textural note.
The blanket had a dependable warmth and a lived-in softness that grew even more inviting with use, a practical yet cozy presence during cooler afternoons.
Steps
- Cut thick fabric strips to equal widths and lay them side by side in the intended order for the blanket.
- Join strips along long edges using a durable seam method to create continuous broad panels for quilted structure.
- Layer the joined panels with a soft inner batting and backing fabric, then secure with quilting stitches at intervals to create cushioned texture.
- Finish outer border with a coordinated binding strip for a tidy edge.
Looped fleece puff blanket without knitting

Puff loops in fleece created a playful, cloud-like field that felt irresistibly soft. Each puff had a round fullness that added airiness and light thermal insulation.
The surface responded to touch with a gentle give and bounce, creating a cheerful texture under hands and knees. Color placement made a soft ombré effect that felt soothing rather than busy.
It was the kind of blanket that brightened a chair and made the room feel instantaneously more relaxed, inviting casual draping and afternoon naps without fuss.
Steps
- Cut fleece into short, wide strips and form puffs by folding and gathering each strip into rounded bundles.
- Secure puffs onto a sturdy base fabric by tying or stitching through their centers at regular spacing.
- Cover the entire base with closely placed puffs to achieve a dense, even surface.
- Trim any uneven ends and fluff puffs to ensure a uniform plush appearance.
Chunky tassel-edge blanket with woven core
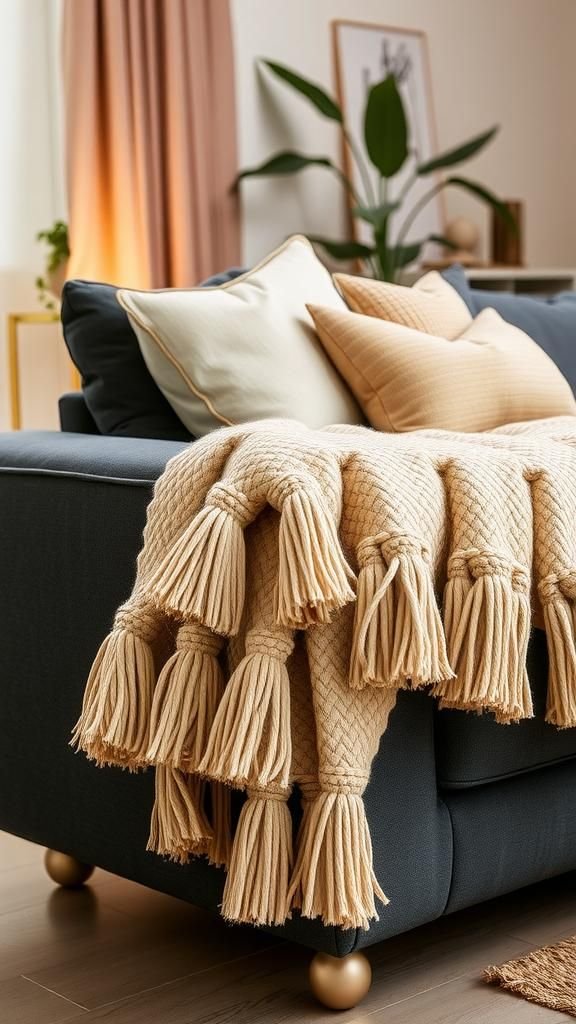
A woven core provided a sturdy foundation while oversized tassels around the edge brought playful drama. The central weave had a steady, grid-like rhythm that contrasted nicely with the lively tassel border.
Tassels swung gently when the blanket was moved, adding a tactile and visual flourish. The weave felt robust and comforting, lending a reassuring structure beneath the decorative edge.
Draped across a sofa, it suggested casual sophistication, with the tassels softening corners and creating a relaxed, handcrafted accent that made moments of lounging feel a touch more special.
Steps
- Create a firm woven core by interlacing thick yarn or fabric strips on a simple loom or flat base.
- Attach long chunky tassels along the perimeter by knotting or securing at regular intervals for a balanced border.
- Ensure tassels are evenly distributed and trimmed to a consistent length for visual harmony.
- Gently press or steam the woven surface to settle the fibers and enhance the overall handfeel.
No-sew chunky chenille blanket concept
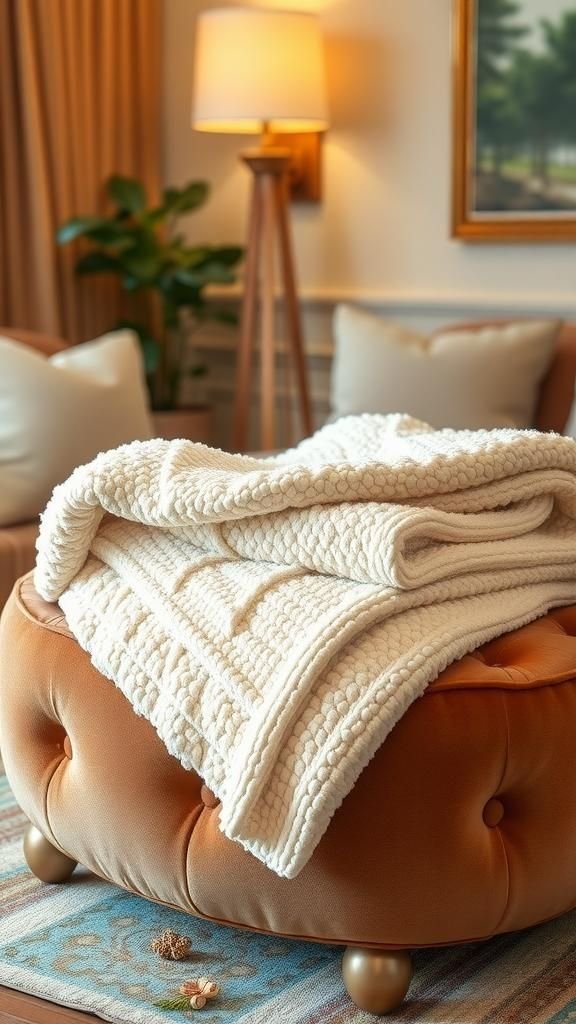
Chenille brought a velvet-like softness that felt immediately luxurious beneath my hands. The pile captured light in a gentle sheen, and the dense pile made the blanket feel warm without heavy weight.
The surface had a smooth, soothing quality that contrasted with chunkier braided elements I had tried before. It settled elegantly over a lap and had a tactile richness that made everyday lounging feel a little more indulgent.
Choosing complementary tones in chenille added depth and a quiet sophistication to an otherwise casual piece.
Steps
- Cut wide strips of chenille fabric and align them side by side for the blanket surface.
- Join strips edge to edge by tying or felting seam strips to create a continuous fabric without sewing.
- Reinforce seams by adding additional chenille ties or a backing for durability.
- Trim any uneven edges and brush the pile for a smooth, even appearance.
Chunky tassel grid blanket for visual interest
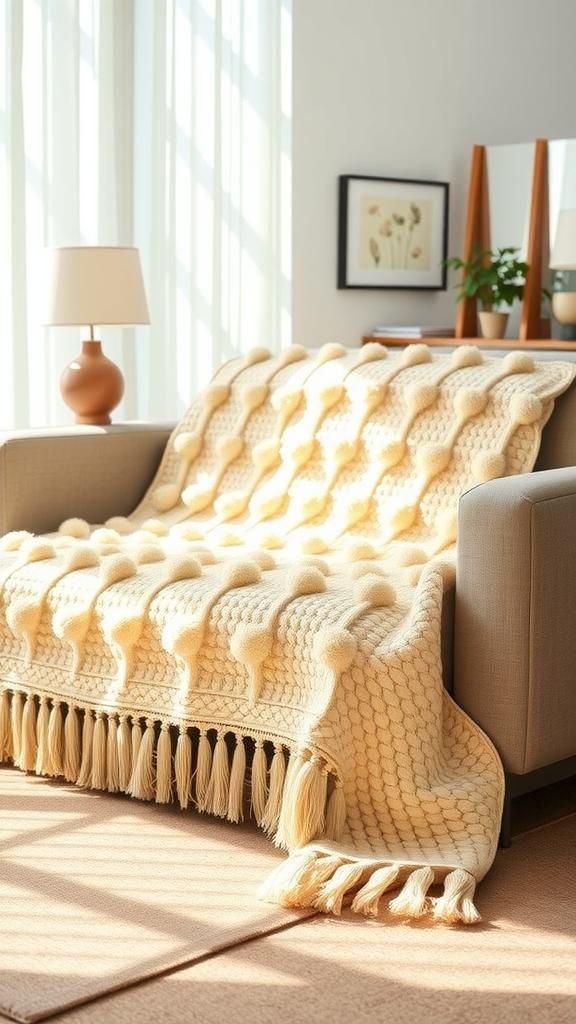
A grid of chunky tassels created a playful checkerboard of motion and texture. Each tassel had weight and bounce, and the grid pattern produced a rhythmic surface that delighted the fingers.
The spaces between tassel clusters revealed glimpses of the base fabric, which balanced the visual density. The resulting blanket was lively without feeling busy, and the tactile contrast between tassel ends and the flat base invited cozy interaction.
It became an instant conversation piece when I had friends over, doubling as a decorative accent and practical throw.
Steps
- Prepare a sturdy base cloth and mark a grid layout for tassel placement.
- Make large tassels from chunky yarn and attach them at each marked intersection by knotting or sewing.
- Work systematically across the grid to maintain consistent spacing and tension.
- Trim tassel ends for uniform length and fluff them to achieve an even look.
Chunky felt ball blanket with soft nods
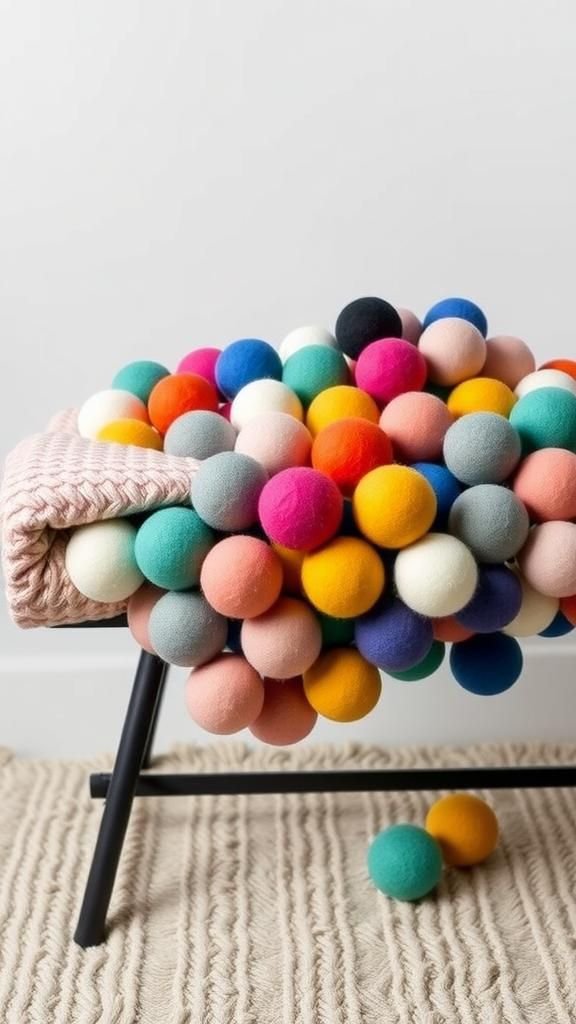
Stringing felt balls into dense rows created a charming, tactile surface reminiscent of playful handmade rugs. Each felt ball had a compact springiness and a subtle matte finish that absorbed light differently across the blanket.
The overall texture felt lively yet cozy; rolling the blanket slightly revealed a surprisingly warm density. The color palette could be bold or muted, and either approach added personality.
It lay pleasantly heavy and provided gentle insulation, while the tactile variety of the balls invited fidgeting in the best possible way on quiet evenings.
Steps
- Make or source felt balls in the chosen palette and size for consistent coverage.
- Thread felt balls onto a strong cord or backing material, spacing them closely to form dense rows.
- Continue adding rows until the blanket reaches the desired size, securing ends to prevent slippage.
- Finish outer edges with a reinforced binding to hold the felt ball arrays in place.
No-knit braided fleece circle throw design
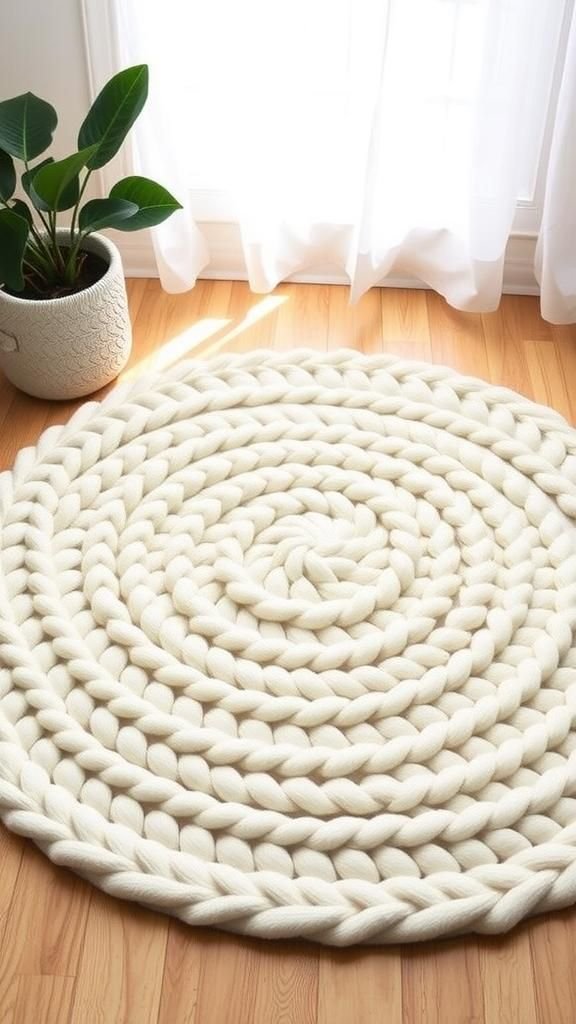
Round, braided throws carried a cozy, comforting geometry that made lounging feel intentional. The circular braids formed concentric rings of texture that pulled the eye inward and provided a soft focal point.
Fleece braids felt cushiony and warm, with a smooth touch that contrasted with knottier techniques. Setting it on the floor created an inviting nest, while draped over furniture it acted like a soft medallion.
The piece had a contemplative calm, its rounded form making it easy to wrap around shoulders or tuck under feet for a snug moment.
Steps
- Cut wide fleece strips and braid them into long ropes that will form the concentric rings.
- Coil braided ropes into a circular layout, joining adjacent coils by sewing or tying at contact points.
- Continue coiling and joining outward until the throw reaches the intended diameter.
- Secure the outer edge with additional ties or a neat binding for a finished look.